Amazon Pinpoint - How it works
If you need omni-channel engagement with your customers to run marketing campaigns, send notifications, or tailored (transactional) messages in bulk, then Amazon Pinpoint is the right tool for you. It allows you to manage your audience and templates and reach customers through email, text, voice messages, custom channels and push or in-app notifications. The provided events and analytics make it easy to track and measure the results of your campaigns and gain valuable insights about customer interactions.
This blog post aims to give an overview of the primary components of Pinpoint - endpoints, segments, channels, message templates, campaigns, and journeys. It would be helpful if you’re getting started, or even if you already have some experience with Pinpoint, you can find some valuable hints. To get started, you need to create a project, also called an app, which represents a container for journeys, campaigns, and segments.
Endpoints
The customers you want to send messages to are called Pinpoint users. They have a unique User ID and can be associated with zero or more endpoints. An endpoint defines a message destination with an address such as the device ID, email address, or phone number and the corresponding channel like APNS, EMAIL, or SMS. To contact the same user over multiple channels, you must create separate endpoints for each channel. Here is an example of the endpoint object:
{
  "ChannelType": enum, //e.g. SMS, EMAIL
  "Address": "string" //phone number, email, etc.
  "EndpointStatus": "string", // ACTIVE or INACTIVE
  "OptOut": "string" // NONE or ALL,
  "RequestId": "string",
  "Location": {
    "Latitude": number,
    "Longitude": number,
    "PostalCode": "string",
    "City": "string",
    "Region": "string",
    "Country": "string"
  },
  "Demographic": {
    "Make": "string",
    "Model": "string",
    "ModelVersion": "string",
    "Timezone": "string",
    "Locale": "string",
    "AppVersion": "string",
    "Platform": "string",
    "PlatformVersion": "string"
  },
  "EffectiveDate": "string",
  "Attributes": {
    // example: "opportunityId": ["1234"]
  },
  "Metrics": {
  },
  "User": {
    "UserId": "string",
    "UserAttributes": {
      // example: "FirstName": ["John"]
    }
  },
  "ApplicationId": "string",
  "Id": "string",
  "CohortId": "string",
  "CreationDate": "string"
}
In this object, the Attributes field is specific to the endpoint itself, whereas UserAttributes are shared between all user endpoints and contain personal data, such as the first name. These custom attributes are stored as a list, regardless of whether there are single or multiple values. Note that the EndpointStatus is ACTIVE when you create or update an endpoint, but if you create or update another one with the same address, it becomes INACTIVE, and messages don’t get sent to it. Therefore, you can’t have multiple active endpoints simultaneously with the same address. The OptOut attribute is used when a customer unsubscribes, and the value NONE means they haven’t unsubscribed.
Segments
A segment is a group of endpoints with common characteristics, for example, all users older than 25 that live in London. When you create a journey or campaign, you select a segment as the audience for the communication. A segment can be static - imported using a CSV or JSON file with a pre-determined number of endpoints or dynamic - based on defined attributes where the number of endpoints changes when customers are added or deleted. Dynamic segments can build upon other base segments using multiple Criteria groups with AND, OR, or NOR statements. Here is an example of how we can create a segment with all email endpoints having as city Berlin and excluding any of them that belong to a test segment:
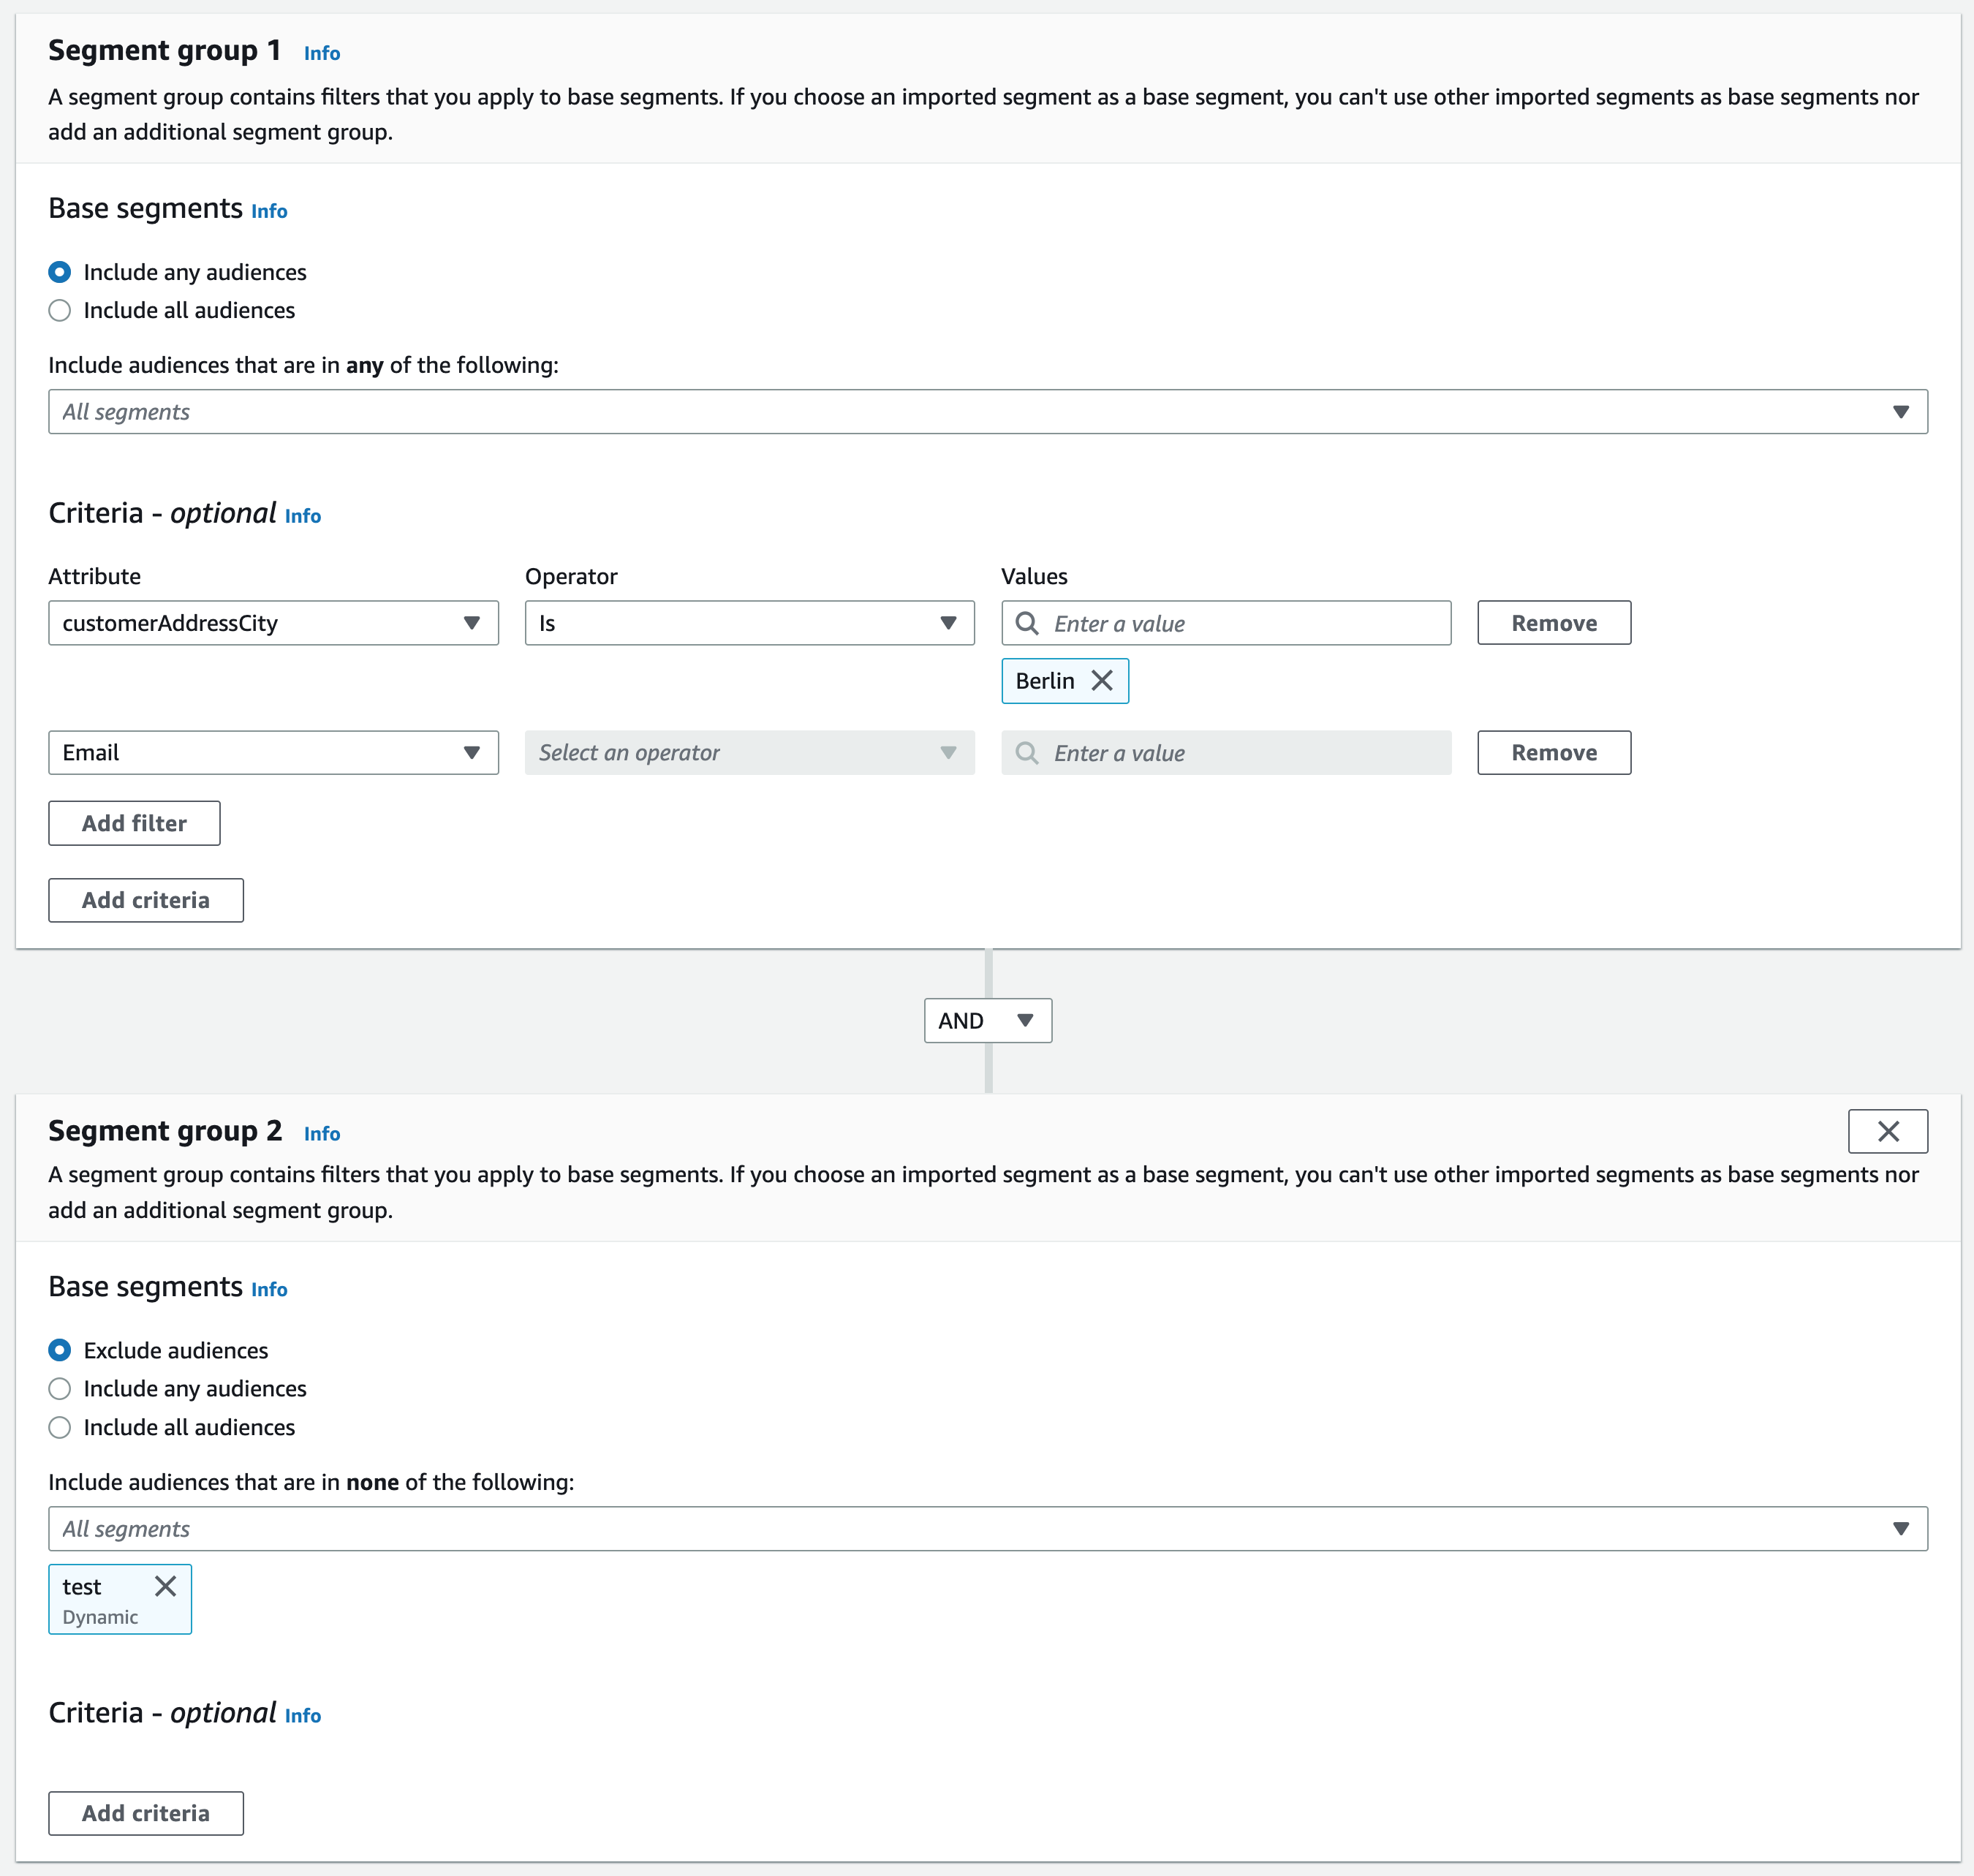
In the console, you can only see the number of endpoints that belongs to a segment but can’t directly view them. To do so, export the segment and download the CSV file. You need to use the CLI or AWS SDK to create, delete and update endpoints.
Channels
The next step after segment definition is to enable the channel to send messages through. These are the available channels:
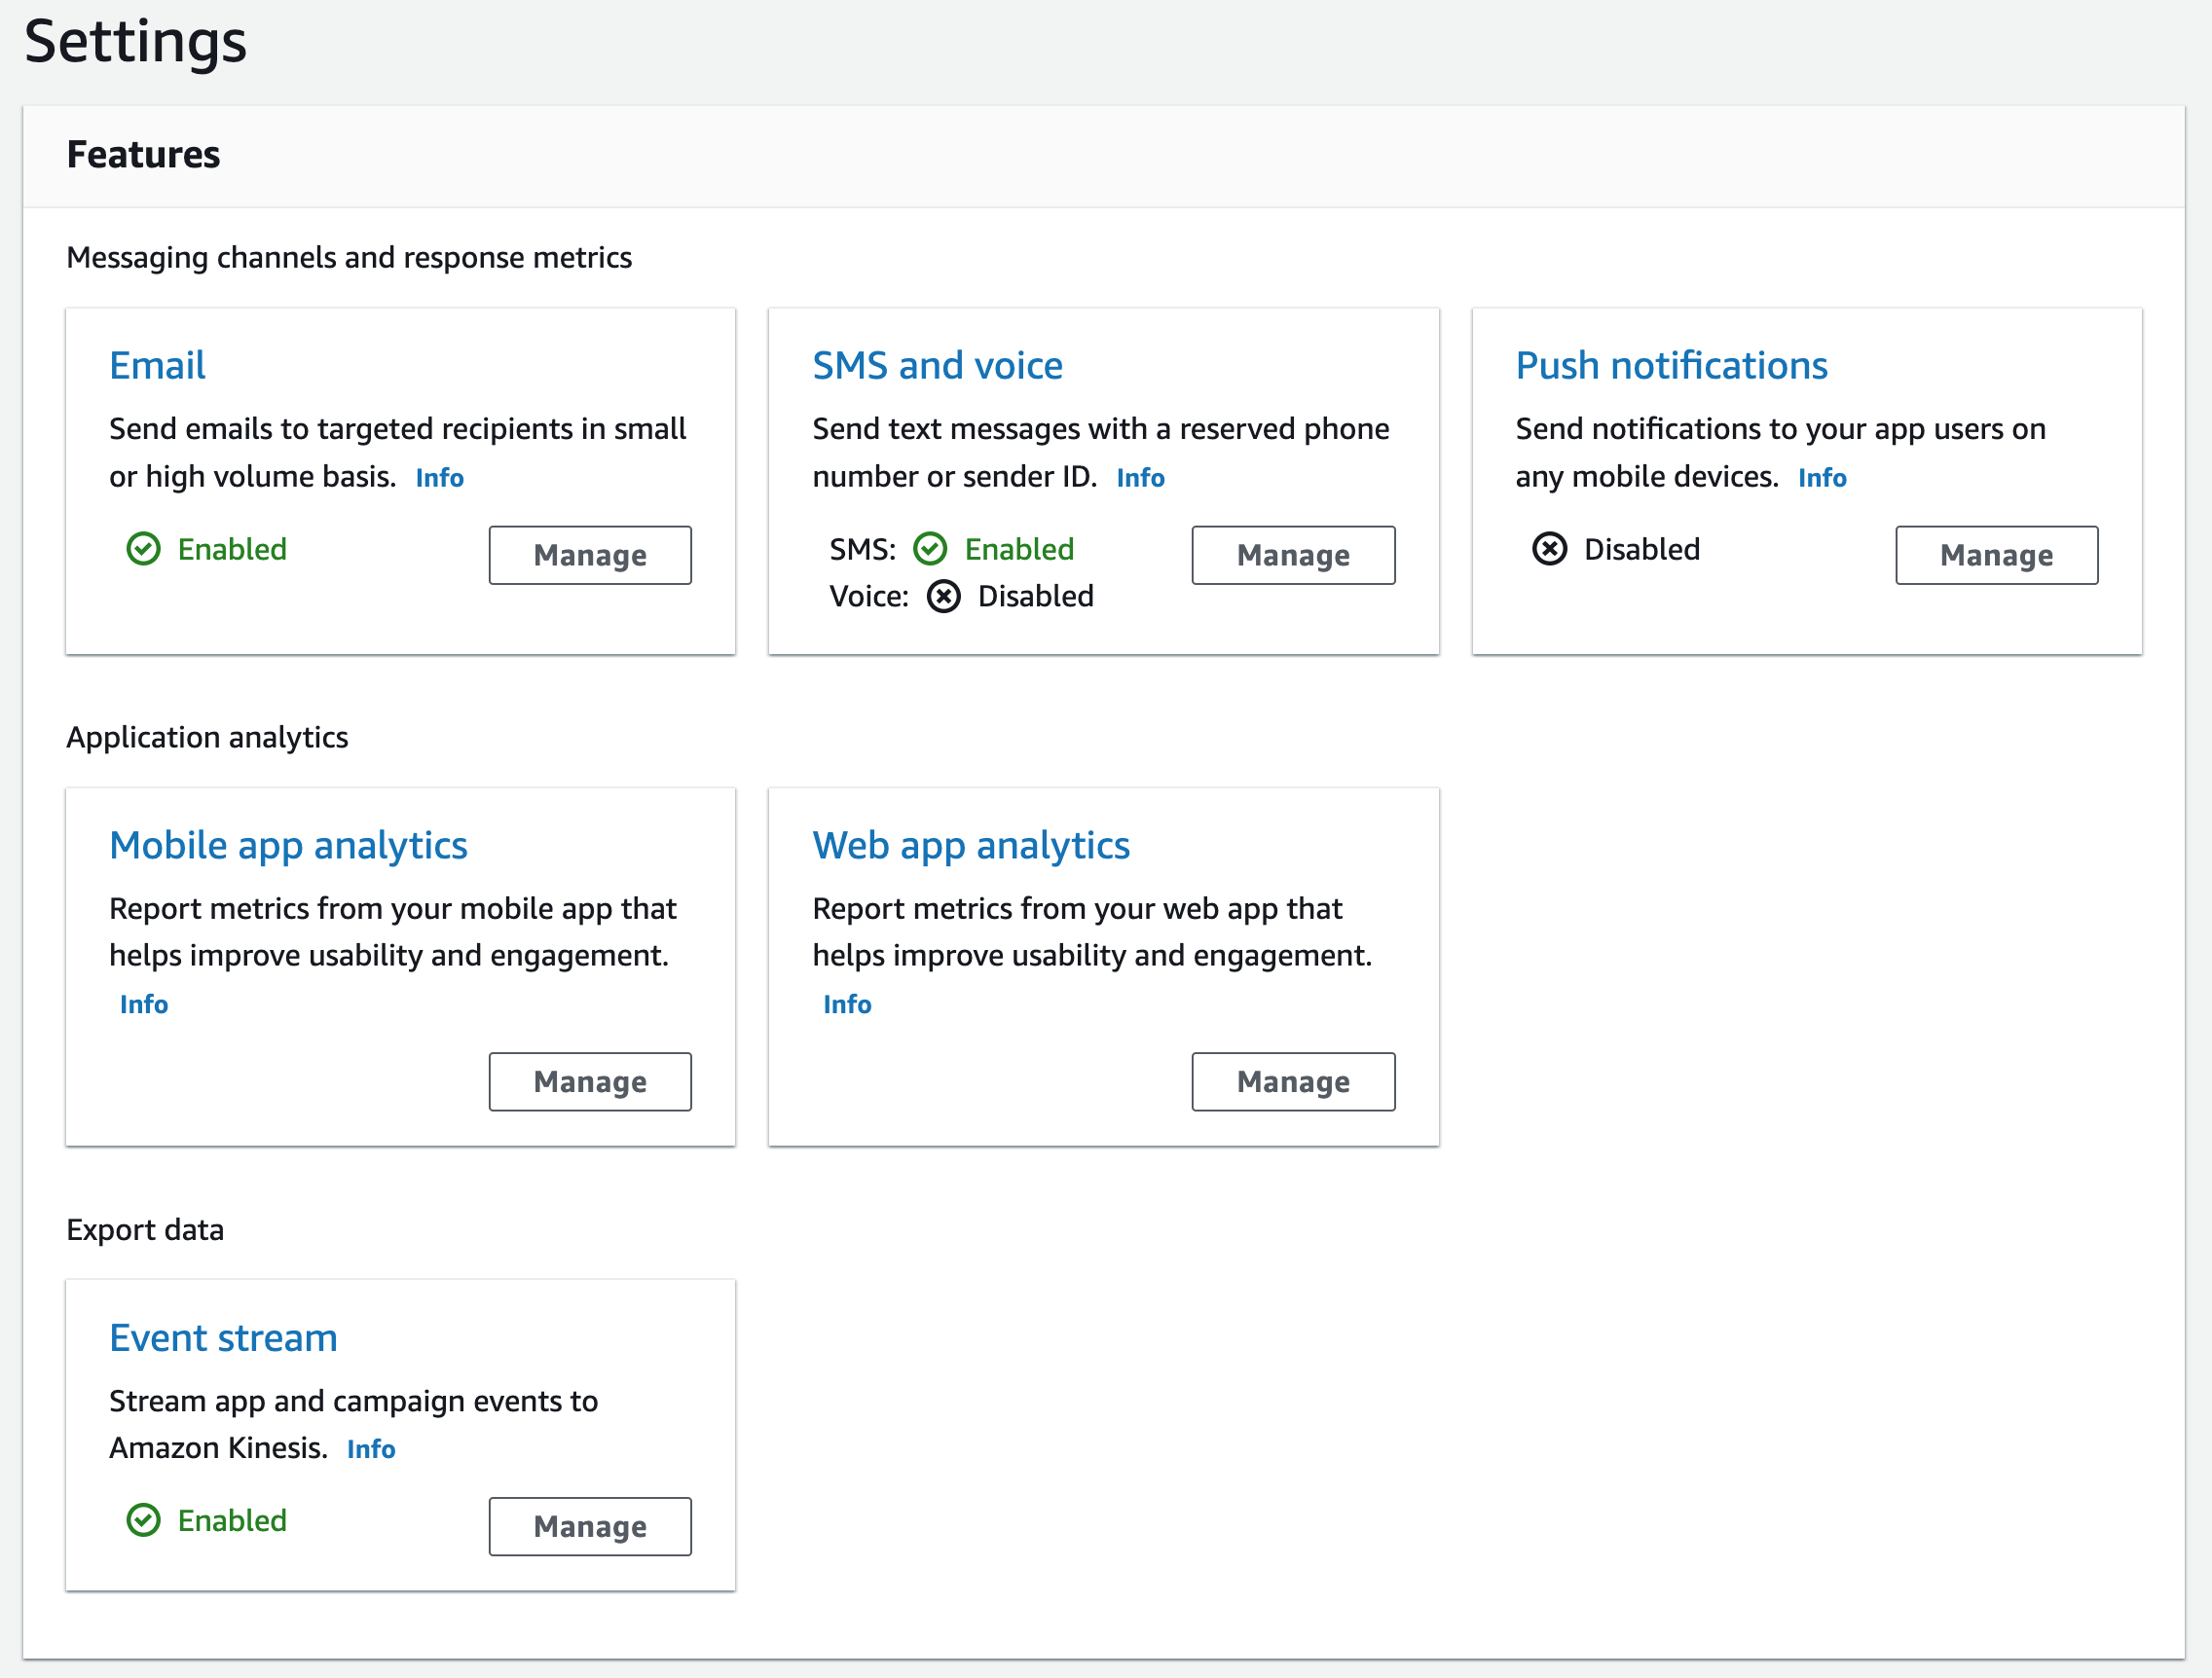
Initially, the account is in a sandbox mode, and messages can only be sent from verified addresses, so you need to request production access to increase the sending quota. Sending emails is based on SES, and sending SMS on SNS. That means you will find similar settings, for example, managing Configuration sets and a Suppression list for SES. If an email bounces or results in a spam complaint, the email address is automatically added to your SES suppression list. In the “Test messaging” section, you can send messages to an endpoint or a specific address to test your channel setup. Additionally, there is a custom channel, which is a Lambda function or a webhook, and it doesn’t have to be explicitly enabled.
Message templates
Frequently used message content can be stored as message templates. These can be email, SMS, in-app, push, or voice templates. They can contain personalized data using variables like {{User.UserAttributes.FirstName}}. Templates support more complex constructs such as each to iterate over a list, if/else logic, or eq to compare values. Here is an example:
{{#and (gte User.UserAttributes.Age.[0] "18") (eq Location.Country "US")}}
You are an 18-year-old in the US.
{{else}}
You aren't an 18-year-old in the US.
{{/and}}
If a UserAttribute can be undefined, you can specify a default value for it. Furthermore, there are string helpers like capitalize and now to print the current date and math helpers like multiply, base64, and uuid. Amazon Pinpoint uses handlebarsjs.com to parse these values.
When you create HTML Email templates, there is an option to preview how they would look like. Ensuring they look good on almost all email clients can be time-consuming if they have a complex structure and embedded images. That’s why I suggest using a service like Stripo, where you can build Email templates with drag-n-drop blocks.
Campaigns
In Amazon Pinpoint, a campaign is the act of sending a message to a specific segment over a single channel at a scheduled time or when an event occurs.
When creating a campaign, you must select the channel and the segment that will receive the message. If you define a Segment hold-out, a percentage of customers can be excluded from receiving the campaign. This can be helpful to find out if customers who have been included change their behavior compared to the omitted ones. The last step is to define when the campaign is sent. This can be at a specific time, immediately, once, or on an hourly, daily, weekly, or monthly schedule or when an event occurs. In the latter, you only specify the type of event and start and end date of the campaign, and Amazon Pinpoint only sends the campaign if the event occurs after the start date and before the end date.
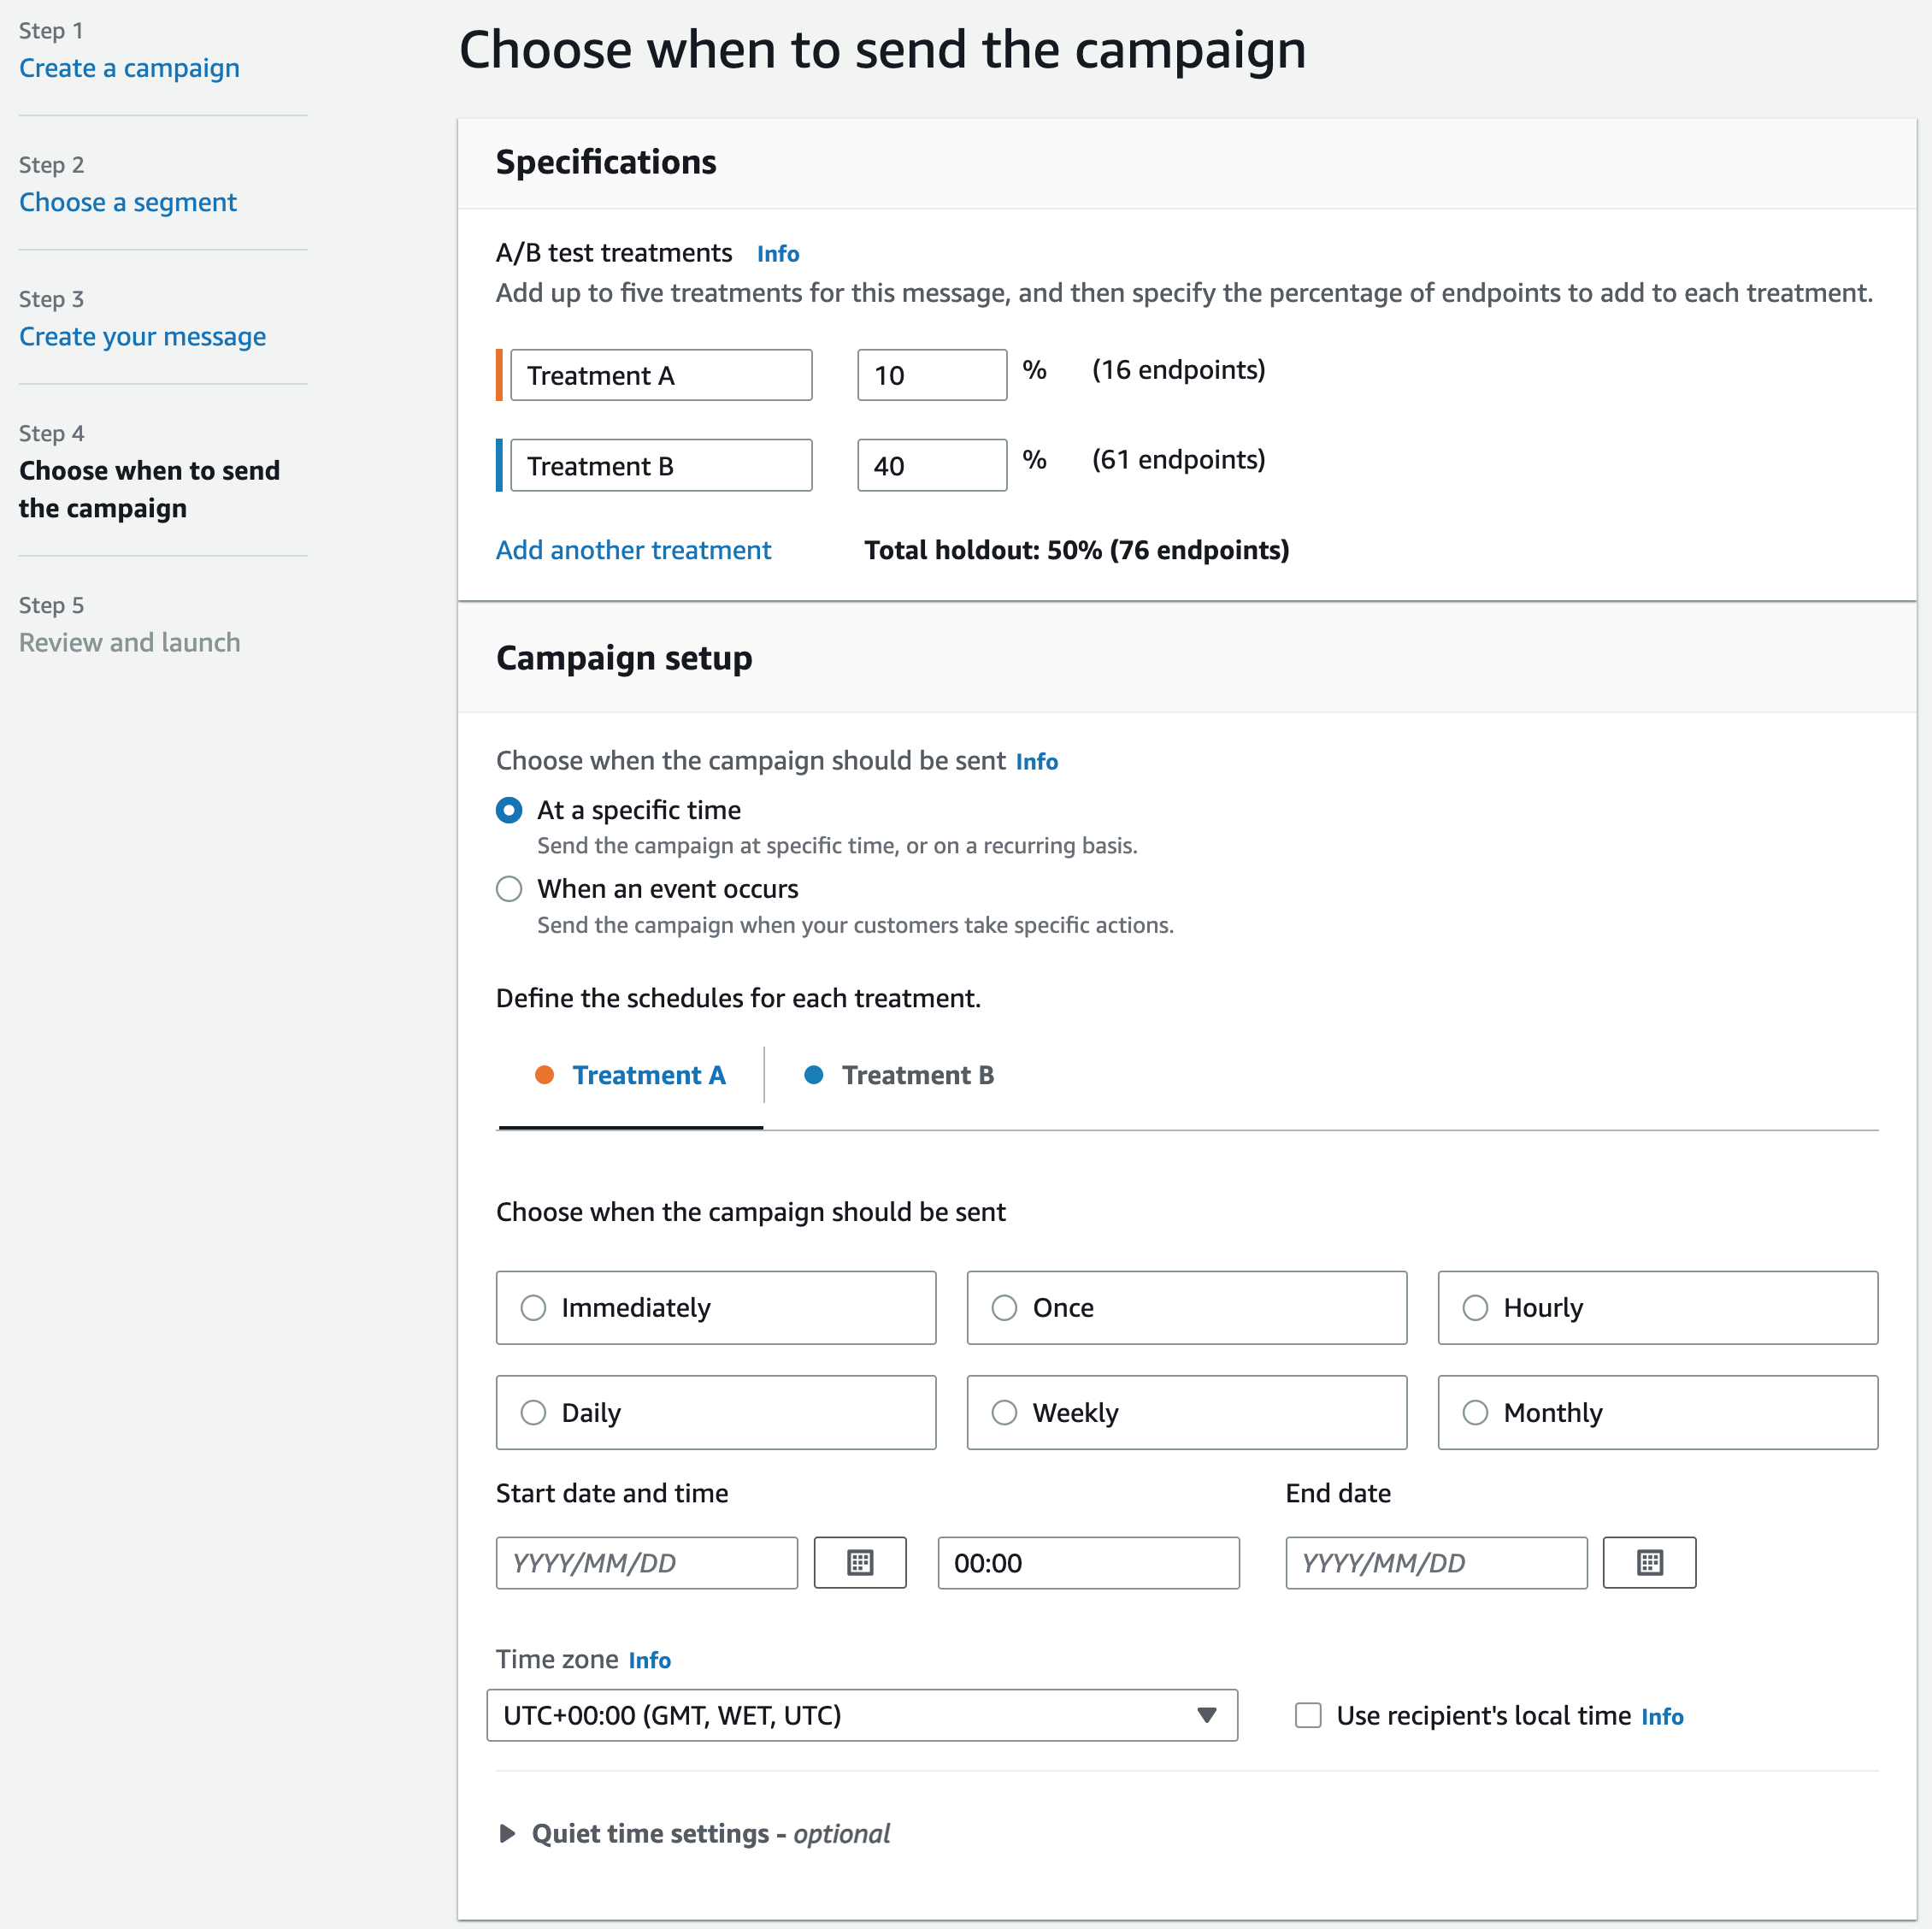
If you want different versions of the campaign’s message or schedule for different endpoints, you can start an A/B test campaign and compare the performance. This is what having two different schedule treatments looks like in the console:
Journeys
Compared to campaigns, journeys represent more sophisticated workflows with a combination of channels. To start, you need to specify a segment that will take part in the journey and whether the journey will be executed when a specific event occurs or when new endpoints are added to a segment. Then you choose the steps called activities that the endpoints will go through, such as sending an email or a Multivariate split that creates branches based on a segment or an event. Here is an example:

If you choose to add participants from a segment, the minimum refresh time is one hour, so it would take at least one hour to run the journey for a new endpoint after it has been added to the segment. Create an event-based journey to avoid a delay and run the journey immediately. The journey has a start and end time and can run up to 3600 days (almost ten years). Consider that you can’t edit a journey once it is running. When a journey starts, and endpoints go through it, you can see execution and engagement metrics for the whole journey or a single activity. The execution metrics include data about the number of endpoints the message was sent to, and the engagement metrics show the number of deliveries and failures:
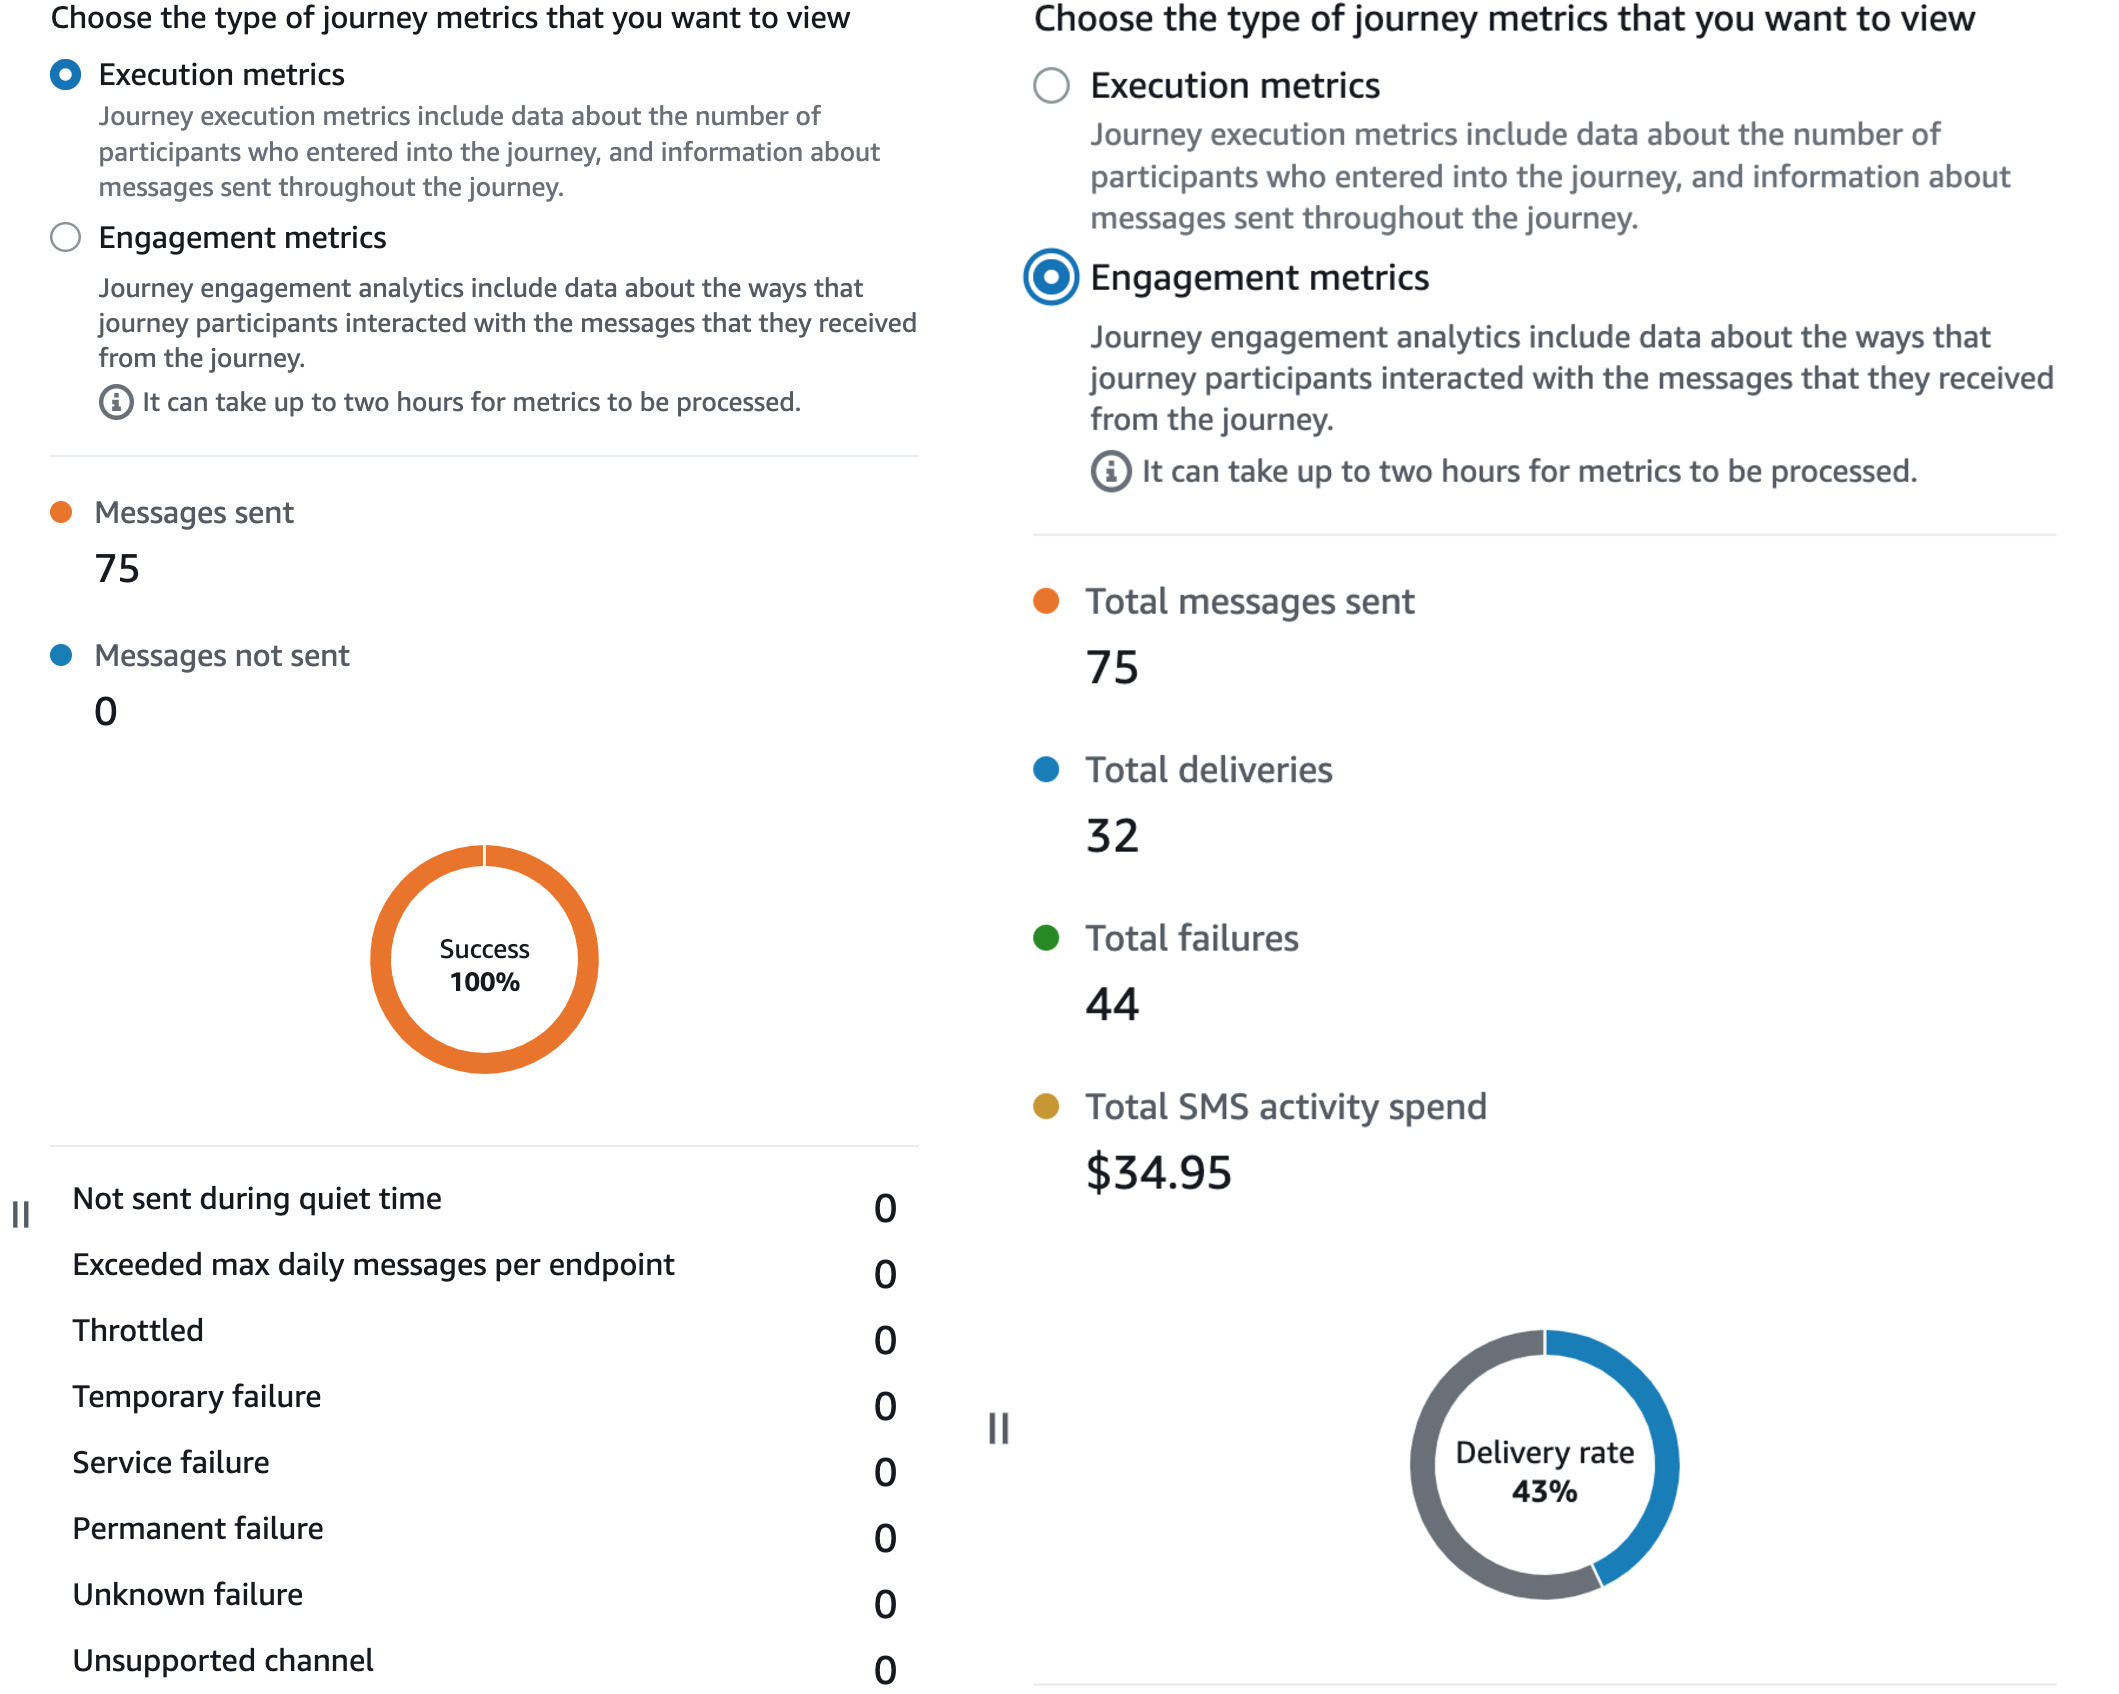
In these metrics, it isn’t visible why exactly the failure happened. More detailed error messages are available if you turn on event streaming and process the events.
Event streaming and analytics
To analyze your customer engagement, turn on event streaming to Kinesis. For example, for email messages, there are the following events:
- _email.send
- _email.delivered
- _email.rejected
- _email.hardbounce
- _email.softbounce
- _email.complaint
- _email.open
- _email.click
- _email.rendering_failure
As mentioned in the previous section, the events have additional information on why a failure occurred, such as smtp; 550 Unrouteable address.
This AWS Blog post can help you set up a QuickSight dashboard to visualize the events.
Another option regarding emails is to use the Amazon Pinpoint deliverability dashboard. It provides much more detailed reporting with features such as domain and IP reputation that can’t be recreated from the event stream. For example, there are inbox placement metrics across different email providers:
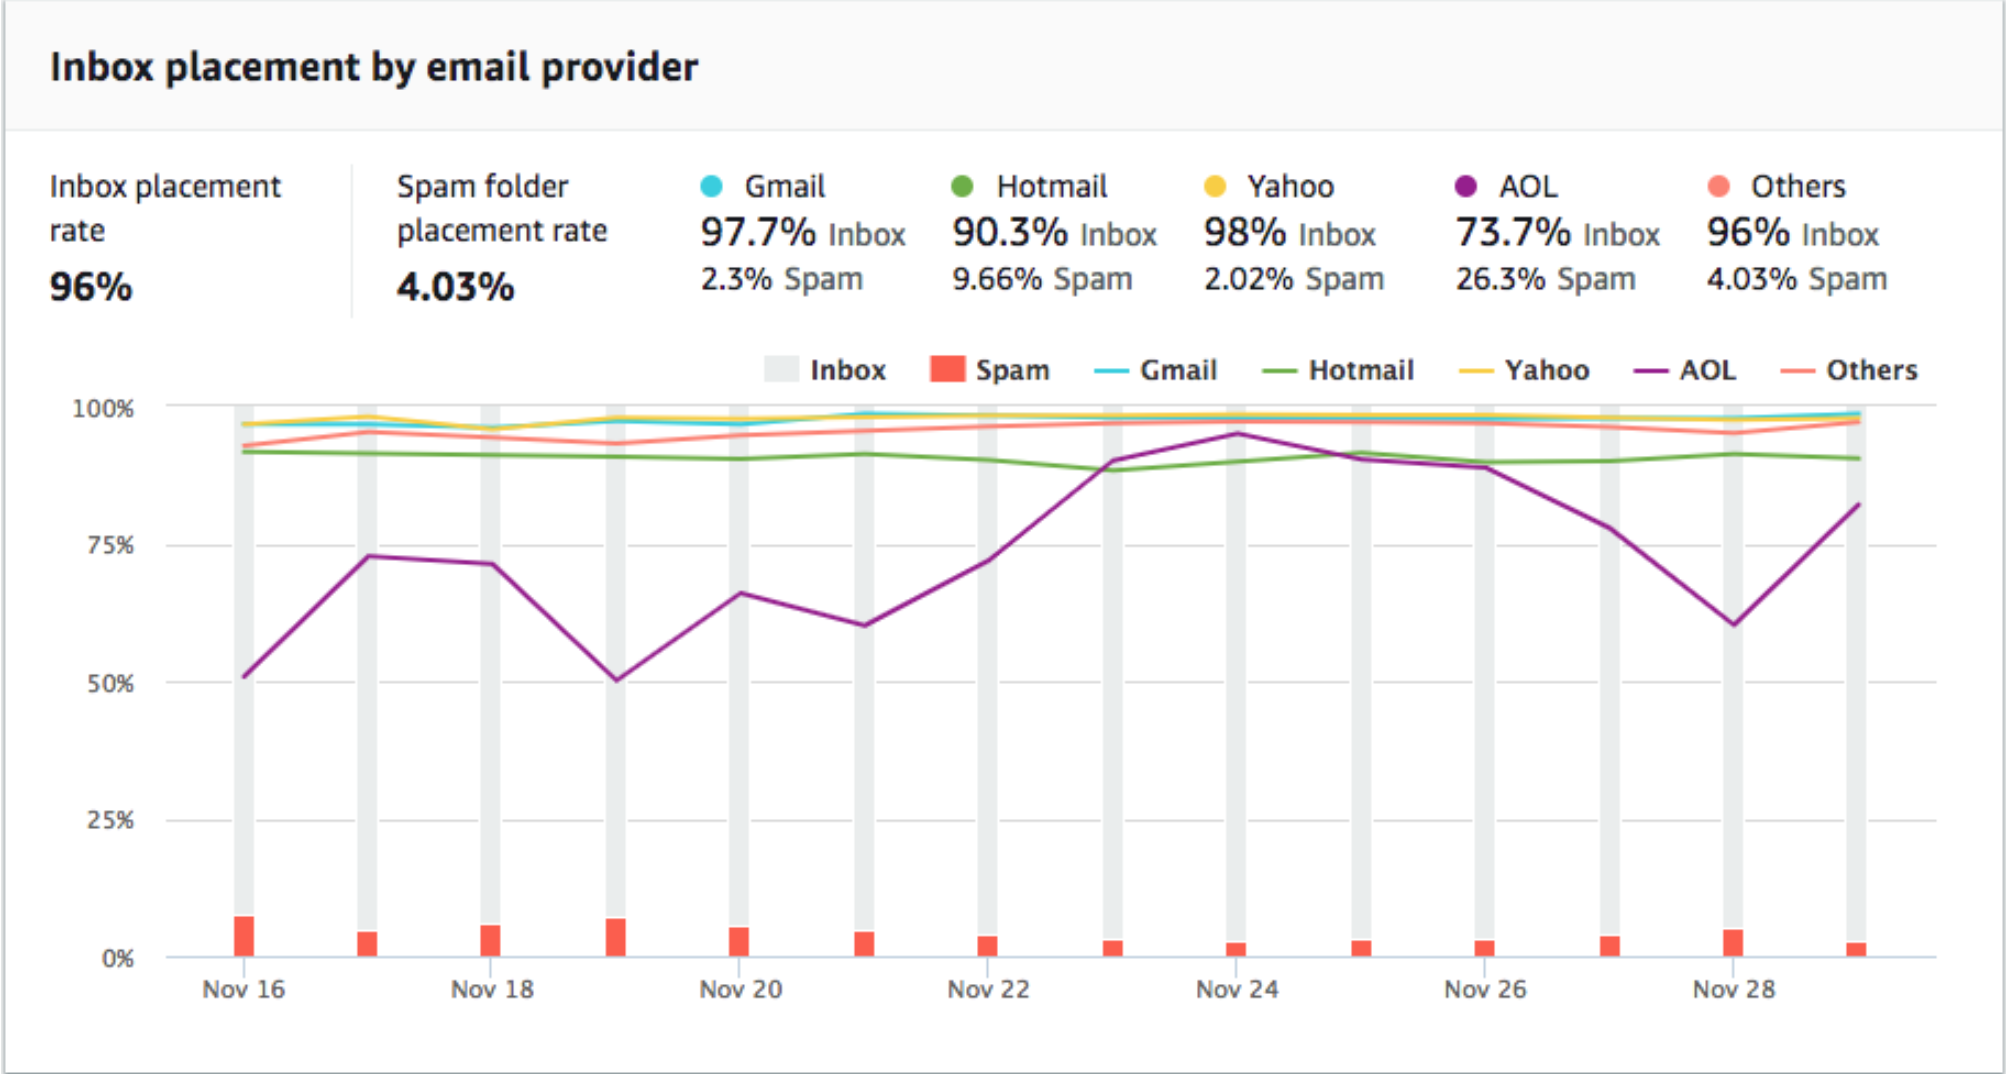
Be aware that the dashboard is available for a fixed monthly price of USD $1,250.
Machine learning models
In Amazon Pinpoint, sending personalized recommendations with a recommender model is possible. To use it, first, you need to create an Amazon Personalize campaign, where you can train and refine the model. After that, Amazon Personalize is connected to Amazon Pinpoint, and in the message templates, you can use variables called recommended attributes. These attributes temporarily store the data from Amazon Personalize and get dynamically replaced with the latest recommendations by Amazon Pinpoint upon sending the message. This feature is currently available only in a limited number of regions.
Further notes
- Check out the AWS Workshop to get started.
- Amazon Pinpoint automatically tracks how many emails were opened or clicked. Add the ses:no-track to the anchor tags in the HTML to disable this feature.
- If you want to create resources with the CDK, consider that all Amazon Pinpoint constructs are L1 as of writing. There isn’t a journey construct available, but campaigns can be scripted.
- IAM permissions start with
mobiletargeting:not withpinpoint: - The Amazon Pinpoint API is asynchronous and returns a 202 Accepted message upon success. Deletion of endpoints can take up to 15 minutes. Consider deleting endpoints containing personal data that won’t be used in the future.
- When sending emails, follow best practices to keep the bounce rate for the account below 5% and the complaint rate below 0.1%. AWS might temporarily prohibit the account from sending emails if these values are exceeded. In general, if you want to find out the spam score of your email messages, you can use the free service Spamcheck.
- When sending an email, this is not handled automatically and you need to handle the Unsubscribe event from the event stream. It is recommended to unsubscribe endpoints instead of deleting them to avoid contacting them in the future.
- If you have a use case with the same journey but with flexible templates that may change in the future, I recommend sending the message through a custom lambda block and implementing the parsing with Handlebars.js yourself. This way, the templates can still be managed by Amazon Pinpoint and used in other journeys, and you can have a single journey that handles complex templating logic. The downside is that you won’t be able to see directly in the journey engagement metrics how many of the messages got sent successfully.
Conclusion
We reviewed the main features of Amazon Pinpoint and its different possibilities to reach your audience, deliver personalized content and analyze the success of customer interactions. Hopefully, this familiarized you with the service and will help you determine if Amazon Pinpoint is the right service for your use case.
If you want to learn more about Pinpoint, feel free to reach out to us.
— Emilia
Sources:
- Image of the Deliverability dashboard (I didn’t want to pay USD 1,2k :D )