Arm your GitHub Actions Runners using AWS Graviton
GitHub does not support any ARM GitHub Actions Runner. So what now? Build it within your AWS environment!
The results are pretty cool: You have full control over the Runners and have no more time constraints like long-running workflows that consume Runners usage minutes.
I will guide you through the basics of creating an AWS EC2 instance and installing the minimum requirements on the OS for having a running GitHub Actions Runner.
AWS EC2 creation
To start with the EC2 creation, I already have established a VPC with two public and two private subnets. Both private subnets have a single NAT Gateway for the outgoing internet connection required for fetching new action jobs of the GitHub Actions runner.

When you are ready, let’s look into the setup of the EC2 instance. Please open the EC2 web interface and click Launch Instances.
The now-mentioned settings are the minimum required to have your EC2 instance running correctly, including the administrative parts within the OS itself.
- Add a Name for your EC2 instance:
GitHub Actions Runner - Choose the AMI you want to use: Quickstart -
Ubuntu 22.04 LTS - Change the Architecture to
64-bit (Arm) - Choose an AWS Graviton instance:
t4g.small(the g stands for Graviton instances) - Choose
Proceed without a key pair(we are using the AWS Session Manager) - Click on
Editin the Network Setting area- Choose your VPC and use a private subnet
- Create a new Security Group with no inbound rules (remove the suggested one)
- Decide about the volume storage (I usually choose 50/100 GB for this)
- Expand
Advanced detailsand add anIAM instance profilethat has at least theAmazonSSMManagedInstanceCoremanaged policy attached - Click on
Launch instance
When you do the steps described, you have done nearly everything to have your own GitHub Actions Runner. The only thing that needs to be done now is to download, extract, configure, and run the runner application.
Configure and register with GitHub
As we have prepared our EC2 instance with the basic settings within AWS, we are looking into the steps for the runner application itself.
To do so, connect yourself to your EC2 instance with the help of the AWS Session Manager.
- Go to EC2 and choose your instance
- Click on
Connect - Choose
Session Managerand click again onConnect(when the button is not available, you might have forgotten to add your instance profile to your EC2 instance that allows this) - Type in
sudo -i -u ubuntuto switch to the default ubuntu user
In a new window in your browser, you have to open up your GitHub Organization Settings.
- In Settings, go to
Actions > Runnersand click onNew Runner - Choose
LinuxandARM64as the Architecture - Follow the mentioned steps (you can easily copy each line). Each instruction line should be executed within your AWS Session Manager Session in your other window.
- Create the working directory
- Download the runner application and extract it
- Configure the runner application (When running the
./config.sh --URL https://github.com/tecracer --token TECRACERyou should initially accept all settings proposed to you. So only press enter until the GitHub Actions Runner is configured.)
- Finally, execute
./run.shto start your own GitHub Actions Runner
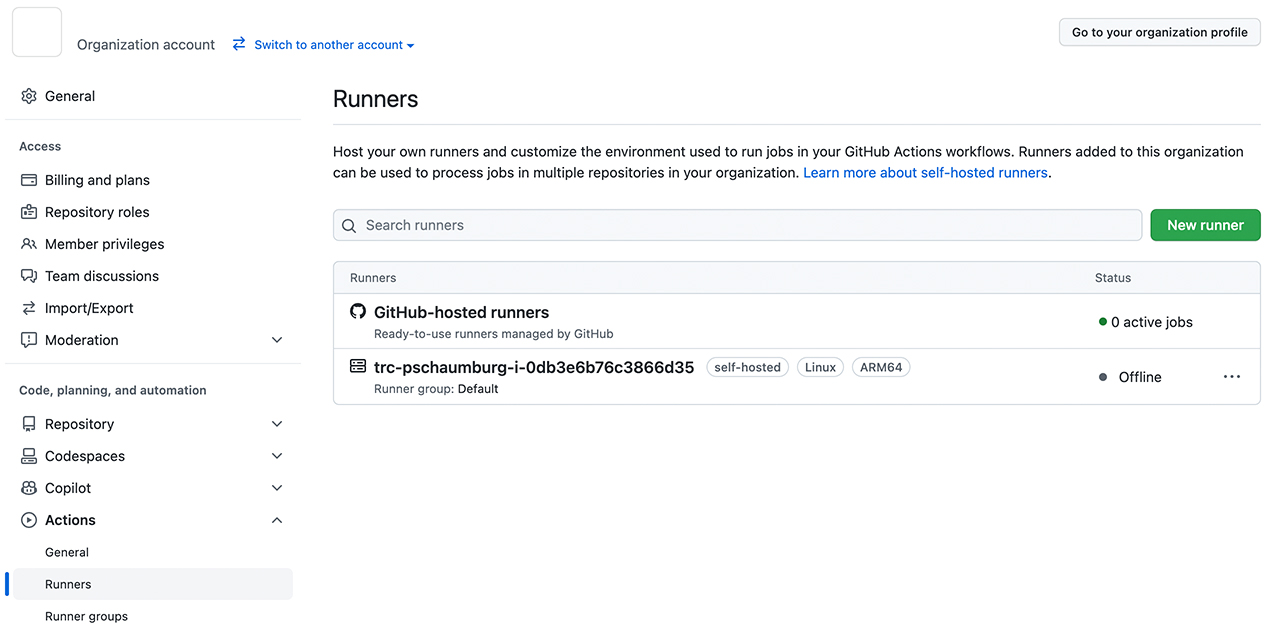
This is the final configuration step in this blog article to have the Actions Runner available. It is now present within the same menu, Organization Settings > Actions > Runners and should be available for you.
You can now install your packages like ruby, dev tools, docker, etc., to use it.
As said, this is only the general configuration. There are more things you should consider to do. Below is some additional content to have at least an idea about things you should consider. I have also added some advantages and disadvantages below.
Have fun testing this out and saving money!
Things to consider
Based on the experience with different software, environments, and customers, it is always good to think a bit about the following:
- using a different user than the default user
- having a hardened OS
- add more security measurements like antivirus, antimalware, etc.
- Use systemd to run
./run.shscript
As we have spoken now about only a single GitHub Actions Runner, which is manually created and configured, think about this:
- Use Terraform to create the infrastructure
- Use Configuration Management tools like Chef for installing and configuring the required software and more
- Use AWS Spot Instances for spending less than having an always-on EC2 instance
Check out GitHub Docs
Advantages and Disadvantages?
Of course, using a self-hosted GitHub Actions Runner always has both. I have created a list to give you at least a short idea of what is good and what is not so good.
Advantages
- choose your own OS, installed software, and manage it in your environment
- decide how performant your runner should be
- no dependency on monthly runner minutes
Disadvantages
- Patching needs to be done on your own
- re-using the same runner again without cleanup per default
Advantages/Disadvantages (based on your work within GitHub)
- only possible for private repositories
— Patrick