Import existing resources into an AWS CloudFormation Stack
Presentation
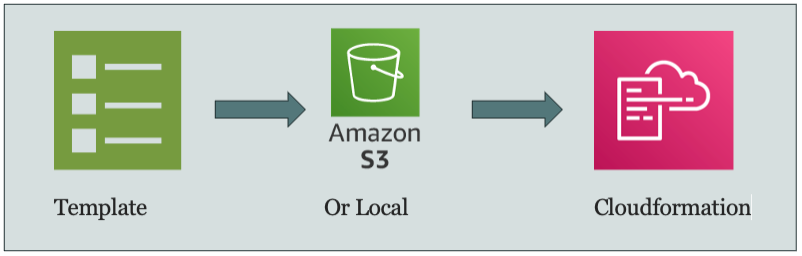
Deploying resources with infrastructure as code is the recommended way to provision resources in AWS. The native AWS-way of doing it is by using Cloudformation or CDK (Cloud Development Kit), and you should of course do this from day one. But in real world sometimes somebody provisioned resources via the console, or there is a need of refactor your code and split your stack into multiple stacks.
Luckily It is not very often we have cases where it’s required to import resources. It is usually in a production environment, and where the resource can not easily be deleted and recreated (for example a running EC2 machine or populated volume).
Preparation and Caveats
- Not all resources can be imported into CloudFormation. For example you can not import RDS-instances and SNS-topics which is a pain some times, as these are resources which are hard to remove and recreate from scratch without a lot of pain. The current list is available in the documentation here: Resources that support import and drift detection operations
- If you have resources that do not contain data, consider removing them and just add them to the stack as new resources (for example a Lambda function), this could save you a lot of manual work.
- Double-check that your resource-type(s) can be imported and test it in a sandbox-account. This is very important when refactoring so you do not remove a resource from a stack which you can not import later.
- Do not design your infrastructure with the assumption that you can move resources between stacks. There are a lot of resources that can not be imported, and there are also risks and a lot of work involved in doing this.
- You can not import resources and do other updates to your stack at the same time so make sure your stack is up to date with no changes pending.
- You can not import resources that are in another stack, so it need to be detached from it’s existing stack if needed. Now you have all the required heads up, let’s crank out with a practical example of how to import an existing EC2 instance into a Cloudformation stack below.
Importing EC2 instance into an Existing CloudFormation Stack
Pre-requisite
You need to have a default VPC along with a keypair in the region where you’ll create a CloudFormation stack.
Step 1
Modify Our template.yaml File.
What we need to do is effectively create a CloudFormation resource that mimics the configuration we have specific on our manually created EC2 instance. We need to define an exact match (or as close as possible match) to this entry. This means manually looking through the configuration on your instance and looking up CloudFormation documentation to add the corresponding settings. If it sounds like reverse engineering this it’s a lot of work, that’s because it is, use it as “last resort” method as indicated above.
The second big requirement is that you need to have a DeletionPolicy for each resource, best to have that set to Retain. A DeletionPolicy tells Cloudformation how to deal with the underlying physical resource if the logical resource is removed from the stack or the whole stack is being deleted.
Step 2
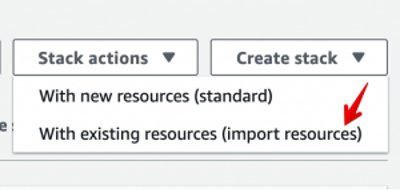
Now that you have the prep, it is time to get started. Go to “Create stack” drop-down and select “With existing resources.”
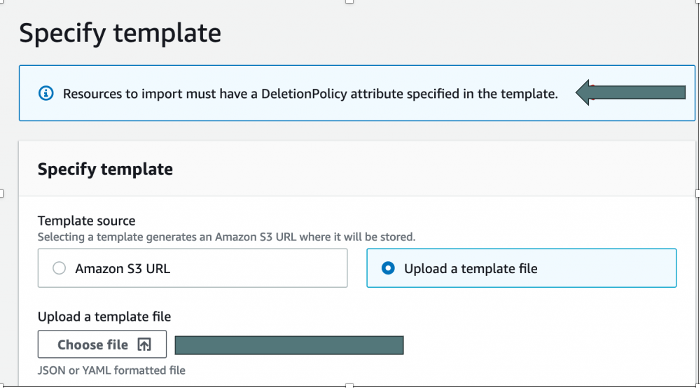
You’ll get a window explaining that you need a template and giving some information. I didn’t bother to include that as it’s just a lot of text and nothing to enter. After you get through that screen is the one to enter your template. This is not too dissimilar to the standard, but you have another infobox reminding you that you need the DeletionPolicy set.
Step 3
Once your template is loaded, you get this new screen. For each resource listed in your template, you’ll be asked to enter the appropriate identifier. In this case, it’s the InstanceID of the instance. Enter in that value and hit Next.

Step 4
Enter in the stack name and any parameters. Nothing unusual here, but remember, the parameters need to match the existing resource.
Step 5
That’s everything that you need to enter. At this step, you are presented with the overview. Along with that, it also shows the change(s) that will happen.
Step 6
Assuming everything is all good, CloudFormation goes off and does the import of the resources. The other thing it does, as the keen-eyed may see in the below, is to add the AWS stack-level tags to each resource, just as it would if you were creating the resources. Note: This is the only addition/update it will allow, once import has been performed, any changes on resources it’d be done as stack update in a secondary task.
Extending functionality
While importing a resource into a new stack is actually pretty straightforward, assuming you have the deletion policy and match the current resource. Note: All the examples were done with an EC2 resource, but similar questions and issues can be applied to other resource types. So, what if I have an EC2 instance that was created via CloudFormation, but someone manually added/removed an extra drive/volume? Could we use this new functionality to update the template? This turned out to be a bit more of a challenge.

- start by going back and updating your stack to have a DeletionPolicy: Retain for each resource
- make sure you have a copy of your template, or just copy it from the Template tab of your stack and take note of the Parameters
- delete your stack! With the deletion policy, your resources should be untouched.
- update your template to include the new resource.
- do a new create stack with existing resources.
Why Import into stack?
OK, so if I had to delete and recreate the stack, what’s the good of the “Import resources into stack”? This is really for when you have, or want, multiple resources in your stack. In this simple example, what if we wanted to include that Security Group into my stack? we can do that with the Import into stack. I can also tidy up our CloudFormation to now use a !Ref to the Security Group rather than passing it as a Parameter.
Conclusion
These features really help you clean up an environment that either started poorly or drifted over time. If the stack doesn’t exist, you can now create one from existing resources. If you want to restructure your stacks, you can do that too. Just make sure you have that DeletionPolicy set and you are good to go! Now, get out there and start cleaning up those messy environments.
— Javier Núñez