Build Golden AMIs with Packer and AWS CodePipeline
When leveraging AWS services such as EC2, ECS, or EKS, achieving standardized and automated image creation and configuration is essential for securely managing workloads at scale. The concept of a Golden AMI is often used in this context. Golden AMIs represent pre-configured, hardened and thoroughly tested machine images that encompass a fully configured operating system, essential software packages, and customizations tailored for specific workload. It is also strongly recommended to conduct comprehensive security scans during the image creation process to mitigate the risk of vulnerabilities.
By adopting Golden AMIs, you can ensure consitent configuration across different environments, leading to decreased setup and deployment times, fewer configuration errors, and a diminished risk of security breaches.
In this blog post, I would like to demonstrate how you can leverage AWS CodePipeline and AWS Stepfunctions, along with Terraform and Packer, to establish a fully automated pipeline for creating Golden AMIs.
Architecture and Workflow
I would like to start by introducing the infrastructure that we are going to deploy as part of this blog post. The architecture diagram below provides a high-level snapshot of the components and workflow we are about to implement. Our objective is to build a CodePipeline complemented by two Stepfunctions to orchestrate the Golden AMI creation process.
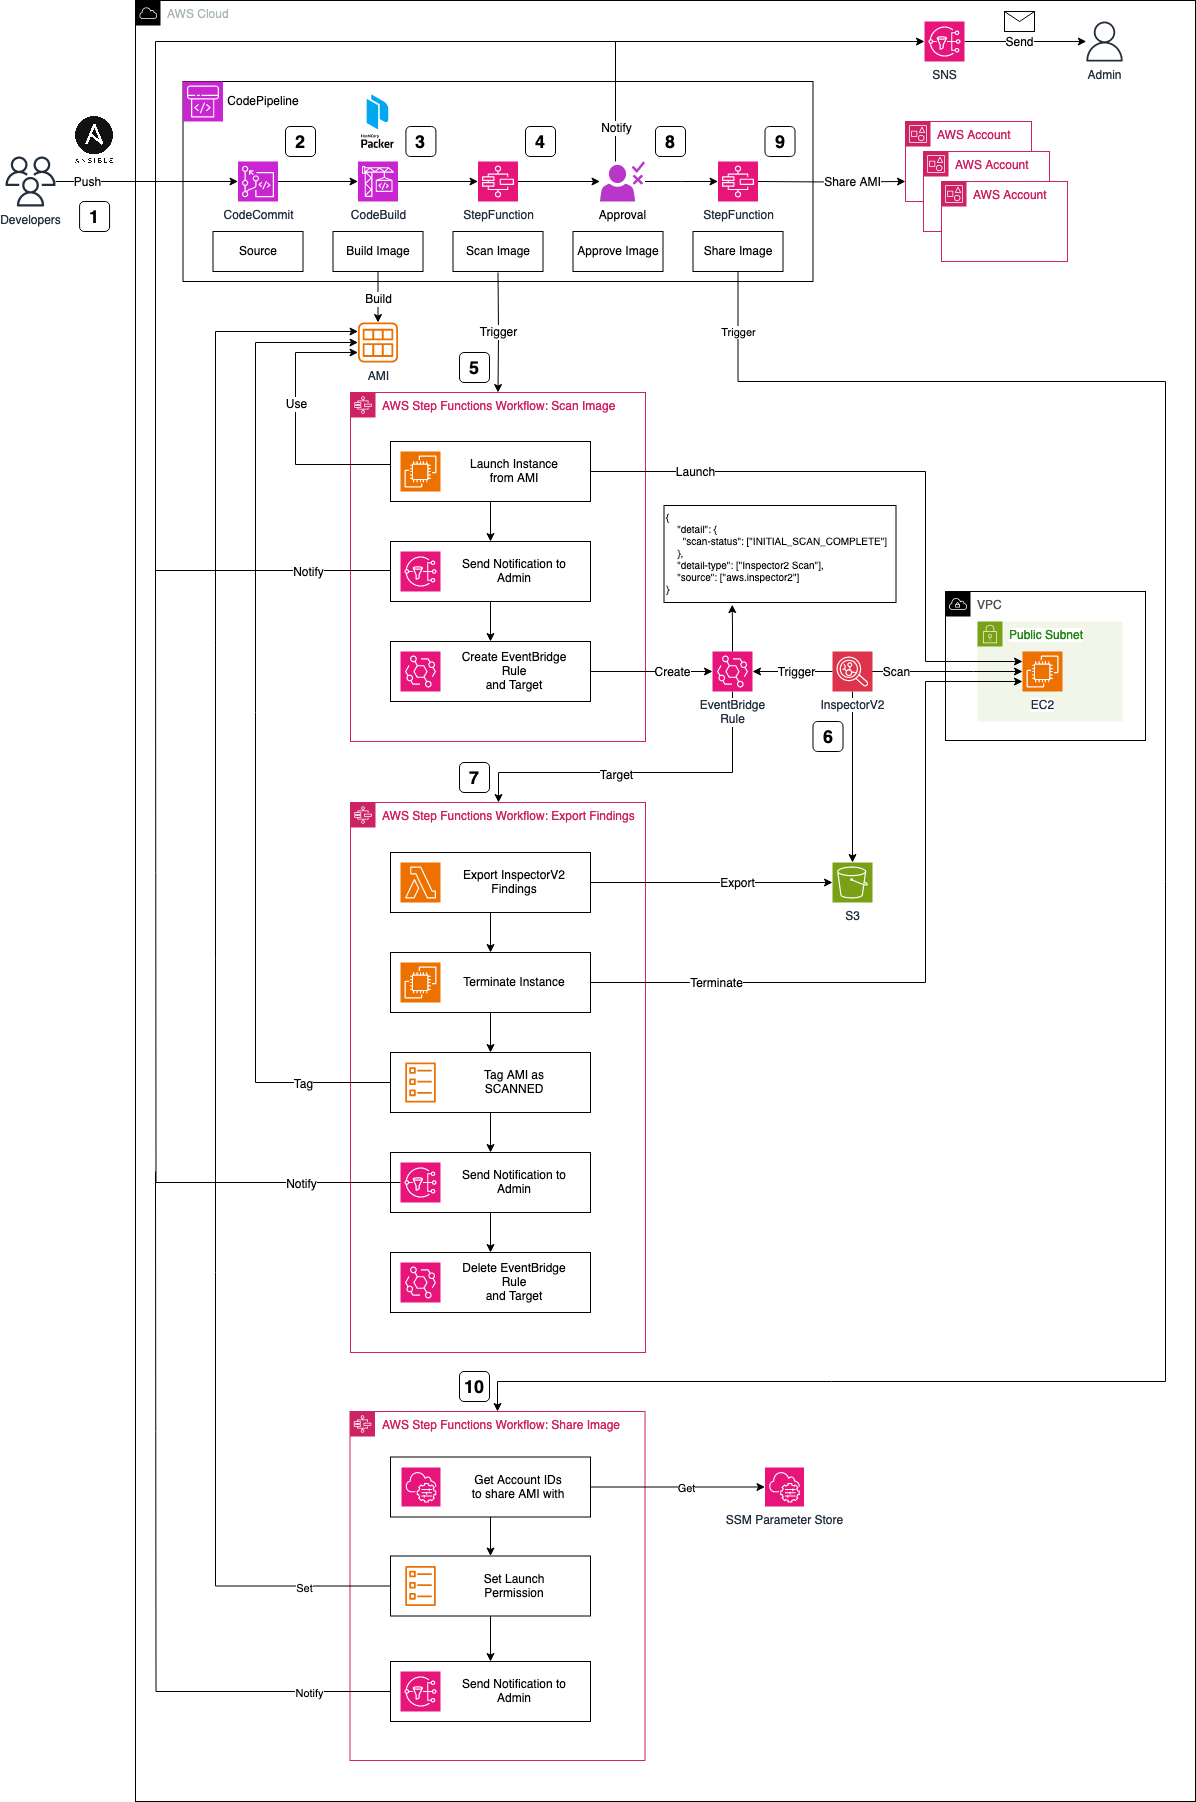
The Workflow can be described as follows:
-
Developers will write
HashiCorp Packer-specificconfigurations for AMI creation, includingAnsibleplaybooks. This grants developers the flexibility to customize their images, install requisite software packages, and configure the system. Once playbooks and Packer configuration files are prepared, developers push their changes to aCodeCommitrepository, triggering theCodePipelineAMI creation workflow. -
The CodeCommit repository serves as the source for CodePipeline, initiating the workflow. While CodeCommit is the chosen source in this scenario, alternatives like GitHub, GitLab, or Bitbucket can be used as an alternative, offering the development team greater flexibility in selecting their tools and software.
-
Upon code submission to CodeCommit and the initiation of CodePipeline, the image build process starts using CodeBuild and HashiCorp Packer. CodeBuild downloads the necessary software and tools, executing
packer build. Packer creates an AWS AMI based on the provided configuration files and pre-configures the AMI using the specified Ansible playbooks. Beyond creating a Golden AMI, our objective includes a deep security analysis to mitigate vulnerability risks. We will leverageAWS StepFunctionto build these security scan workflows. -
Post the successful creation of the AMI via Packer, CodePipeline triggers an AWS Stepfunctions Workflow. This initial workflow is part of a two-step process designed to perform a security scan on the AMI using AWS Inspector V2. In contrast to Inspector V1, Inspector V2 continually scans Amazon EC2 instances post-launch.
-
To scan our AMI, an EC2 instance based on the new AMI is launched. The Stepfunctions workflow starts by launching this EC2 instance, notifying an administrator via SNS of the scan initiation, and configuring an EventBridge Rule and Target.
-
The EventBridge Rule reacts to Inspector V2 scans marked as
INITIAL_SCAN_COMPLETE. After launching and setting up our EC2 instance, AWS Inspector V2 automatically performs a scan, triggering the EventBridge Rule upon completion. The associated Target, in turn, triggers our second Stepfunctions workflow. -
The second StepFunction is tasked with exporting findings and alerting the administrator of potential vulnerabilities. The workflow begins by exporting Inspector findings using a Lambda function, storing them in an S3 bucket. The workflow continues by terminating the temporary scan EC2 instance, and tagging the AMI as SCANNED for easy identification. Subsequently, a notification is dispatched to the administrator via SNS, conveying the Inspector findings and completion of the process. Finally, the workflow deletes the EventBridge Rule and Target from the first workflow.
-
Post-creation and an inspection via Inspector, the Golden AMI is ready for sharing with member accounts of your organization or selected customers. Prior to sharing, approval is sought for both the Packer build and Inspector V2 results.
-
Once administrator approval is granted, CodePipeline initiates another Stepfunction step, facilitating the sharing of the newly created Golden AMI with predefined AWS accounts.
-
The StepFunctions workflow commences by retrieving the Account IDs from the Systems Manager Parameter Store, stored as an SSM Parameter. After extraction, the launch permissions of the AMI are modified, and the administrator is promptly notified of this adjustment. This streamlined process ensures that shared AMIs align with company requirements, thanks to the standardized approach to image creation and security scans.
Building the Pipeline
The code associated with this blog post is hosted on GitHub. Feel free to either clone the repository or manually copy the code to your local machine. Within the provided directory, you’ll find two folders. The packer-pipeline folder encompasses the complete Terraform configuration for the AMI creation pipeline. It includes the Lambda source code, buildspec files, and StepFunction configuration files. Meanwhile, the manifests folder houses a sample Packer configuration, complete with a straightforward Ansible playbook.
Before deploying our pipeline, a few adjustments need to be made to our Terraform variables. Navigate back to the packer-pipeline folder and open the terraform.tfvars file, where you’ll find the following variables.
  application_name                    = "packer-ami-build-pipeline"
  sns_endpoint                        = "test@example.com"
  account_ids = {
      dev = "xxxxx"
  }
There are two crucial values that need adjustment before applying the Terraform configuration. First, define a new sns_endpoint variable. This will be the email address SNS will send its notifications to. Second, set one or more account_ids the Golden AMI should be shared with at the end of the workflow.
In this example, we’re using regular AWS accounts. If needed, you can modify the Terraform code to enable AMI sharing with organizations.
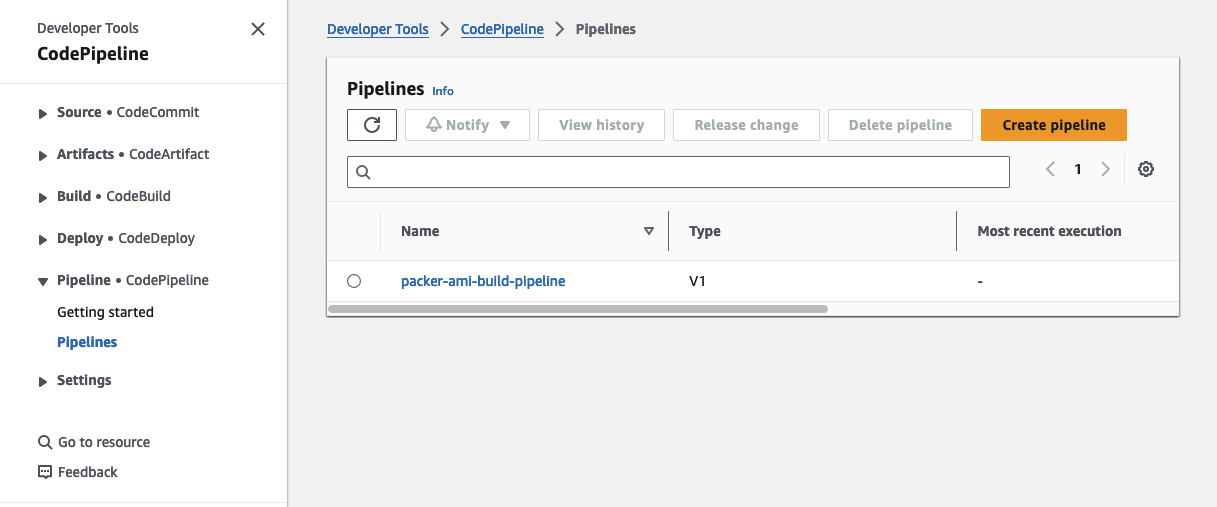
Once you’ve made these necessary adjustments, execute terraform init to initialize the Terraform providers, and then use terraform apply to deploy the infrastructure. Visit the AWS Console’s CodePipeline service, where you should now find a new AMI creation pipeline.
Please be aware that the attribute force_destroy has been set on all S3 Buckets for easier deletion of the infrastructure. It is advised to remove this attribute if the infrastructure is used as part of a production workload.
Workflow Test
Push Packer Configuration
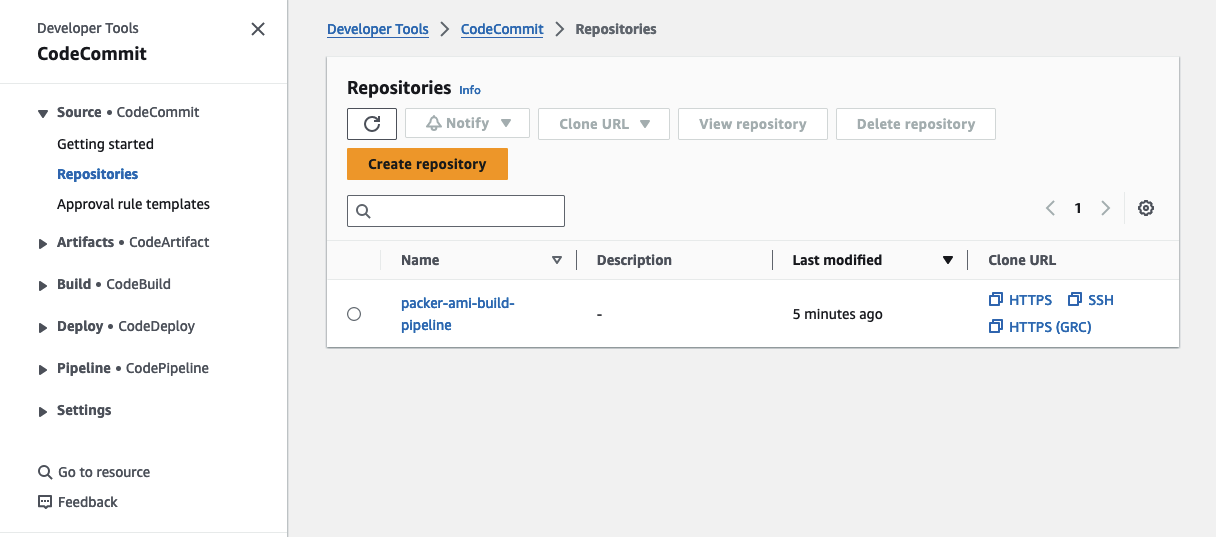
To confirm that the AMI pipeline is functioning correctly, we’ll push a sample Packer configuration, including an Ansible playbook, to our CodeCommit repository. You can locate the code in the manifests folder in the GitHub directory. Head to the CodeCommit console and clone the repository to your local machine.
Copy the files from the manifest directory into the newly cloned repository.
Do not copy the whole manifest directory into the newly cloned repository. You need to extract the files itself.
Feel free to tailor the variables in the variables.pkrvars.hcl to suit your preferences. If you’re using a region other than eu-central-1, you might want to adjust the source AMI and the AWS Region.
Once these adjustments are made, employ git add, git commit, and git push to upload your Packer configuration to CodeCommit. After uploading the configuration, you should observe CodePipeline initiating the workflow.
Build AMI with Packer
The initial phase of CodePipeline involves kickstarting the creation of the Golden AMI through CodeBuild and Packer. CodeBuild will take care of fetching all the essential tools, validating the Packer configuration, and setting up the AMI according to our Ansible playbook.
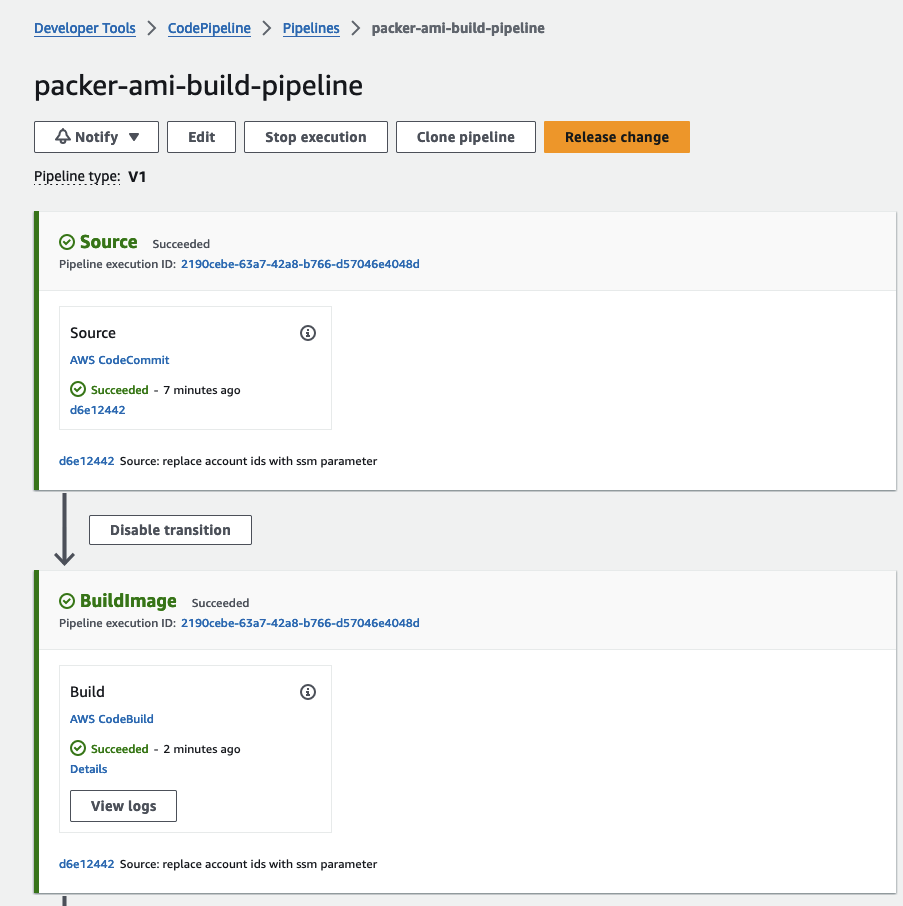
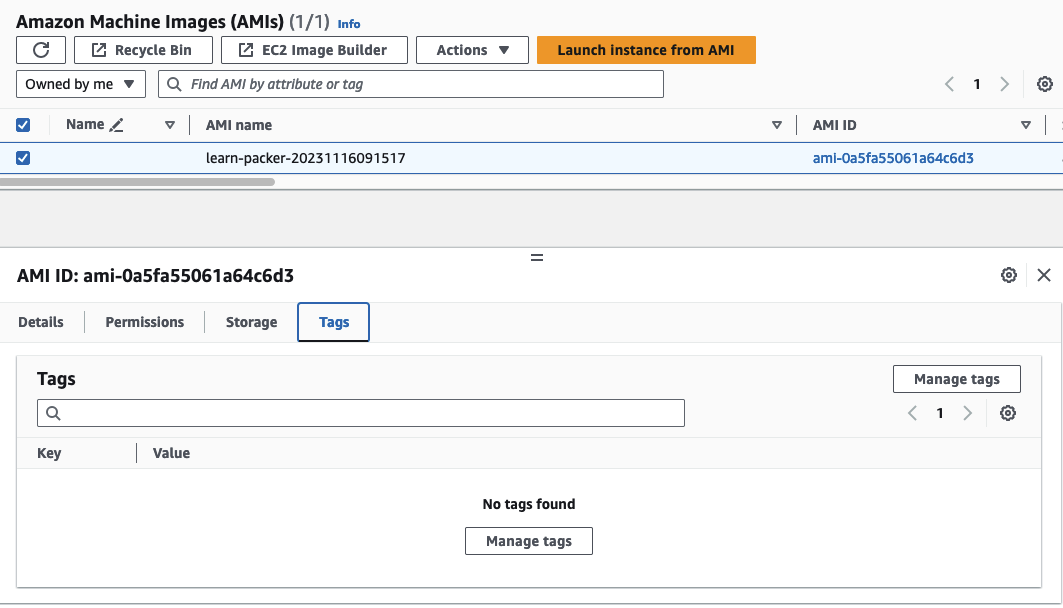
Once you’ve successfully executed packer build, navigate to the AWS console, where you should locate the recently created AMI. Please note that, as of now, the AMI is untagged.
Security Scan
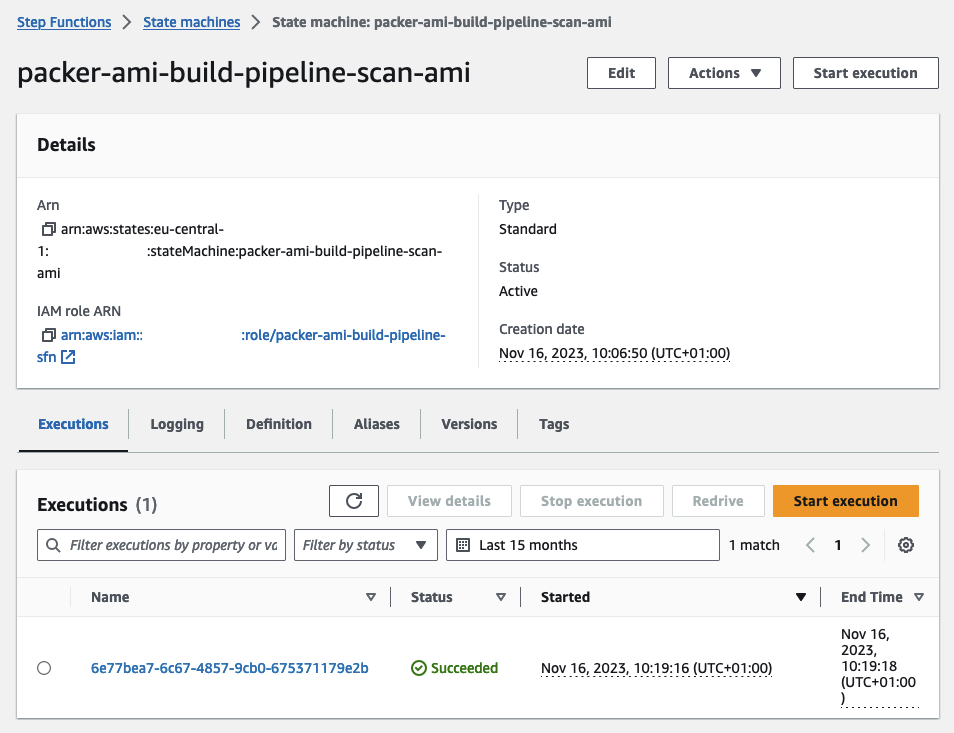
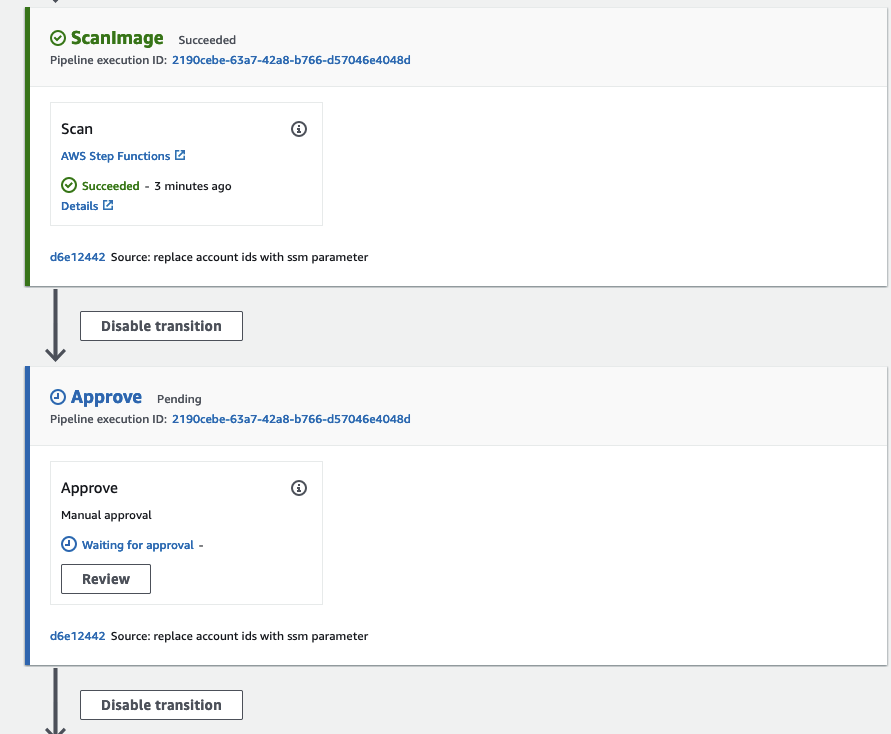
Upon completion of the AMI creation, CodePipeline will activate an AWS StepFunction to execute a security scan using Inspector V2. The initial workflow, named Scan-AMI, will launch an EC2 instance based on our AMI and establish EventBridge rules and targets. These components will notify us once the Inspector V2 scan concludes. For a detailed walkthrough, feel free to follow the steps in the AWS Console.
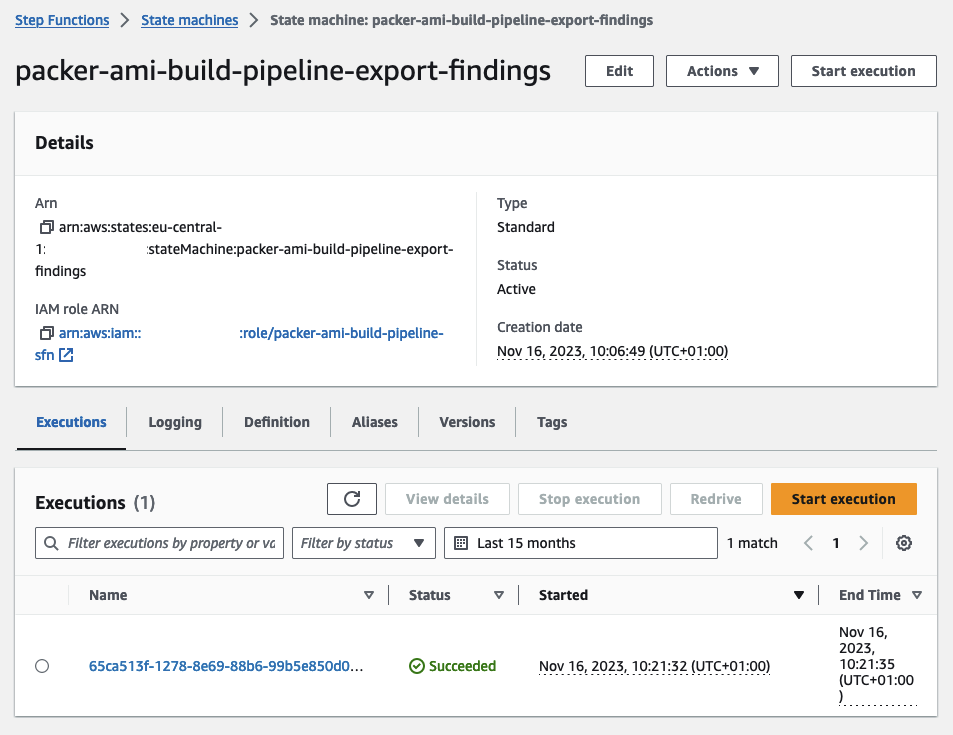
Following the Inspector V2 scan completion, the second workflow, Export-Findings, will be automatically triggered. This workflow is designed to terminate the instance, tag our AMI, and export the findings identified by Inspector.
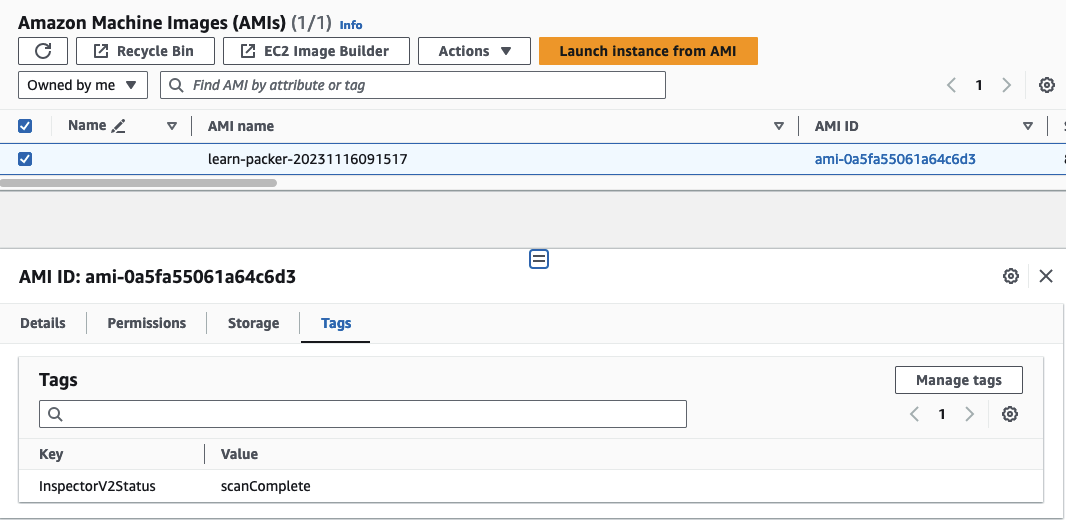
After the successful completion of the workflow, you’ll observe that the previously untagged AMI is now tagged with ScanComplete.
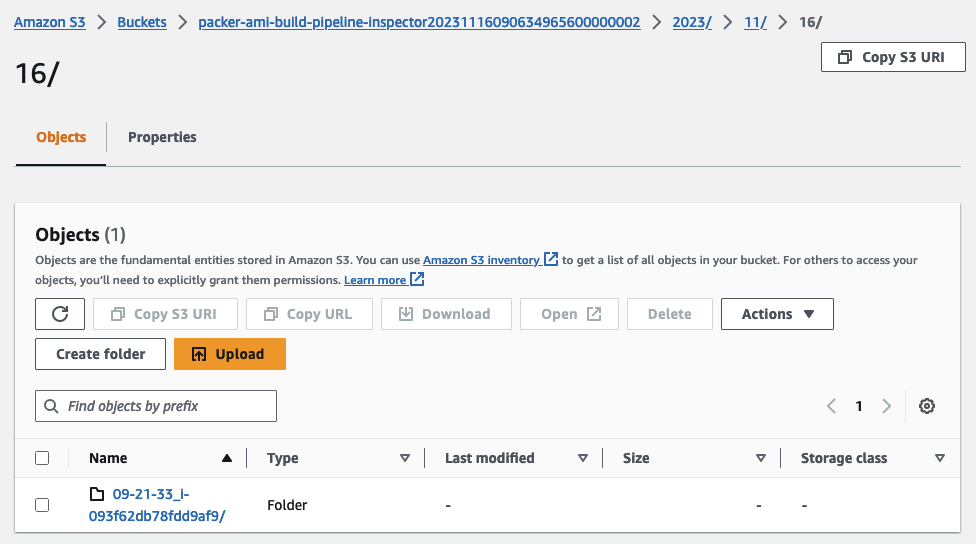
The exported findings can be located in a dedicated S3 Bucket, organized by year, month, and day for easy retrieval and tracking.
Share AMI
Following a successful security scan, you have the option to share the AMI with a predefined set of accounts or organizations. To proceed with the workflow, approve the CodePipeline approval step.
Shortly after, the ShareAMI Stepfunction step will initiate and proceed to share the AMI.
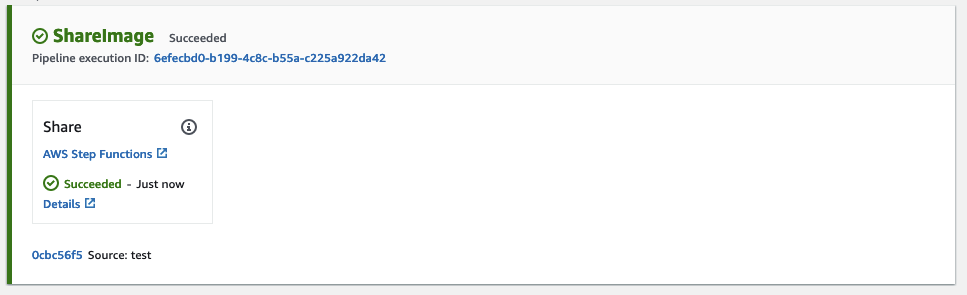
Once it completes successfully, revisit the EC2 console and inspect the AMI permissions, where you should now find the shared accounts or organizations listed under Permissions. The AMI can now be leveraged by your organizations or by other AWS accounts to build workload on EC2.
Summary
The implemented architecture serves as a foundational example, and there are various ways to enhance its robustness and efficiency. One approach is to integrate an additional step in CodePipeline, acting as a manual Quality Assurance (QA) process. This step involves launching another EC2 instance using the scanned AMI, allowing for manual QA checks and verification before ultimately sharing it with the organization.
While Inspector V2 scans cover a broad range of potential vulnerabilities, you can further optimize your scans by incorporating third-party analysis tools. This integration can enhance the effectiveness of your security scans.
I hope you had fun and learned something new while working through this example. I am looking forward to your feedback and questions. If you want to take a look at the complete example code please visit my Github.
— Hendrik
Title Photo by Zlaťáky.cz on Unsplash