Create issues in Jira from Security Hub findings
AWS Security Hub allows you to get and manage an aggregated view of security findings in your AWS Accounts. Different companies require to have all findings tracked within their issue-tracking system, like Jira. Manual interaction is out, so let’s automate its content creation.
During the last few years, it happened that customers required the publishing of findings and more to be sent over to a shared mailbox within their company. This would have been like an integration with AWS EventBridge with an SNS topic as the target. Whereas the SNS topic itself only has the email address in it. So someone had to look into the JSON content of that mail and find out what happened.
You already might think this will be error-prone, so let’s bring a new solution to make your life easier. If you already use Jira, you are ready for the next steps.
Let’s look at an easy solution to publish your findings in Security Hub.
Overview
Before we begin, I’d like to give an overview of the design I want to have implemented. On the left-hand side, everything begins with an enabled and configured AWS Security Hub. When a new finding has been found, Amazon EventBridge will filter that event and publish the necessary information to a Lambda Function. This Lambda Function then will reformat the content to align with the Atlassian Jira REST API and creating a new issue there.

Step by step
1st Step: Create a Lambda function
The first step is to create the Lambda function to be referenced in Amazon EventBridge.
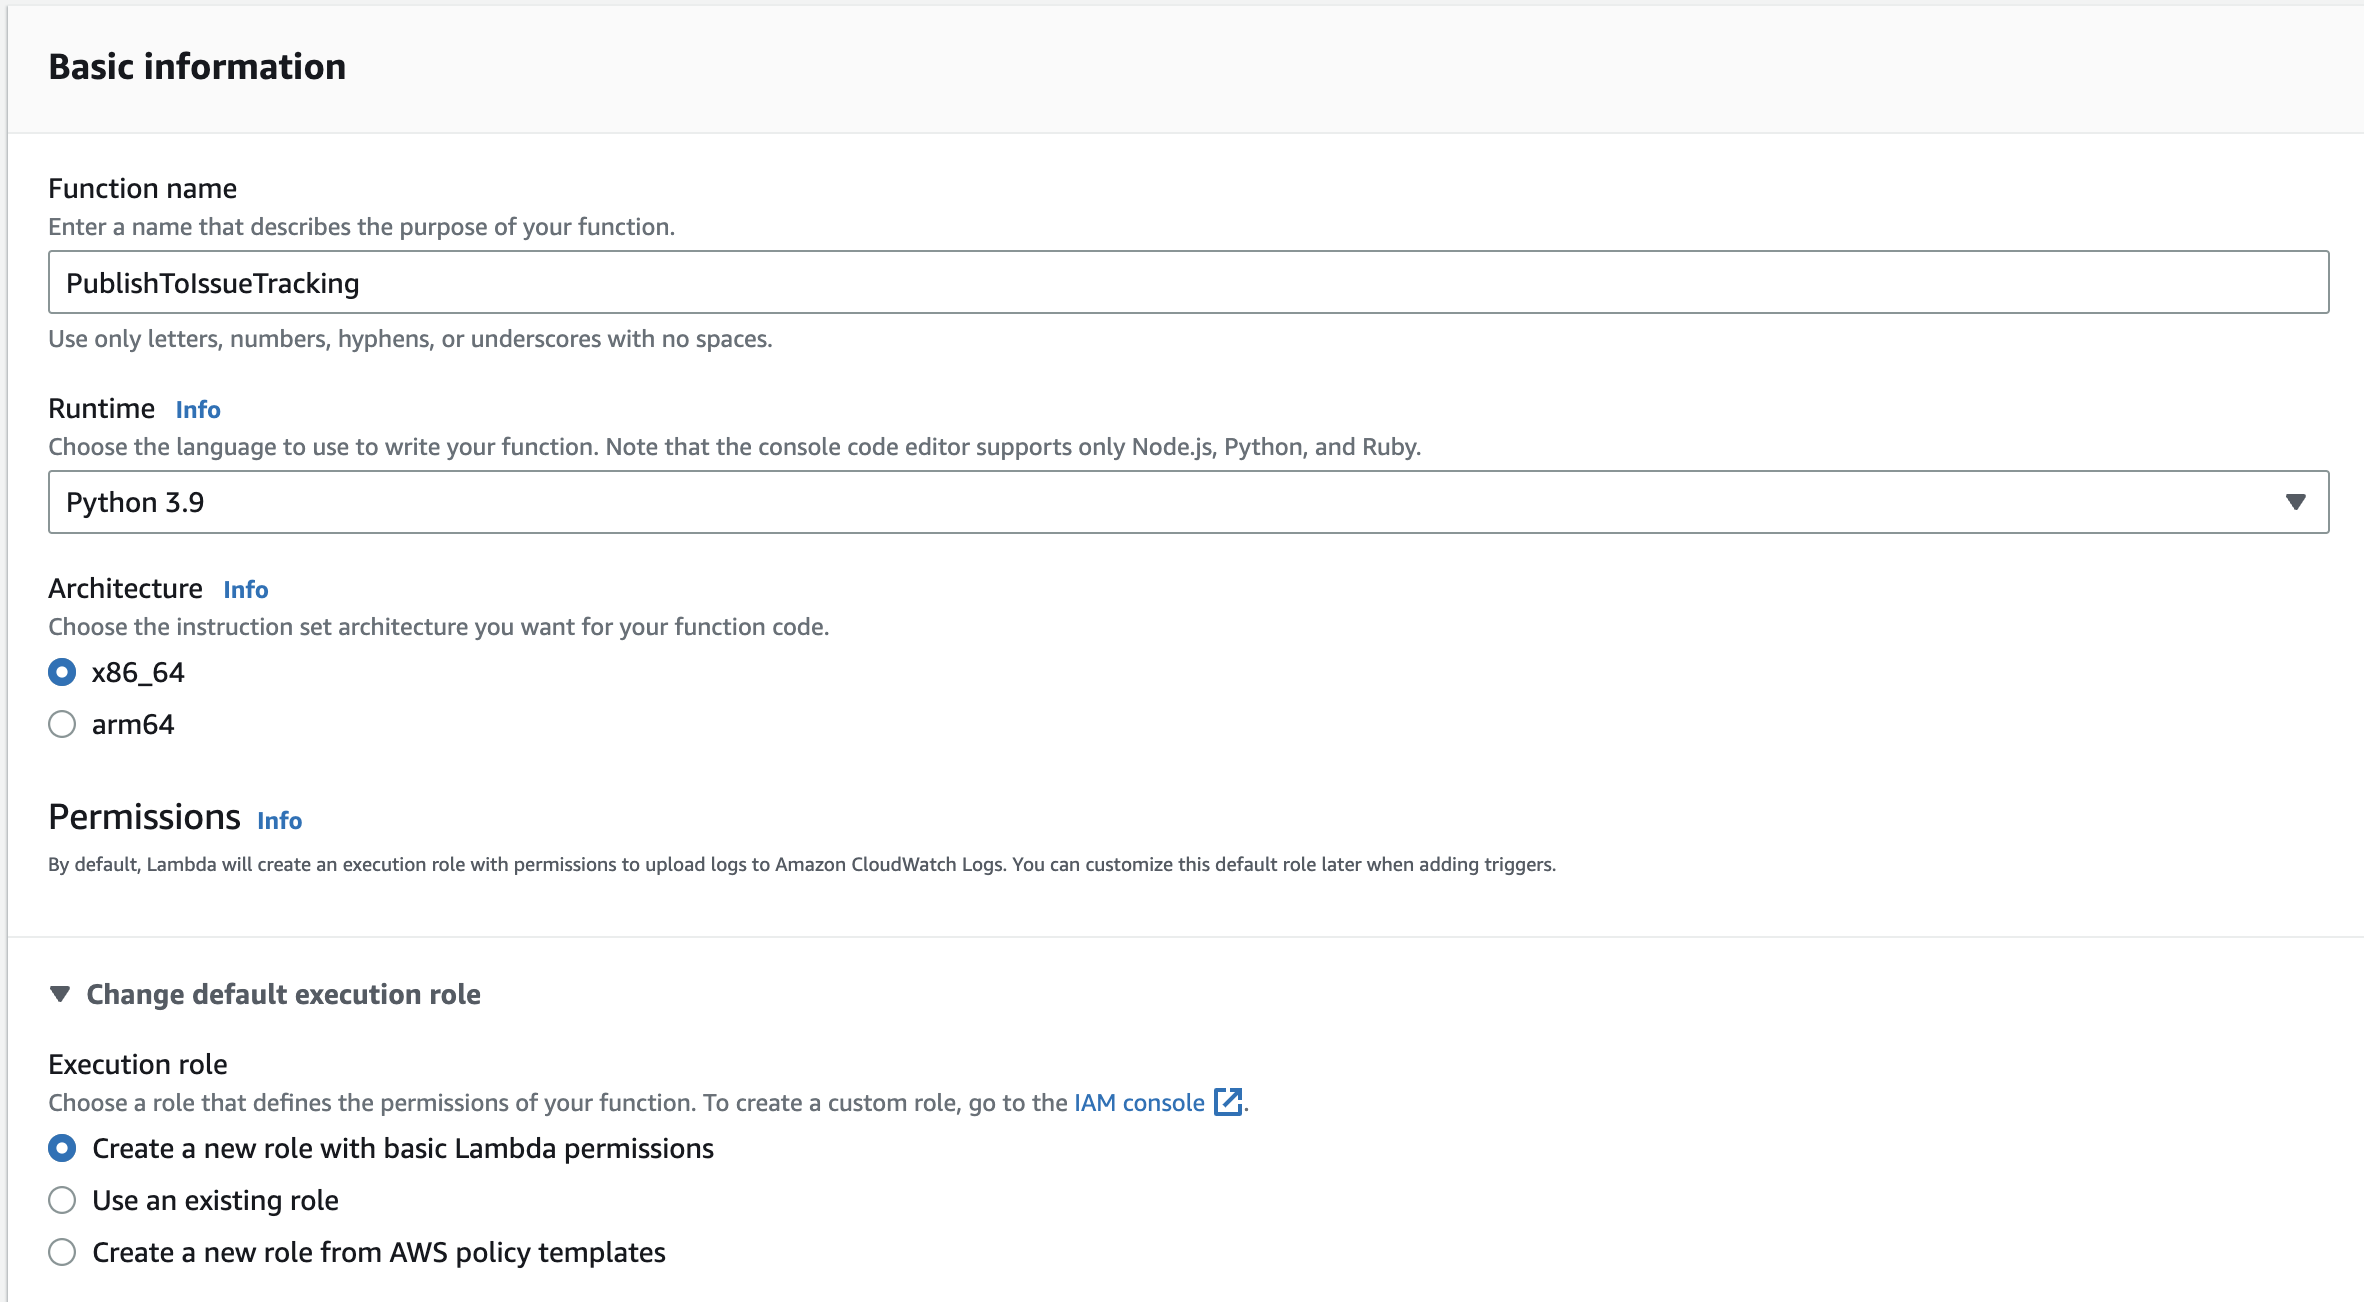
To do so, open your AWS Management Console and open the Lambda AWS Service and create a new function.
I’m mainly using the default settings for my function. So it has only an added name of PublishToIssueTracking changed runtime to Python 3.9.
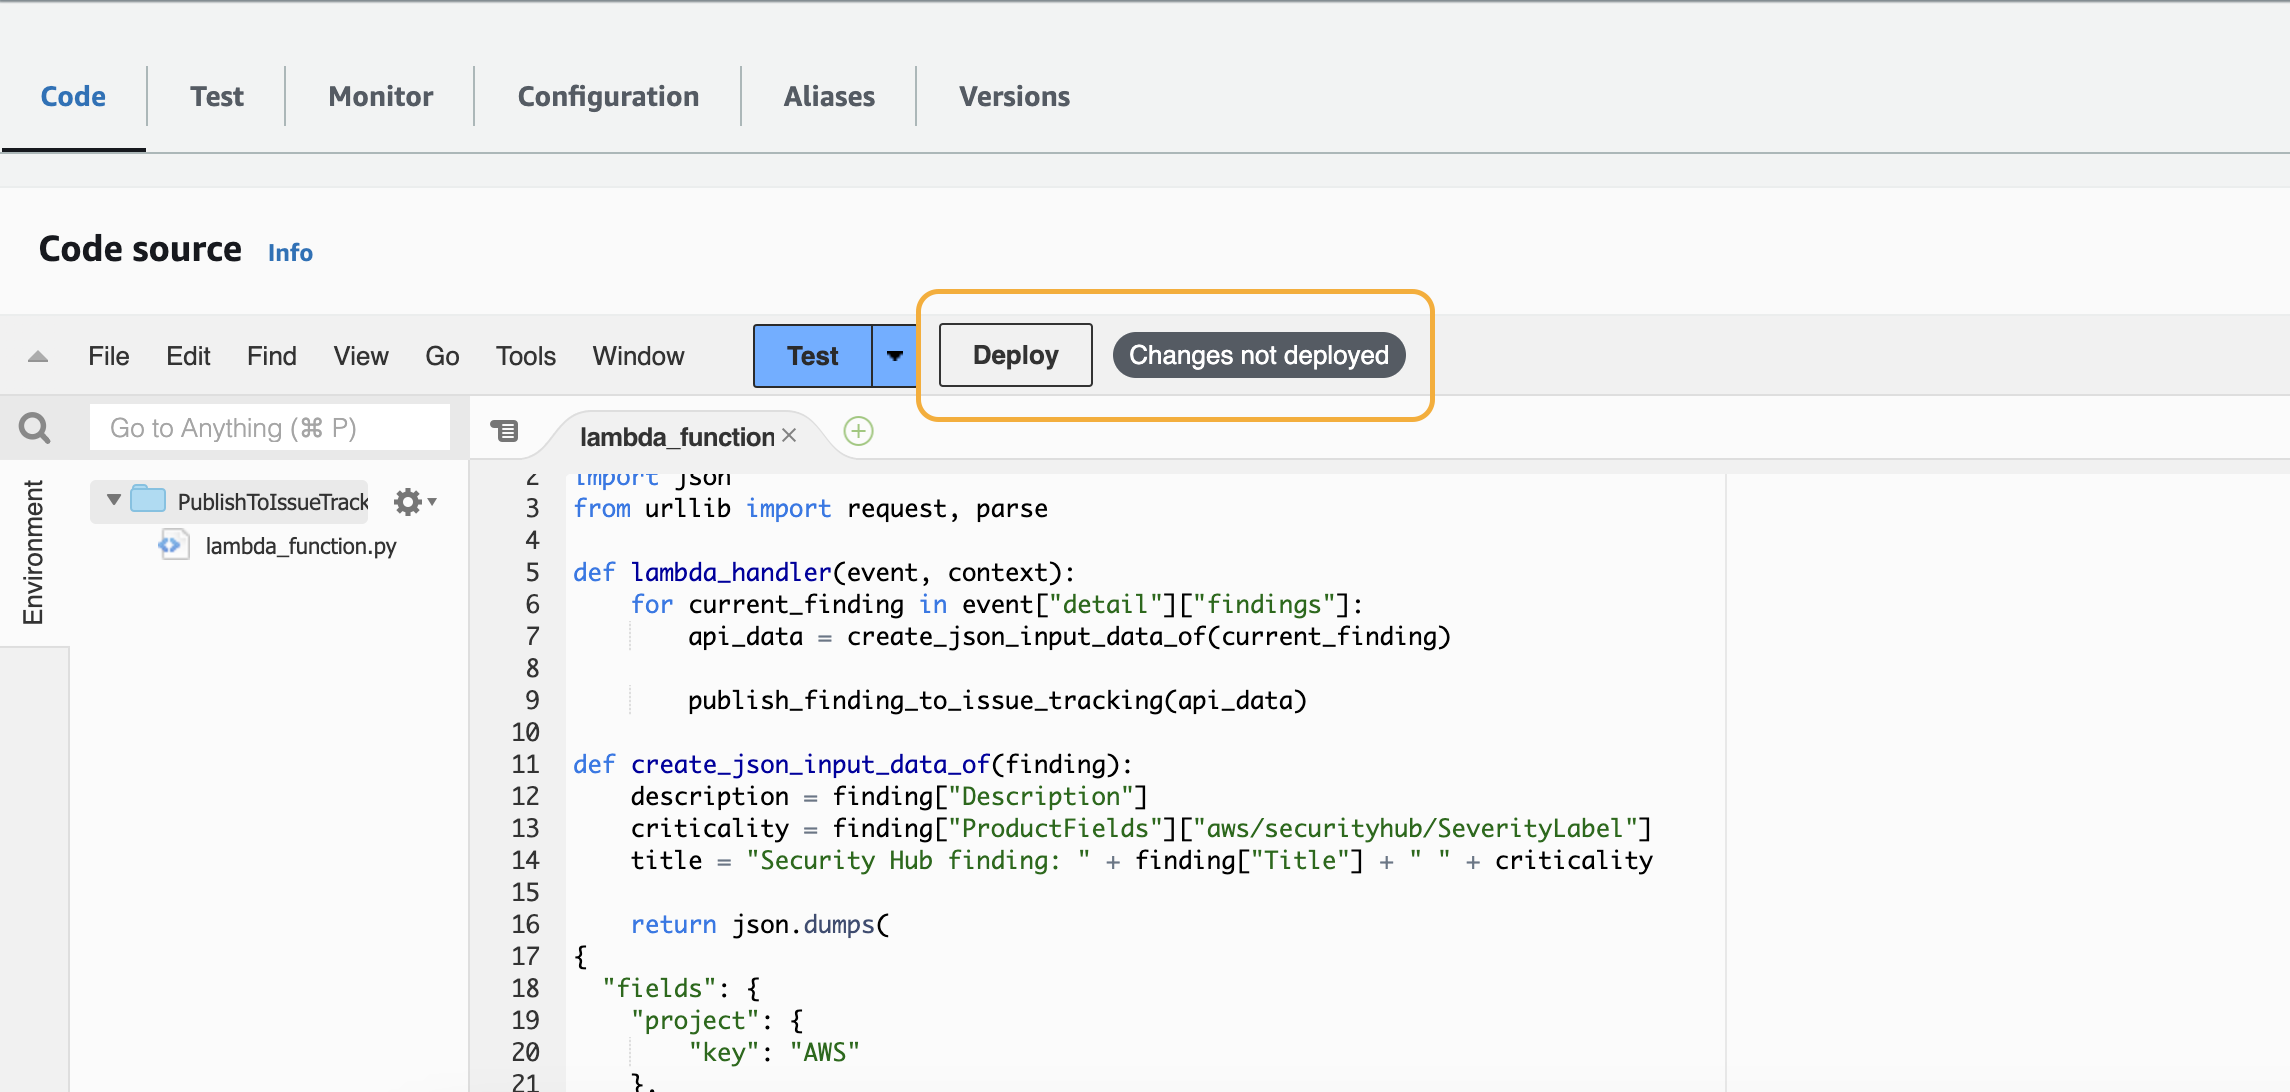
When created, it will bring us to the function where you have to your Lambda’s Code source.
You can copy the code from below the screenshot, and the only thing left to do is to click on deploy.
import boto3
import json
from urllib import request, parse

def lambda_handler(event, context):
    for current_finding in event["detail"]["findings"]:
        api_data = create_json_input_data_of(current_finding)

        publish_finding_to_issue_tracking(api_data)

def create_json_input_data_of(finding):
    description = finding["Description"]
    criticality = finding["ProductFields"]["aws/securityhub/SeverityLabel"]
    title = "Security Hub finding: " + finding["Title"] + " " + criticality

    return json.dumps(
{
  "fields": {
    "project": {
        "key": "AWS"
    },
    "summary": title,
    "description": description,
    "issuetype": {
      "name": "Bug"
    }
  }
}
)

def publish_finding_to_issue_tracking(data):
    encoded_data = data.encode()
    req = request.Request("http://localhost:8080/rest/api/2/issue/", data=encoded_data)
    return request.urlopen(req)
Good to know: A Lambda function has internet access per default. So when using a publicly available Jira, we don’t have to change anything else here. When you have an internal Jira running in AWS, you have to attach the VPC to your function.
2nd Step: Create an Amazon EventBridge rule
Open the Amazon EventBridge service, and go to Rules on the left-hand menu within the Buses headline.
Create a new rule.
Step 1
Enter a Name. I’m using again the same name we did before PublishToIssueTracking.
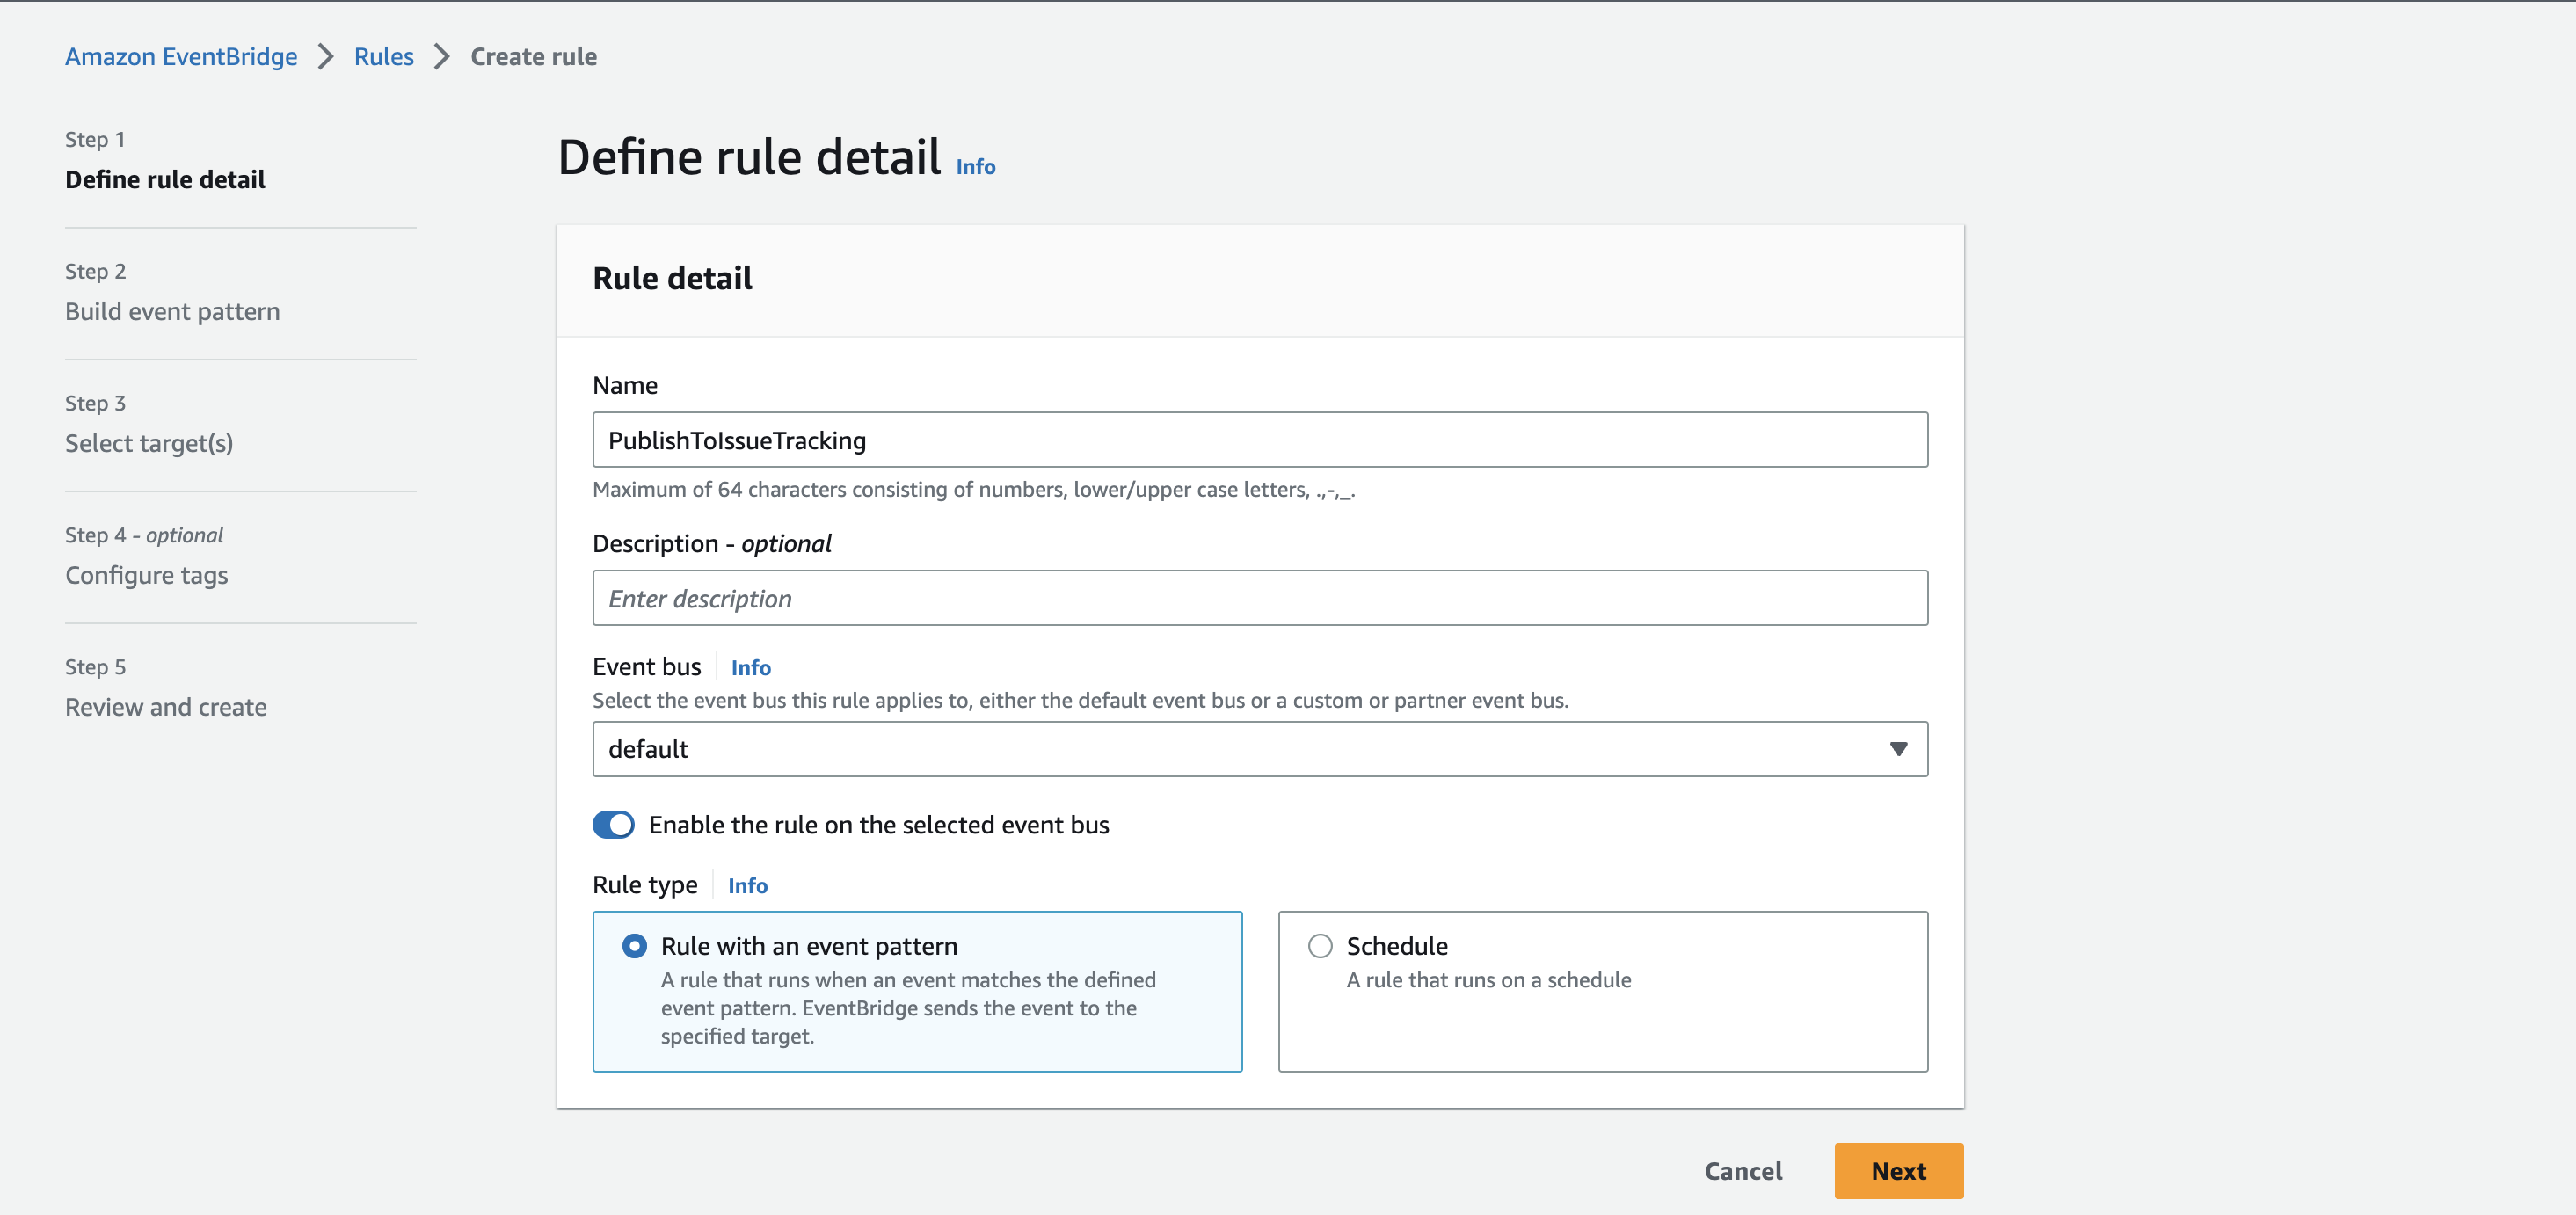
Go to the next site.
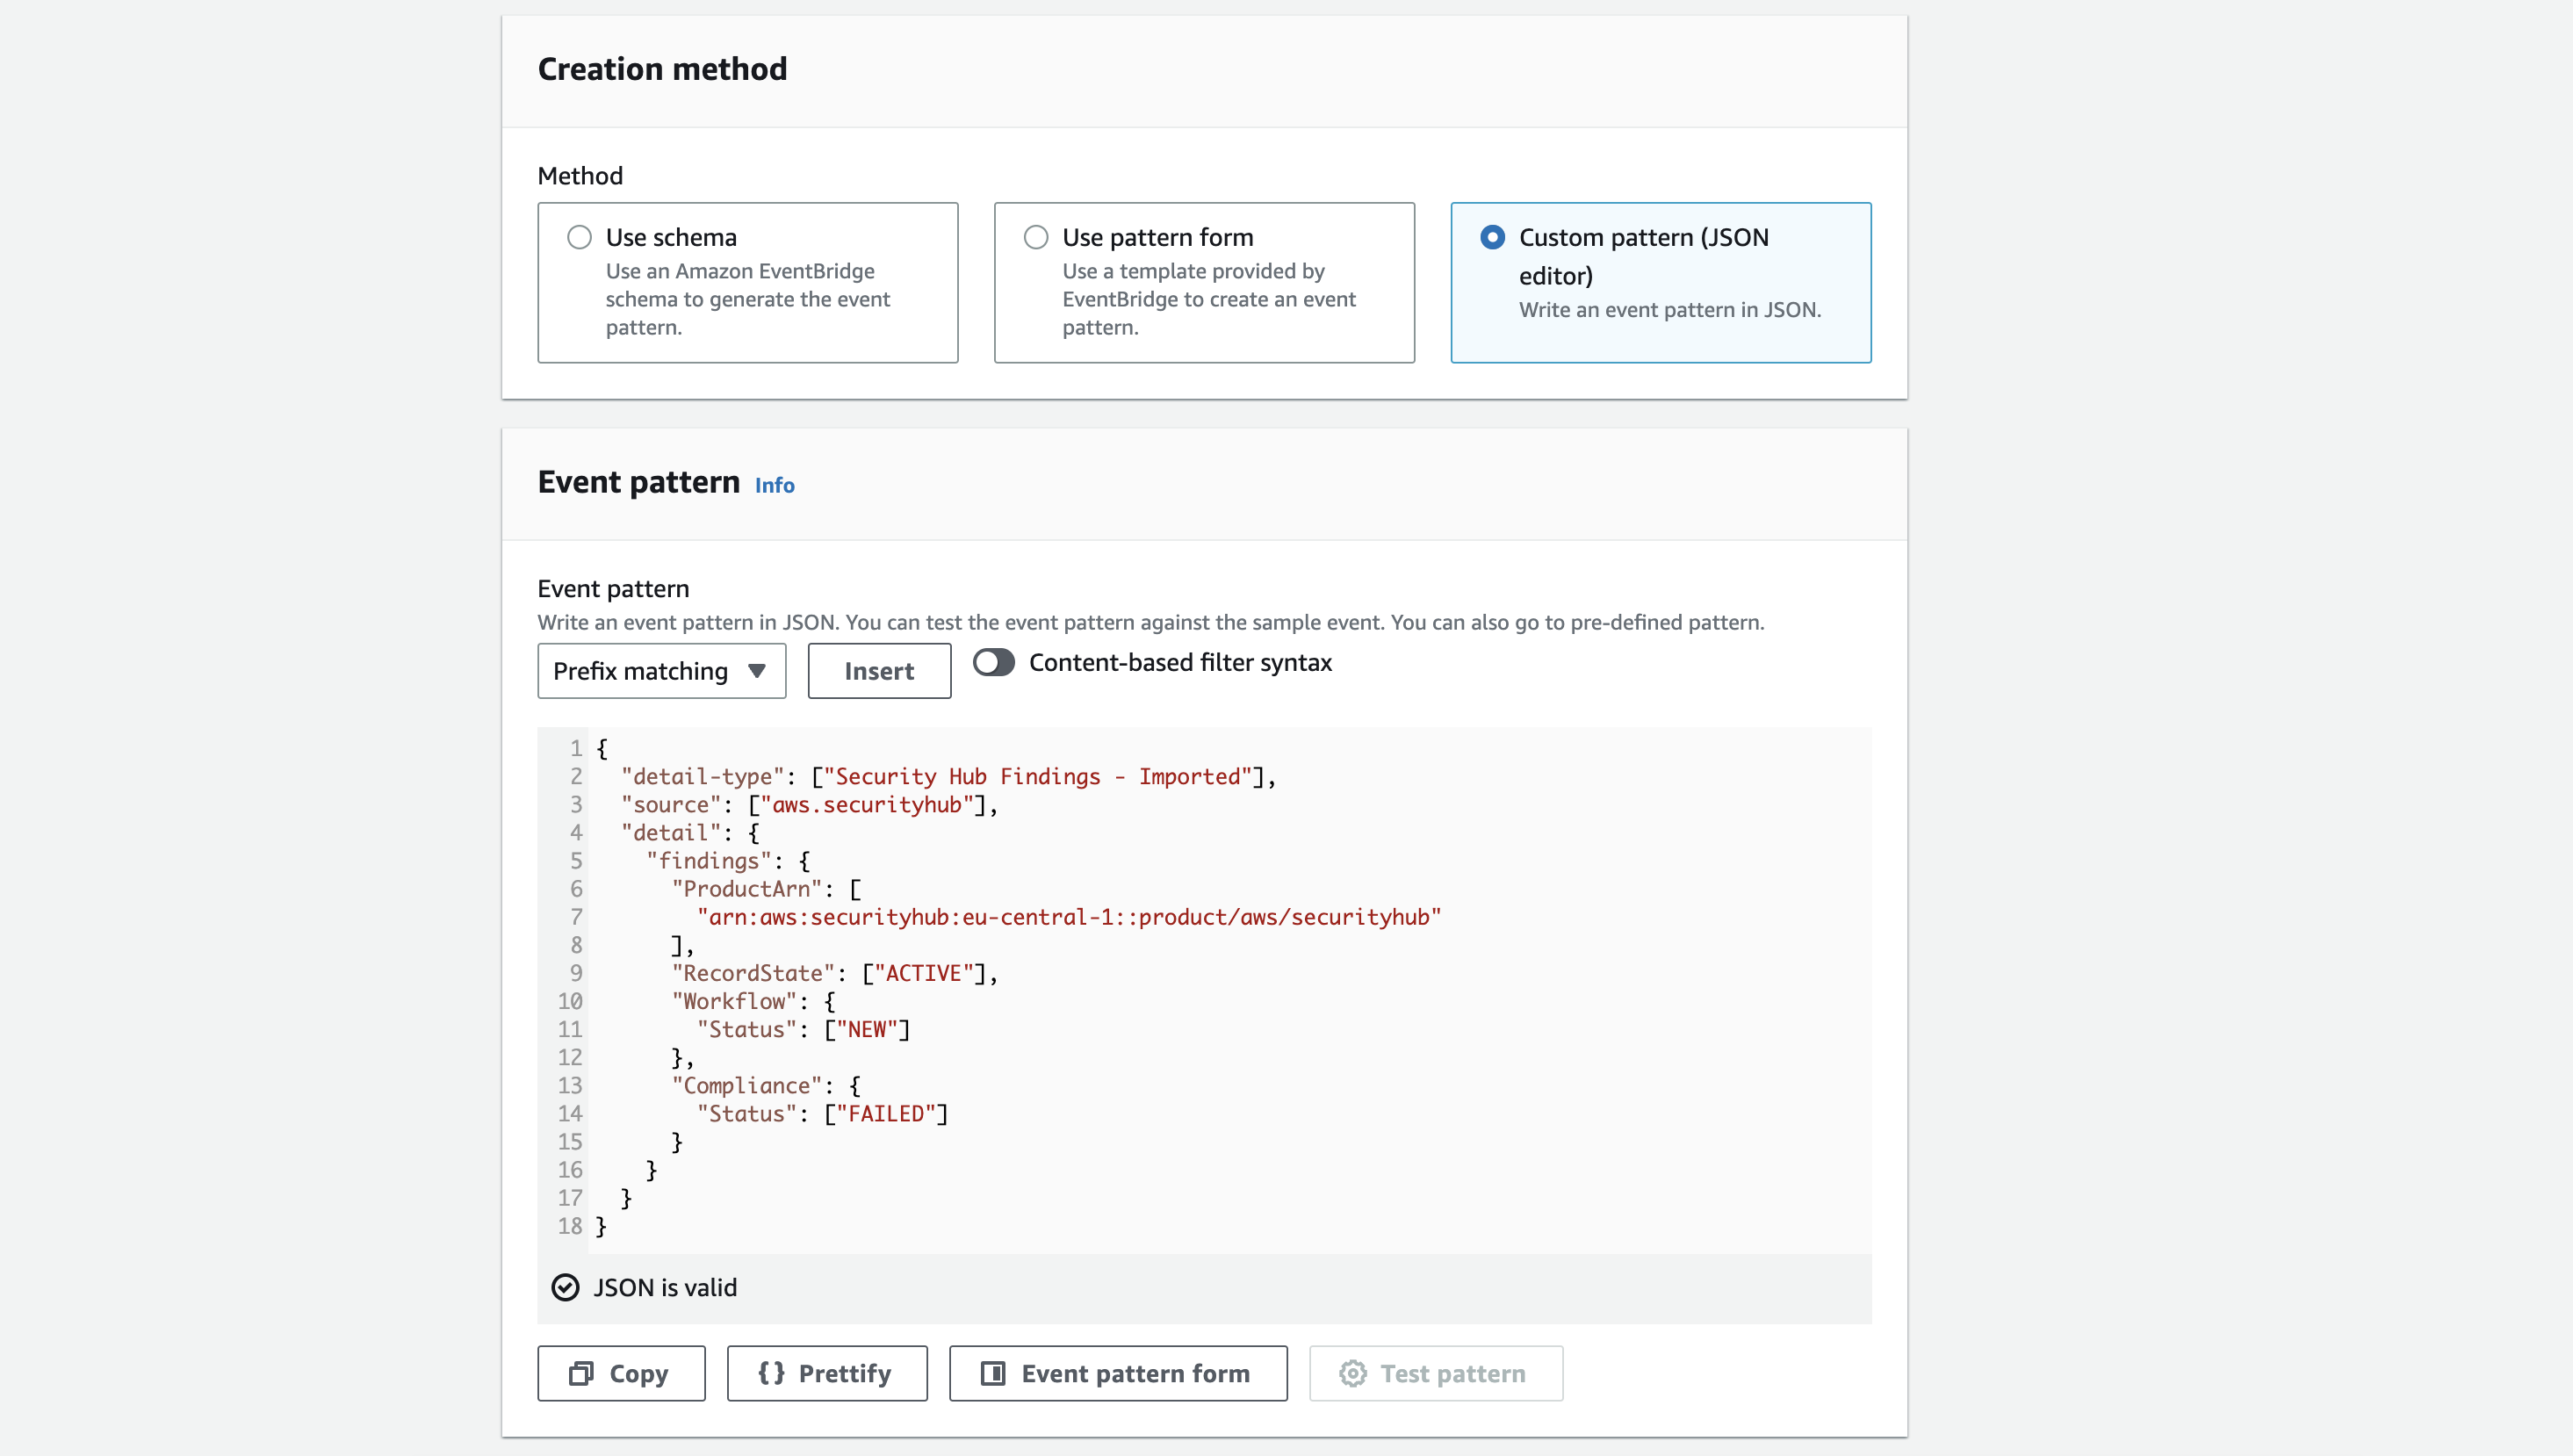
Step 2
Scroll down a bit until you get to the Creation method headline. Choose Custom pattern (JSON editor).
Copy the contents from below. With the pattern, we filter out only newly created findings that failed the compliance check. Otherwise you would also receive those who have the status passed.
{
  "detail-type": ["Security Hub Findings - Imported"],
  "source": ["aws.securityhub"],
  "detail": {
    "findings": {
      "ProductArn": [
        "arn:aws:securityhub:eu-central-1::product/aws/securityhub"
      ],
      "RecordState": ["ACTIVE"],
      "Workflow": {
        "Status": ["NEW"]
      },
      "Compliance": {
        "Status": ["FAILED"]
      }
    }
  }
}
Hint: Adjust the region to yours to match the region where Security Hub findings are aggregated.
If you have found anything in the docs or from different sources about WorkflowState, then be aware that this key is replaced in 2020 by Workflow.Status. It is still published in the API, but as far as I have seen it, it only reflects NEW as the value and does not change.
Go to the next site.
Step 3
Choose
- Target type:
AWS Service - Target:
Lambda function - Function:
PublishToIssueTracking
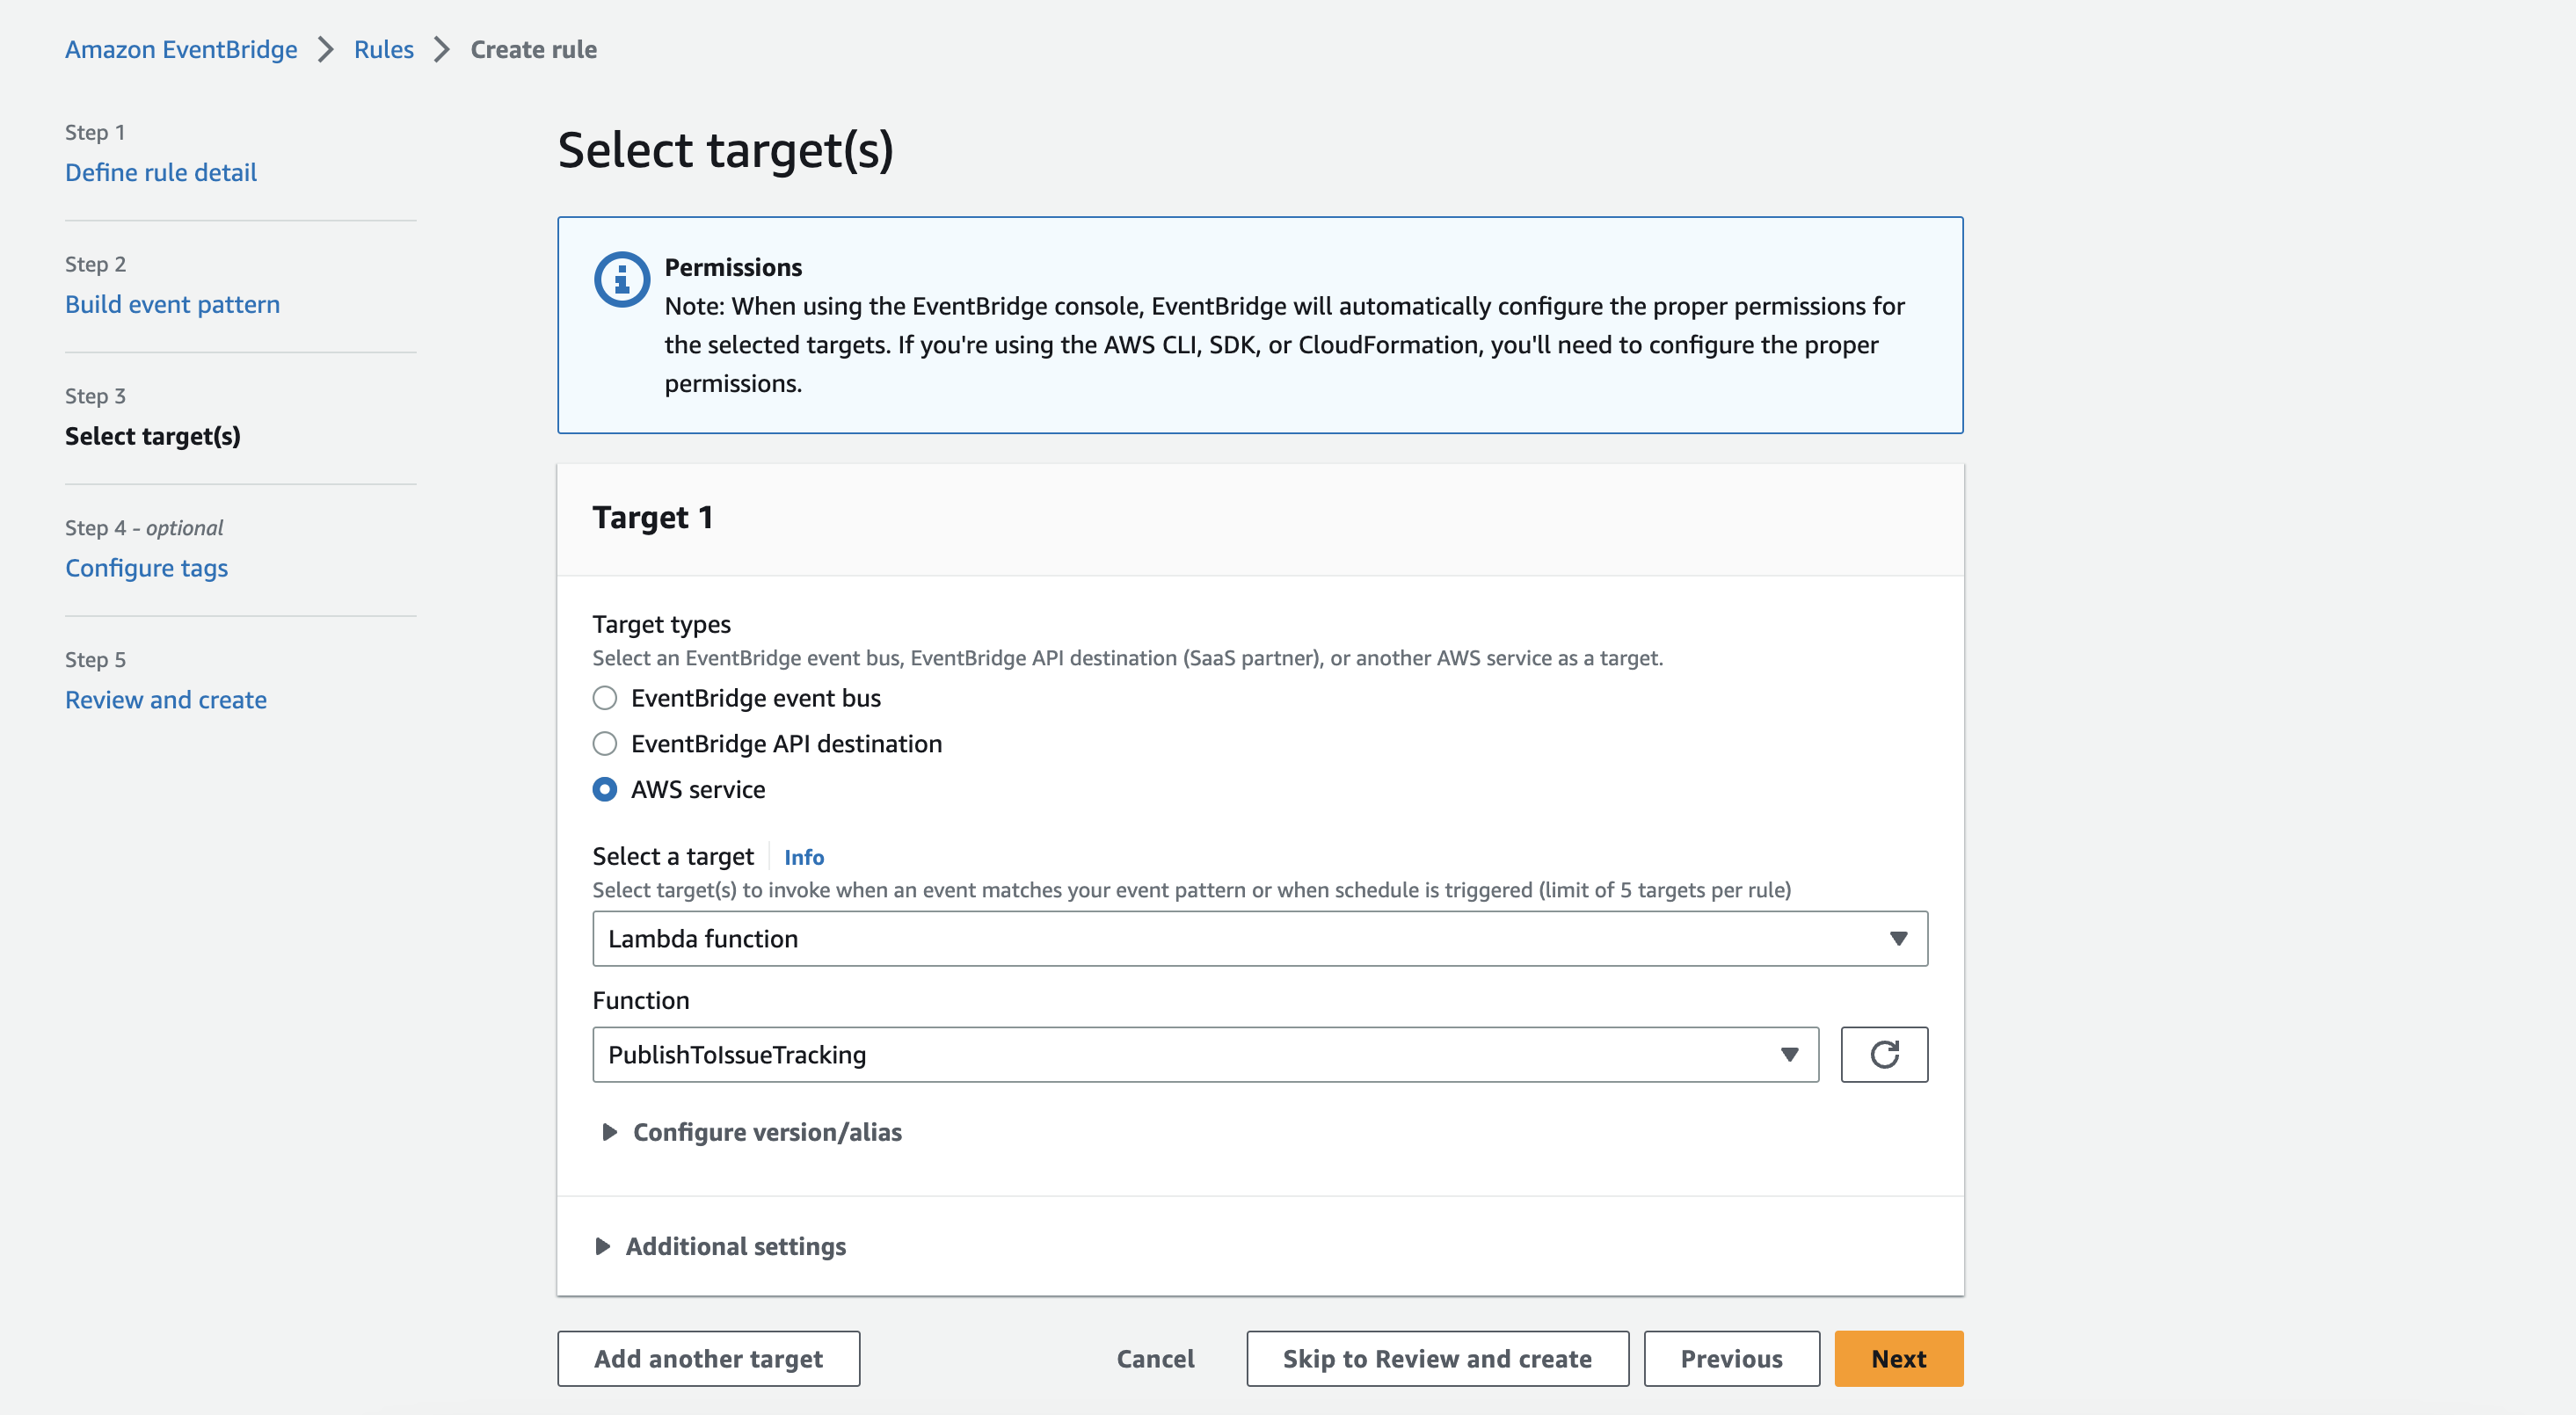
Go to the next site.
Skip Step 4, and in Step 5, click on Create rule.
To test out everything, you must wait for a failed Security Hub finding. This could be something within the first 24 hours after activation, as Security Hub relies on different integrated sources. Mostly it gave me a first result within the first 2 hours.
Things to consider
When having this small Lambda function with the EventBridge rule in place, more things should be considered.
- Add another functionality that resolves your findings
- Trigger other automation, if possible
- Integration with Systems Manager
— Patrick