Serverless Jenkins on ECS Fargate: Part 3
When setting up a Jenkins build server on a physical machine, right-sizing can become a challenging task. Long idle times followed by high, irregular loads make it hard to predict the necessary hardware requirements. One solution to this problem is the deployment of a containerized Controller/Agent-based Jenkins setup and to offload workloads to dedicated, transient agents.
This is the third post of a three-post series. In this series, I would like to show you how you can leverage AWS Fargate and Terraform to deploy a serverless as well as fault-tolerant, highly available, and scalable Jenkins Controller/Agent deployment pipeline.
Introduction
This is the third post of a three-post series.
In the first post Serverless Jenkins on ECS Part 1, we set up a Jenkins Controller with Terraform on AWS Fargate.
In the second post Serverless Jenkins on ECS Part 2, we expanded the setup by adding a Jenkins Agent.
We finish part three by customizing our Controller and Agent Docker images and setup a deployment pipeline for Terraform using Jenkins Configuration as Code. Please find the link to part one and two down below.
Please be aware that this blog post won’t go into much detail regarding Jenkins itself. We will set up a Jenkins job to deploy Terraform configuration in part three of this series, but won’t do a deep dive into topics like plugin management, task configuration, and user management. For more information, please visit the official Jenkins website.
Architecture Review
Before we start the third part of this series, I would like to revisit part one and two and take a look at what we already build. The diagram below shows the components that were already deployed in parts one and two as well as the infrastructure we will create in part three.
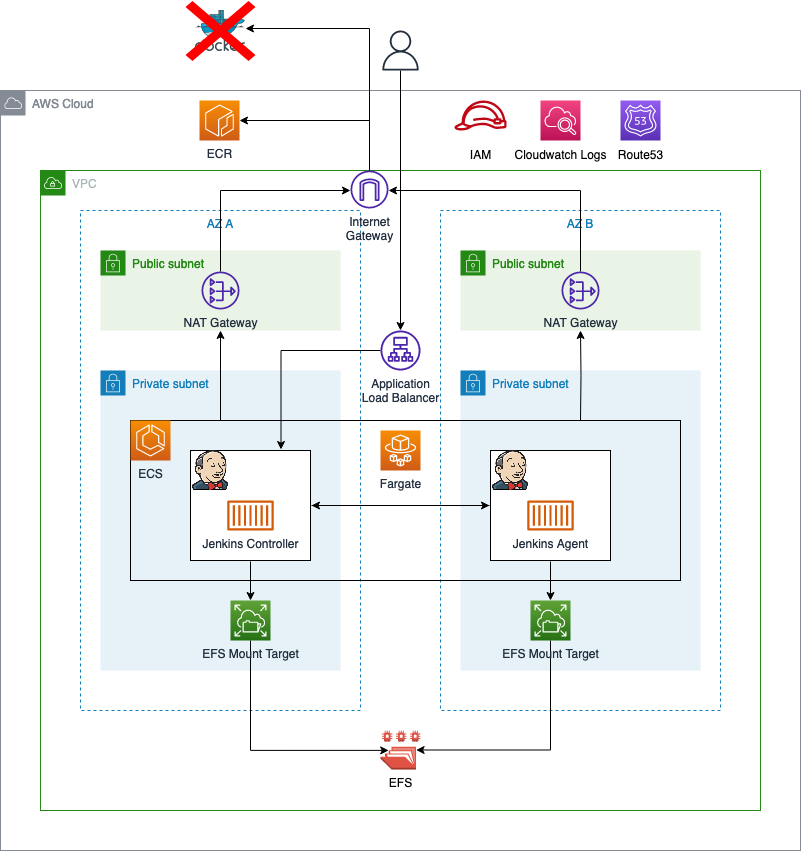
As you can see, most of the infrastructure has already been deployed. The only thing we will add in part three is the custom Docker Images for the Jenkins Controller and Agent as well as the Amazon Elastic Container Registry.
Terraform Workflow
The example from part two of the series might be fully functional but does not serve an actual purpose. The goal of this series is to create a deployment pipeline for Terraform that is able to deploy actual Terraform code. Before we start creating custom Docker images I would like to give you a short overview of the Terraform workflow our pipeline will implement. The pipeline we want to implement consists of seven steps. The workflow is shown below.
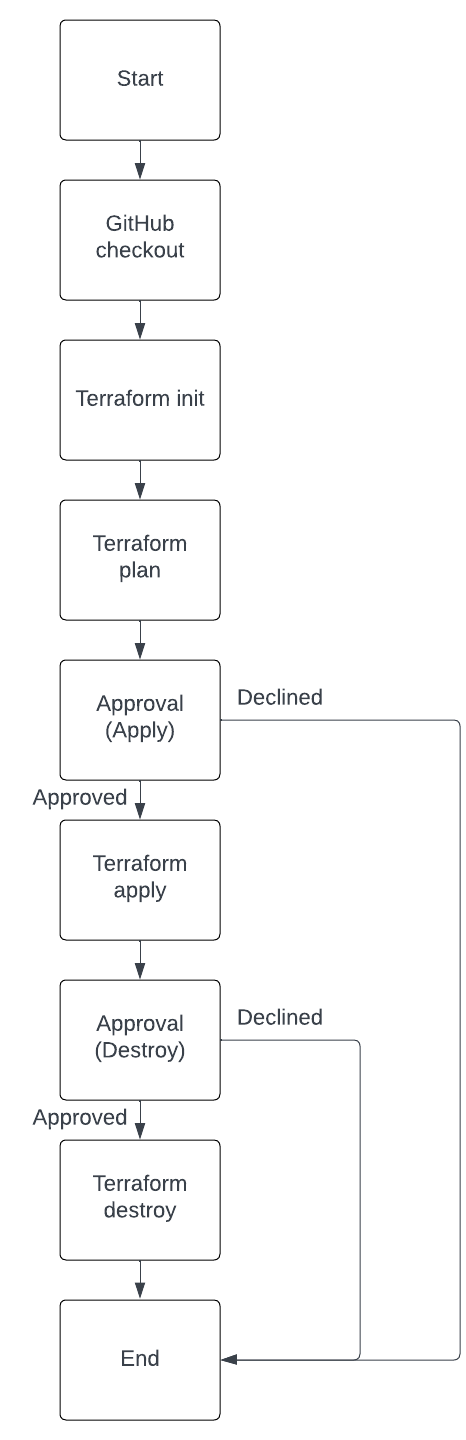
The workflow is straight forward. It starts with the checkout of the GitHub repository. Afterward, we will run terraform init to initialize Terraform and terraform plan to create a plan output. Once terraform plan has finished, we are able to review the plan output in the Jenkins Console. If the plan output is to our satisfaction, we can give our approval and continue the workflow. Only if our approval has been given will terraform apply be run. Jenkins will deploy the infrastructure via Terraform. After having deployed everything, we will be asked to give our approval again. This time we need to approve the destruction of our infrastructure. Only if our approval has been given will terraform destroy be run. terraform destroy will remove the AWS resources that were previously deployed.
Create Custom Images
Even though the setup from part two of the series is in a working state, we will make a few improvements. We will create our own custom images for the Jenkins Controller and Agent. We will also configure Jenkins using Configuration as Code. The goal is to have an automatically configured Jenkins environment that is able to deploy Terraform configurations. Let’s start by creating two custom Docker images. Add the following folders and files to the project structure from part one.
├── ecr.tf
├── docker
│   ├── jenkins-agent
│   │   └── Dockerfile
│   └── jenkins-controller
│       └── Dockerfile
│       └── jenkins.yaml
│       └── job.xml
│       └── plugins.txt
│       └── initialConfig.groovy
Besides the Dockerfiles, we need to create a few additional files for the Jenkins Controller. The jenkins.yaml contains the Jenkins Configuration as Code and will set up Jenkins as well as the Amazon EC2 Container Service Cloud node. The job.xml contains a simple pipeline job that will deploy and destroy Terraform configuration in a five-step process. The plugins.txt contains a list of plugins we will install on our Jenkins Controller. The initialConfig.groovy initializes our Jenkins environment after the Controller node has been started.
Custom Jenkins Agent Image
Once you have created the additional files, it’s time to fill them with life. We will start with the Dockerfile of the Agent. Copy the following snippet into the Dockerfile of the Agent.
FROM --platform=linux/amd64 jenkins/inbound-agent:4.11-1-alpine-jdk11

USER root

RUN \
# Update
apk update && \
# add Unzip
apk add unzip && \
# need wget
apk add wget && \
# vim
apk add vim && \
# git
apk add git

# install terraform 1.4.4
RUN wget https://releases.hashicorp.com/terraform/1.4.4/terraform_1.4.4_linux_amd64.zip
RUN unzip terraform_1.4.4_linux_amd64.zip
RUN mv terraform /usr/local/bin/
The Dockerfile above uses the Jenkins image jenkins/inbound-agent:4.11-1-alpine-jdk11 as its base. We will install a few additional tools like wget, git, and unzip before installing Terraform version 1.4.4. By installing Terraform, we will be able to run Terraform CLI commands on our Jenkins Agent.
Execute docker build -t jenkins-agent . to build the custom Jenkins Agent image. The flag -t is used to tag the image jenkins-agent.
Custom Jenkins Controller Image
While the Agent image is being built, we will continue with the Jenkins Controller. Copy the following snippet into the Dockerfile of the Controller.
FROM --platform=linux/amd64 jenkins/jenkins:2.398-jdk11

USER root

RUN \
# Update
apt-get update -y && \
# Install Unzip
apt-get install unzip -y && \
# need wget
apt-get install wget -y && \
# vim
apt-get install vim -y && \
# git
apt-get install git -y

# install terraform 1.4.4
RUN wget https://releases.hashicorp.com/terraform/1.4.4/terraform_1.4.4_linux_amd64.zip
RUN unzip terraform_1.4.4_linux_amd64.zip
RUN mv terraform /usr/local/bin/

# copy the list of plugins to install
COPY plugins.txt /usr/share/jenkins/ref/plugins.txt
RUN jenkins-plugin-cli -f /usr/share/jenkins/ref/plugins.txt

# disable the setup wizard
ENV JAVA_OPTS -Djenkins.install.runSetupWizard=false

# copy the config-as-code yaml file into the image
COPY jenkins.yaml /usr/share/jenkins/ref/jenkins.yaml

# tell the jenkins config-as-code plugin where to find the yaml file
ENV CASC_JENKINS_CONFIG /usr/share/jenkins/ref/jenkins.yaml

COPY initialConfig.groovy /usr/share/jenkins/ref/init.groovy.d/initialConfigs.groovy

# create a sample job via XML
COPY job.xml /usr/share/jenkins/ref/jobs/serverless-jenkins-on-ecs/config.xml
The Dockerfile above uses the Jenkins image jenkins/jenkins:2.398-jdk11 as its base. We will install a few additional tools like wget, git, and unzip before installing Terraform version 1.4.4. By installing Terraform, we will be able to run Terraform CLI commands on our Jenkins Controller. As we will use Jenkins Agent to deploy our Terraform configuration, installing Terraform on the Controller is not necessary. It is still useful for debugging or for running short test jobs.
Besides installing Terraform, there are a few more steps that will be executed compared to the Agent. The first step after the Terraform installation will install all plugins mentioned in the plugins.txt inside the Docker image.
# copy the list of plugins to install
COPY plugins.txt /usr/share/jenkins/ref/plugins.txt
RUN jenkins-plugin-cli -f /usr/share/jenkins/ref/plugins.txt
Once the plugins have been installed, we will disable the setup wizard in the next step and configure Jenkins using Configuration as Code and the file jenkins.yaml. In order to use Jenkins Configuration as Code we need to install the Jenkins plugin configuration-as-code.
# disable the setup wizard
ENV JAVA_OPTS -Djenkins.install.runSetupWizard=false

# copy the config-as-code yaml file into the image
COPY jenkins.yaml /usr/share/jenkins/ref/jenkins.yaml

# tell the jenkins config-as-code plugin where to find the yaml file
ENV CASC_JENKINS_CONFIG /usr/share/jenkins/ref/jenkins.yaml
We now copy the initialization script initialConfig.groovy into the appropriate folder. Any Groovy scripts that Jenkins finds in this directory will be executed on startup.
COPY initialConfig.groovy /usr/share/jenkins/ref/init.groovy.d/initialConfigs.groovy
The last step consists of creating a Jenkins job called serverless-jenkins-on-ecs via an XML file.
# create a sample job via XML
COPY job.xml /usr/share/jenkins/ref/jobs/serverless-jenkins-on-ecs/config.xml
Before we can build our Jenkins Controller image, we have to adjust the files plugins.txt, jenkins.yaml, initialConfig.groovy and job.xml.
Plugins
Copy the list below into the plugins.txt. The list contains all the plugins we will need to run our Jenkins Terraform deployment pipeline. If you wish to test out additional Jenkins plugins, feel free to add them to the list.
build-timeout:1.28
ws-cleanup:0.44
workflow-aggregator:596.v8c21c963d92d
git:5.0.0
github:1.37.0
amazon-ecs:1.48
terraform:1.0.10
configuration-as-code:1625.v27444588cc3d
initialConfig.groovy
The initialConfig.groovy is straight forward. The sole purpose of the script is to tell Jenkins what its external-facing URL is.
import jenkins.model.*

url = System.env.JENKINS_URL
urlConfig = JenkinsLocationConfiguration.get()
urlConfig.setUrl(url)
urlConfig.save()
jenkins.yaml
The jenkins.yaml is used to configure our Jenkins Controller via Configuration as Code. Please copy the snippet below into the jenkins.yaml. The configuration will set up a Jenkins user as well as an ECS cloud node. You might remember how we set up the ECS cloud node in part two of this series manually and recognize most of the fields.
By using Configuration as Code we are able to set up our Agent automatically. You might also have noticed how a majority of the field values are set via environment variables. We will provide these environment variables at runtime via our ECS Task Definition. This allows us to reuse our Jenkins Controller image and configure our Agent dynamically.
jenkins:
  remotingSecurity:
    enabled: true
  securityRealm:
    local:
      allowsSignup: false
      users:
        - id: ${USER_NAME}
          password: ${USER_PASSWORD}
  slaveAgentPort: 50000
  agentProtocols:
    - JNLP4-connect
  authorizationStrategy:
    loggedInUsersCanDoAnything:
      allowAnonymousRead: false
  clouds:
    - ecs:
        credentialsId: ""
        cluster: ${ECS_CLUSTER_ARN}
        name: ${ECS_CLUSTER_NAME}
        regionName: ${ECS_REGION}
        jenkinsUrl: ${JENKINS_URL}
        tunnel: ${JENKINS_CONTROLLER_AGENT_TUNNEL}
        templates:
          - assignPublicIp: false
            cpu: 1024
            executionRole: ${ECS_EXECUTION_ROLE_ARN}
            taskrole: ${ECS_AGENT_TASK_ROLE_ARN}
            image: ${JENKINS_AGENT_IMAGE}
            label: "agent"
            templateName: "agent"
            launchType: "FARGATE"
            logDriver: "awslogs"
            logDriverOptions:
              - name: awslogs-group
                value: ${JENKINS_AGENT_CLOUDWATCH_LOG_GROUP_NAME}
              - name: awslogs-region
                value: ${JENKINS_AGENT_CLOUDWATCH_LOG_GROUP_REGION}
              - name: awslogs-stream-prefix
                value: jenkins-agent
            memoryReservation: 2048
            networkMode: "awsvpc"
            operatingSystemFamily: "LINUX"
            platformVersion: "LATEST"
            privileged: false
            remoteFSRoot: "/home/jenkins"
            securityGroups: ${JENKINS_AGENT_SECURITY_GROUP}
            subnets: ${JENKINS_AGENT_SUBNET_IDS}
job.xml
The job.xml is used to automatically create our first Jenkins job. A sample job.xml can be taken from my GitHub repository.
The job.xml contains the the Pipeline Configuration of the job. The workflow follows the seven steps described in the first chapter of this post Terraform Workflow. You might have noticed that the GitHub repository is set to my personal project repository https://github.com/Eraszz/tecracer-blog-projects.git. The Terraform configuration we will deploy as part of this example is an earlier blog post of mine called Serverless Swagger UI: Generate interactive documentation for your AWS API Gateway. As my repository is publicly available, the GitHub integration in Jenkins is easy to set up. Feel free to use your own Terraform code if you wish.
Build Docker Image
Execute docker build -t jenkins-controller . to build the custom Jenkins Controller image. The flag -t is used to tag the image jenkins-controller.
Upload Images to ECR
To make sure that ECS has access to our newly created Docker images, we have to upload them to a container repository. Feel free to use your personal Docker Hub. For this example, we will use the AWS native container registry ECR to store our Docker images. We will create ECR with Terraform. Please copy the following snippet into the ecr.tf
################################################################################
# ECR
################################################################################

resource "aws_ecr_repository" "this" {
  name                 = var.application_name
  image_tag_mutability = "IMMUTABLE"

  image_scanning_configuration {
    scan_on_push = true
  }
}
Run terraform init and terraform apply to deploy the infrastructure. Once the ECR has been deployed, we will push our custom images. In order to push images to ECR, we have to follow a few specific steps. The detailed documentation can be found here. Follow the documentation to push your two Docker images to your ECR.
Adjust ECS configuration
Now that we have created and uploaded our custom Docker images, we have to adjust our ECS Terraform configuration. The only thing we have to change is our ECS Task and Container Definition. Replace the content of your container_definition.tftpl with the snippet below.
[
    {
      "name": "${container_name}",
      "image": "${container_image}",
      "portMappings": [
          {
            "containerPort": ${jenkins_controller_port}
          },
          {
            "containerPort": ${jenkins_agent_port}
          }
      ],
      "mountPoints": [
        {
          "sourceVolume": "${source_volume}",
          "containerPath": "/var/jenkins_home"
        }
      ],
      "LogConfiguration":
        {
          "LogDriver": "awslogs",
          "Options":
            {
                "awslogs-group": "${awslogs_group}",
                "awslogs-region": "${awslogs_region}",
                "awslogs-stream-prefix": "jenkins-controller"
            }

        },
        "environment": [
          {
            "name": "USER_NAME",
            "value": "${user_name}"
          },
          {
            "name": "USER_PASSWORD",
            "value": "${user_password}"
          },
          {
            "name": "ECS_CLUSTER_ARN",
            "value": "${ecs_cluster_arn}"
          },
          {
            "name": "ECS_CLUSTER_NAME",
            "value": "${ecs_cluster_name}"
          },
          {
            "name": "ECS_REGION",
            "value": "${ecs_region}"
          },
          {
            "name": "JENKINS_URL",
            "value": "${jenkins_url}"
          },
          {
            "name": "JENKINS_CONTROLLER_AGENT_TUNNEL",
            "value": "${jenkins_controller_agent_tunnel}"
          },
          {
            "name": "ECS_EXECUTION_ROLE_ARN",
            "value": "${ecs_execution_role_arn}"
          },
          {
            "name": "ECS_AGENT_TASK_ROLE_ARN",
            "value": "${ecs_agent_task_role_arn}"
          },
          {
            "name": "JENKINS_AGENT_IMAGE",
            "value": "${jenkins_agent_image}"
          },
          {
            "name": "JENKINS_AGENT_CLOUDWATCH_LOG_GROUP_NAME",
            "value": "${awslogs_group}"
          },
          {
            "name": "JENKINS_AGENT_CLOUDWATCH_LOG_GROUP_REGION",
            "value": "${awslogs_region}"
          },
          {
            "name": "JENKINS_AGENT_SECURITY_GROUP",
            "value": "${jenkins_agent_security_group}"
          },
          {
            "name": "JENKINS_AGENT_SUBNET_IDS",
            "value": "${jenkins_agent_subnet_ids}"
          }
      ]
    }
  ]
We added the environment variables that will be used to dynamically configure our Jenkins Controller and Agent to our container definition template. Next, we have to provide the values to our template via the Terraform configuration. Replace the current templatefile values of the Terraform resource aws_ecs_task_definition with the following values.
container_name      = var.jenkins_controller_identifier,
container_image     = "${data.aws_caller_identity.this.account_id}.dkr.ecr.eu-central-1.amazonaws.com/${var.application_name}:jenkins-controller",
jenkins_controller_port = var.jenkins_controller_port
jenkins_agent_port  = var.jenkins_agent_port
source_volume       = "home",
awslogs_group       = aws_cloudwatch_log_group.this.name,
awslogs_region      = data.aws_region.current.name,

user_name                    = "admin",
user_password                = "admin",
ecs_cluster_arn              = aws_ecs_cluster.this.arn,
ecs_cluster_name             = aws_ecs_cluster.this.name,
ecs_region                   = data.aws_region.current.name,
jenkins_url                  = "http://${aws_lb.this.dns_name}",
jenkins_controller_agent_tunnel  = "${var.jenkins_controller_identifier}.${var.application_name}:${var.jenkins_agent_port}",
ecs_execution_role_arn       = aws_iam_role.execution.arn,
ecs_agent_task_role_arn      = aws_iam_role.agent.arn,
jenkins_agent_image          = "${data.aws_caller_identity.this.account_id}.dkr.ecr.eu-central-1.amazonaws.com/${var.application_name}:jenkins-agent",
jenkins_agent_security_group = aws_security_group.ecs_jenkins_agent.id,
jenkins_agent_subnet_ids     = join(",", local.private_subnet_ids),
As this is only an example, Jenkins admin username and password are hardcoded in the ECS Task Definition. This is NOT best practice. A better approach when working in production environments would be to use AWS Secrets and retrieve the values via Terraform data resources. If you wish to read more on how to deal with secrets in Terraform, feel free to read the following blog entry.
Your Terraform resource aws_ecs_task_definition should look like this:
################################################################################
# ECS task
################################################################################

resource "aws_ecs_task_definition" "this" {
  family = var.application_name
  container_definitions = templatefile("${path.module}/container_definition.tftpl", {
    container_name      = var.jenkins_controller_identifier,
    container_image     = "${data.aws_caller_identity.this.account_id}.dkr.ecr.eu-central-1.amazonaws.com/${var.application_name}:jenkins-controller",
    jenkins_controller_port = var.jenkins_controller_port
    jenkins_agent_port  = var.jenkins_agent_port
    source_volume       = "home",
    awslogs_group       = aws_cloudwatch_log_group.this.name,
    awslogs_region      = data.aws_region.current.name,

    user_name                    = "admin",
    user_password                = "admin",
    ecs_cluster_arn              = aws_ecs_cluster.this.arn,
    ecs_cluster_name             = aws_ecs_cluster.this.name,
    ecs_region                   = data.aws_region.current.name,
    jenkins_url                  = "http://${aws_lb.this.dns_name}",
    jenkins_controller_agent_tunnel  = "${var.jenkins_controller_identifier}.${var.application_name}:${var.jenkins_agent_port}",
    ecs_execution_role_arn       = aws_iam_role.execution.arn,
    ecs_agent_task_role_arn      = aws_iam_role.agent.arn,
    jenkins_agent_image          = "${data.aws_caller_identity.this.account_id}.dkr.ecr.eu-central-1.amazonaws.com/${var.application_name}:jenkins-agent",
    jenkins_agent_security_group = aws_security_group.ecs_jenkins_agent.id,
    jenkins_agent_subnet_ids     = join(",", local.private_subnet_ids),
    }
  )


  network_mode = "awsvpc"
  cpu          = 1024
  memory       = 2048

  execution_role_arn = aws_iam_role.execution.arn
  task_role_arn      = aws_iam_role.task.arn

  requires_compatibilities = ["FARGATE"]


  volume {
    name = "home"

    efs_volume_configuration {
      file_system_id     = aws_efs_file_system.this.id
      transit_encryption = "ENABLED"

      authorization_config {
        access_point_id = aws_efs_access_point.this.id
        iam             = "ENABLED"
      }
    }
  }
}
To make sure that our Terraform configuration works as expected, we will deploy the new infrastructure and replace the current ECS Cluster as well as the EFS. Run terraform apply -replace=aws_ecs_cluster.this -replace=aws_efs_file_system.this. Once the changes have been deployed and the resources have been replaced, you should see the new ECS cluster in the AWS Console.
Run Terraform Pipeline
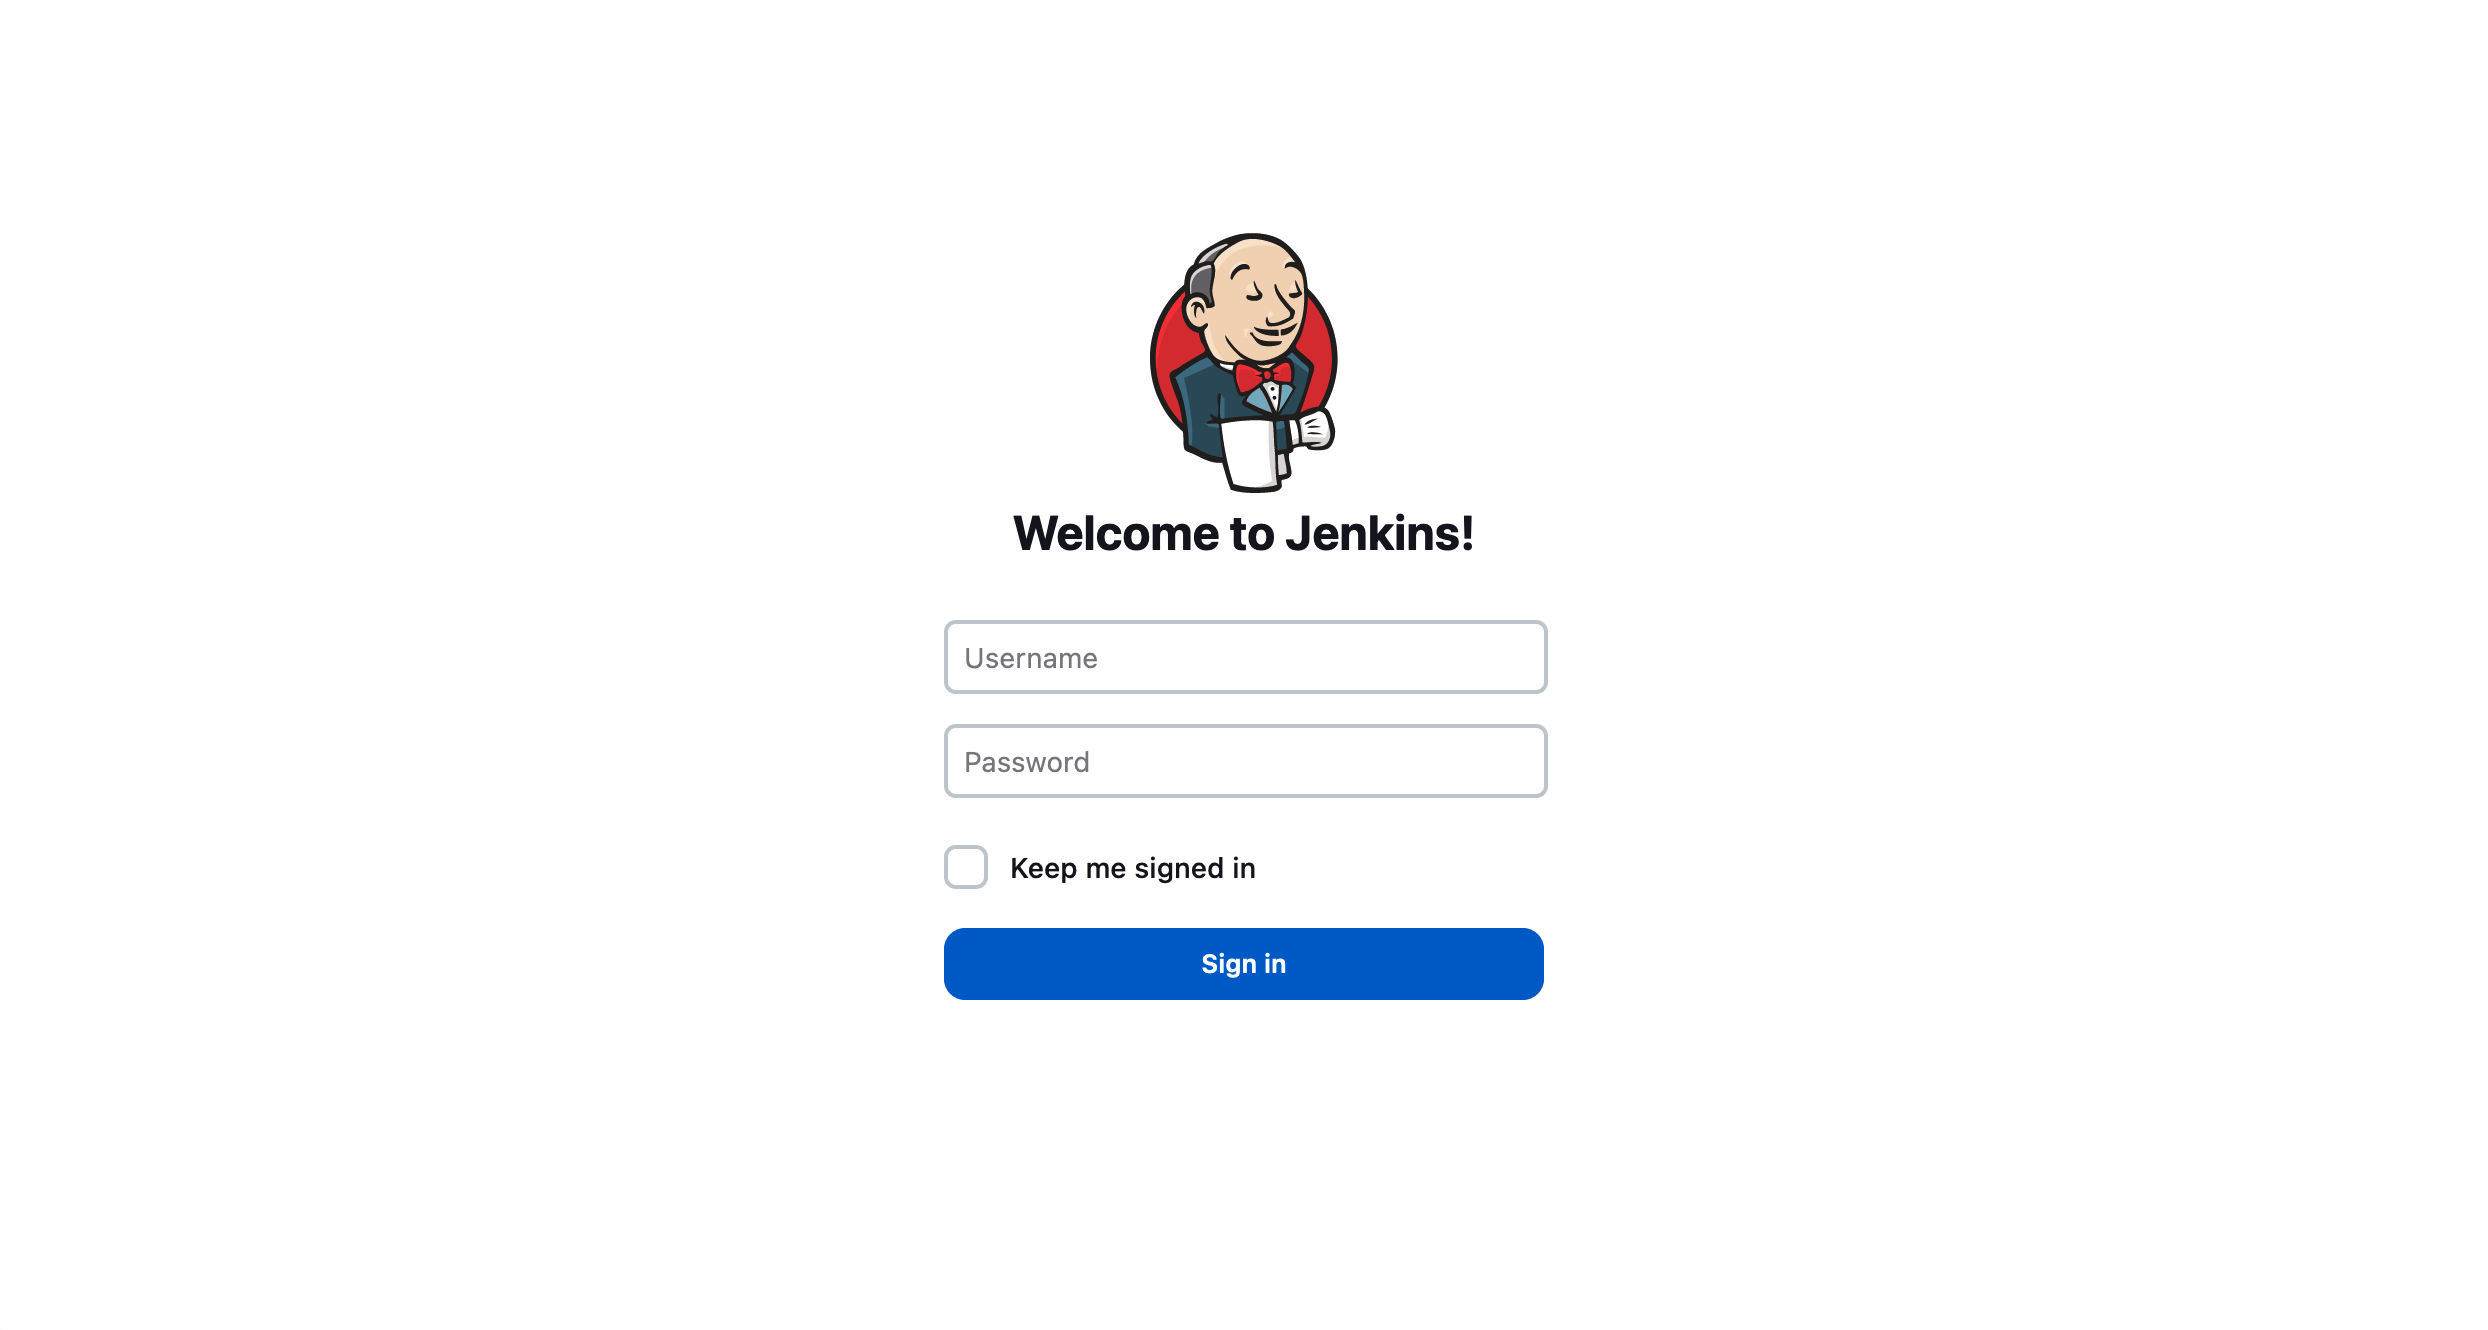
Open the Jenkins URL to access the Jenkins Controller. Instead of the setup screen, you will be greeted by the login screen. Login using the admin username and password defined in the ECS container definition.
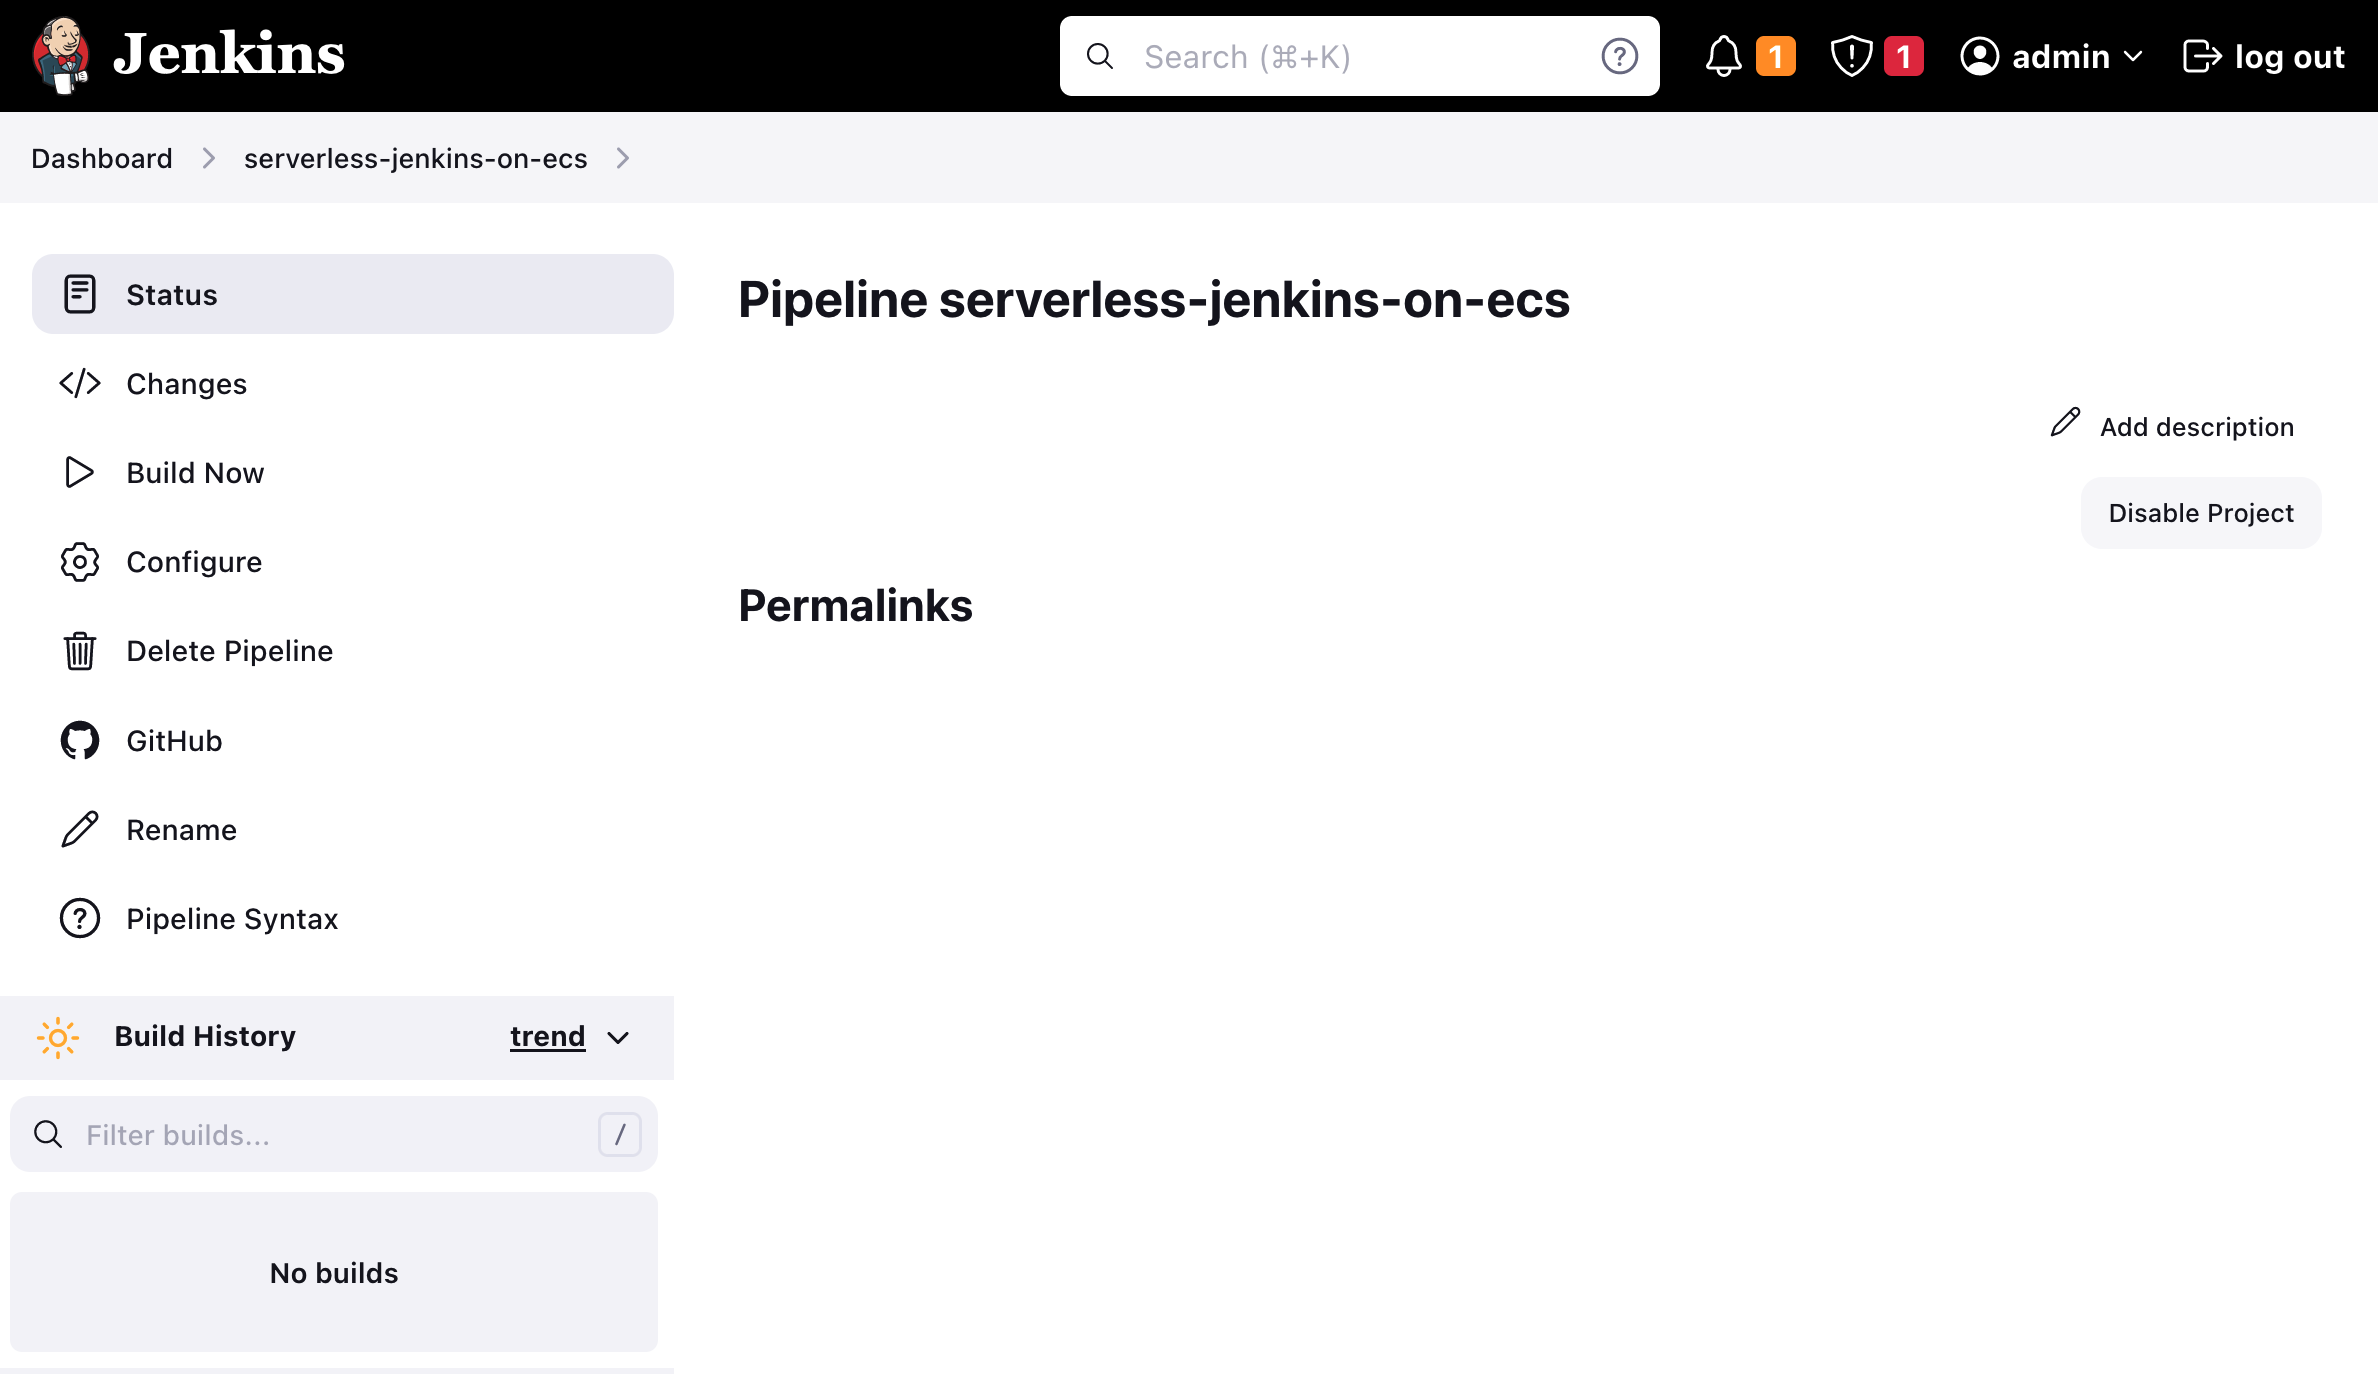
Once you have logged in using the Jenkins admin, you will be redirected to the Jenkins Dashboard. You should find the Jenkins task serverless-jenkins-on-ecs already predefined and preconfigured.
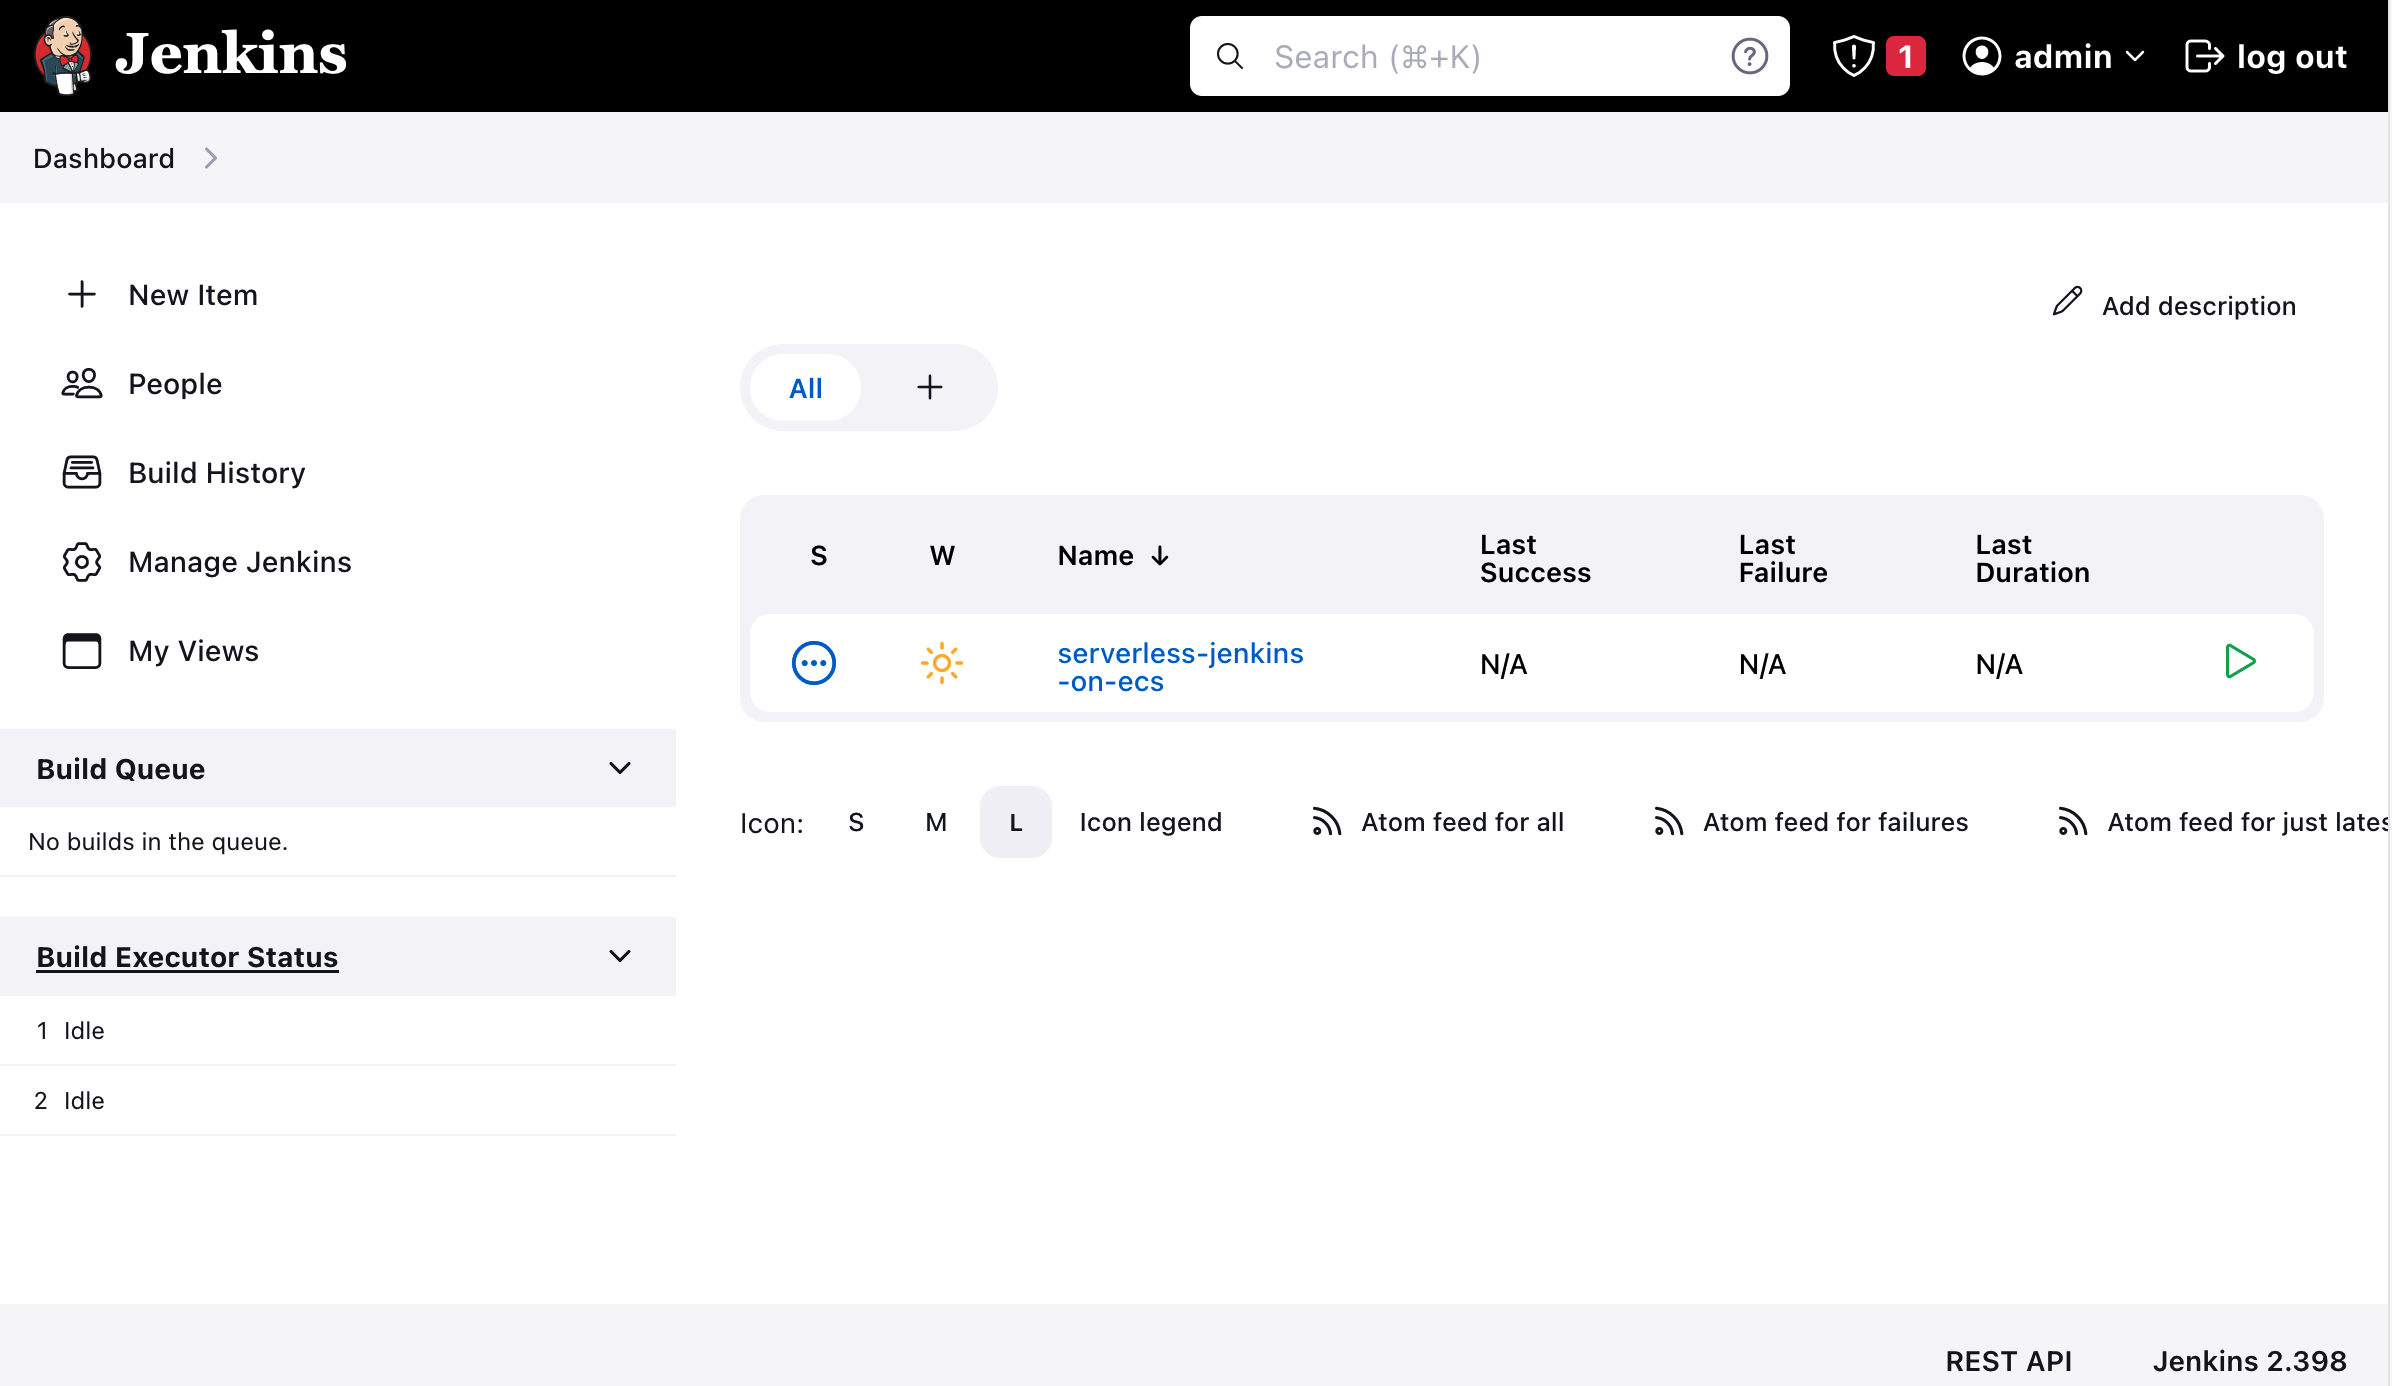
Open up the task and click on Build Now to build the project.
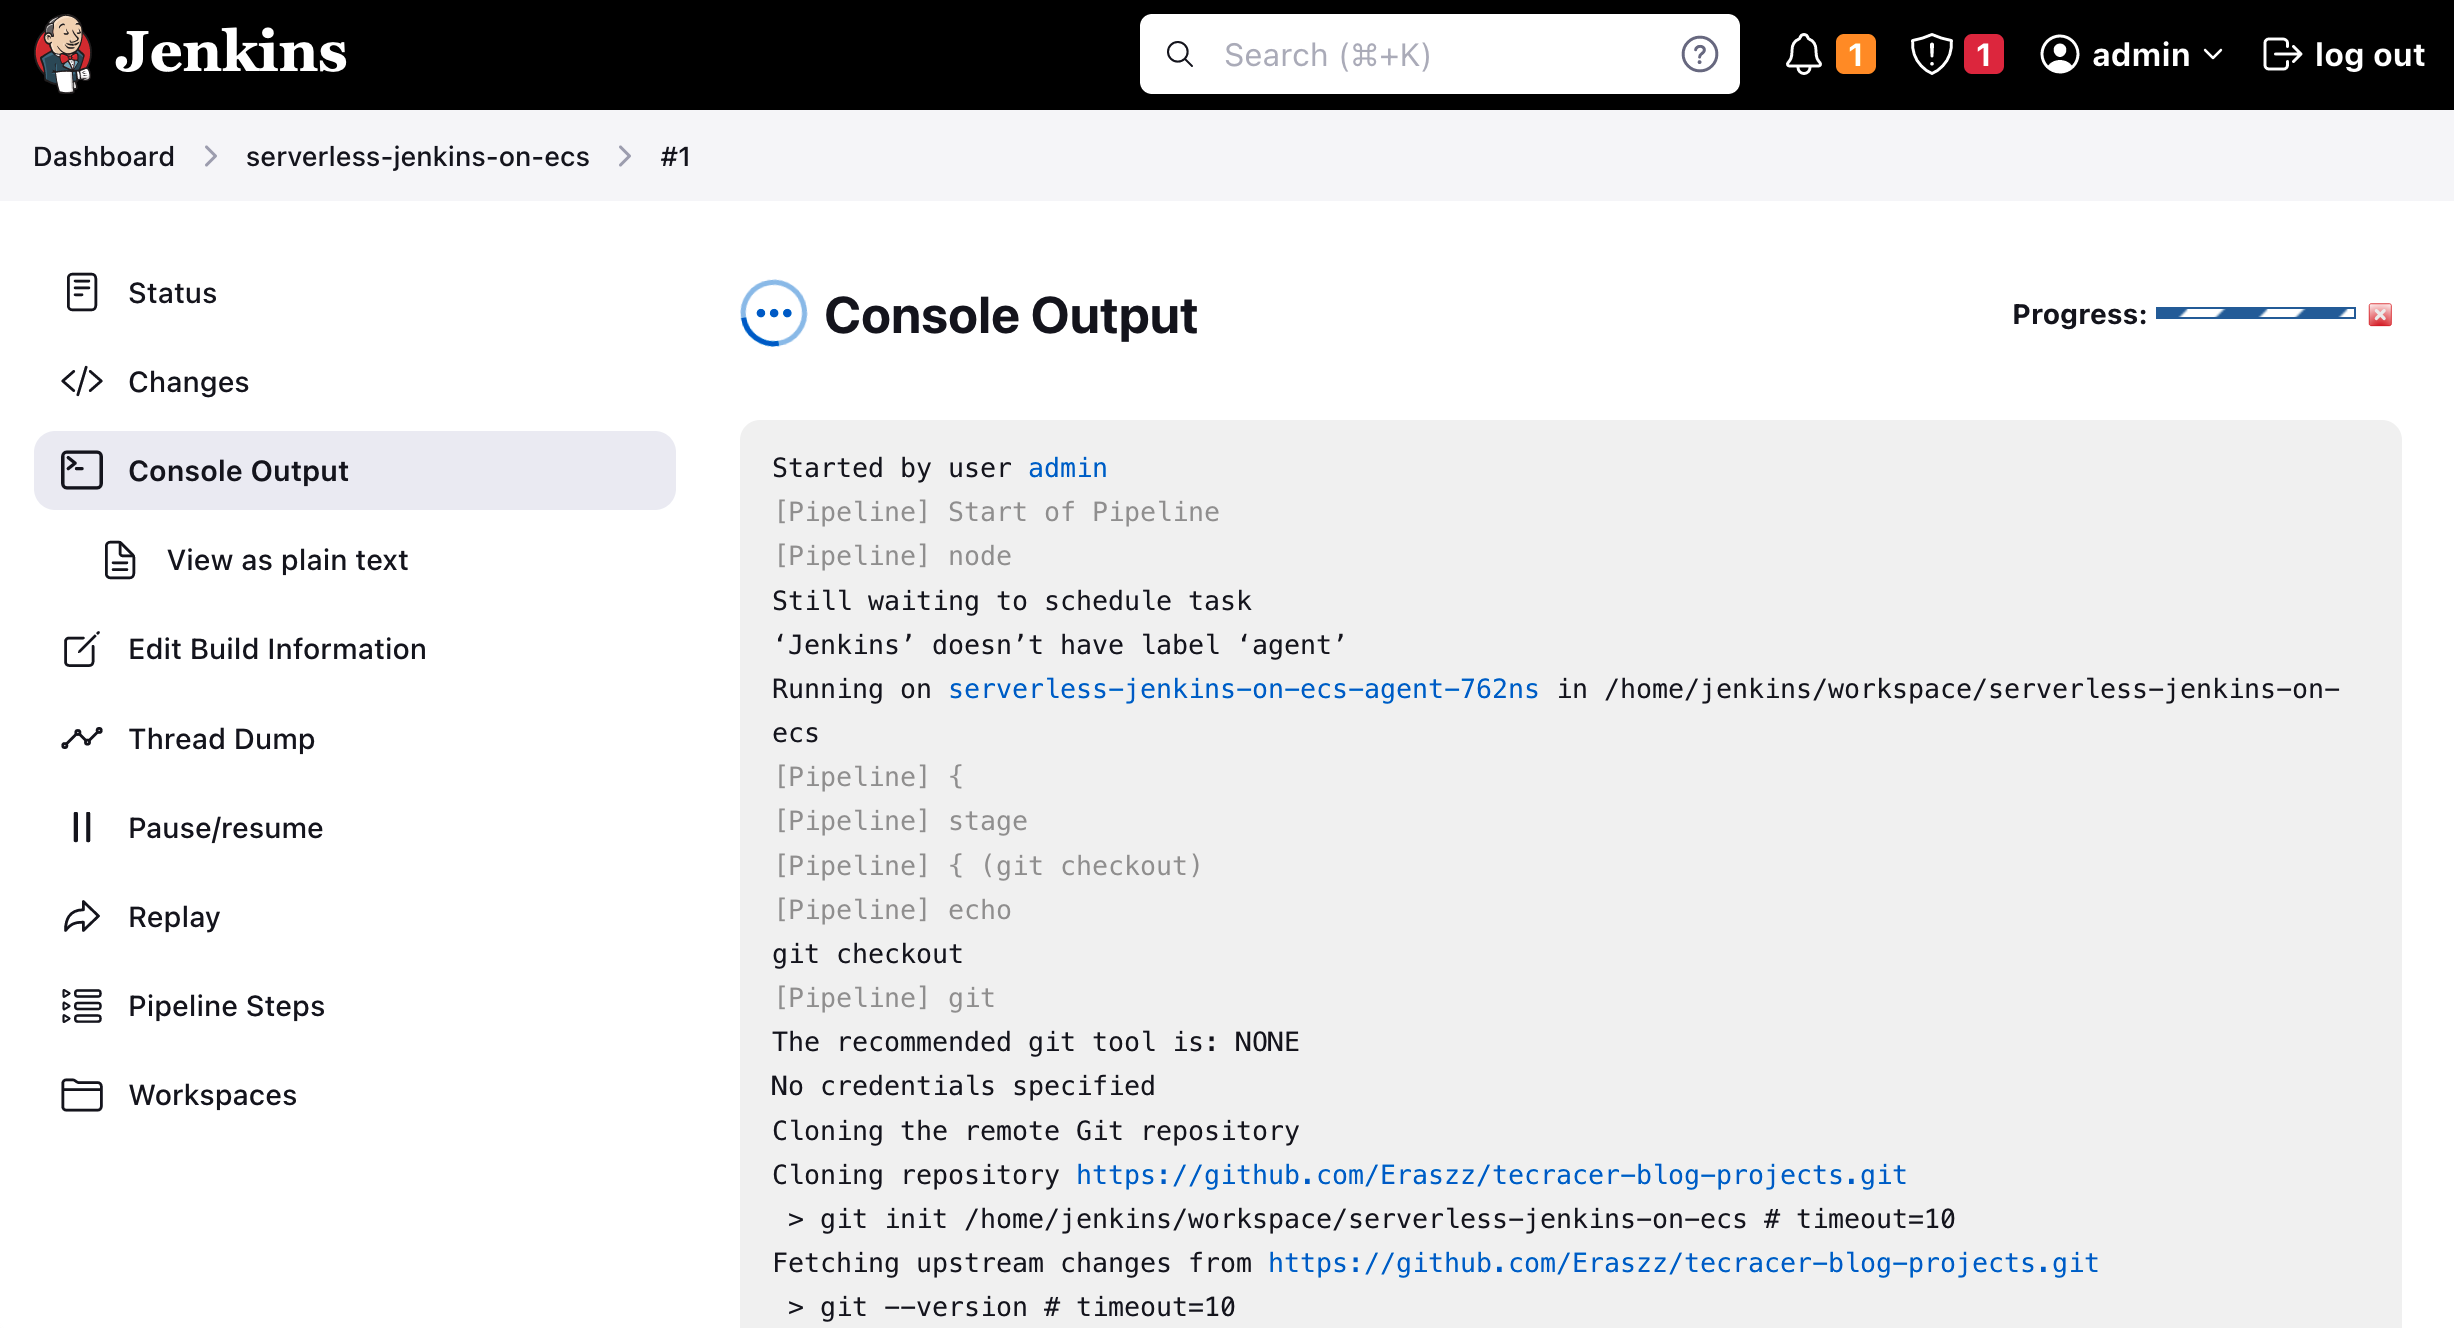
To follow the build steps, select the Console Output. Jenkins will launch a new agent before executing the pipeline steps we defined in the job.xml. Once the agent has been started, the pipeline will start by checking out the GitHub Project. After having checkout our Terraform code, Jenkins will perform a terraform init and a terraform plan.
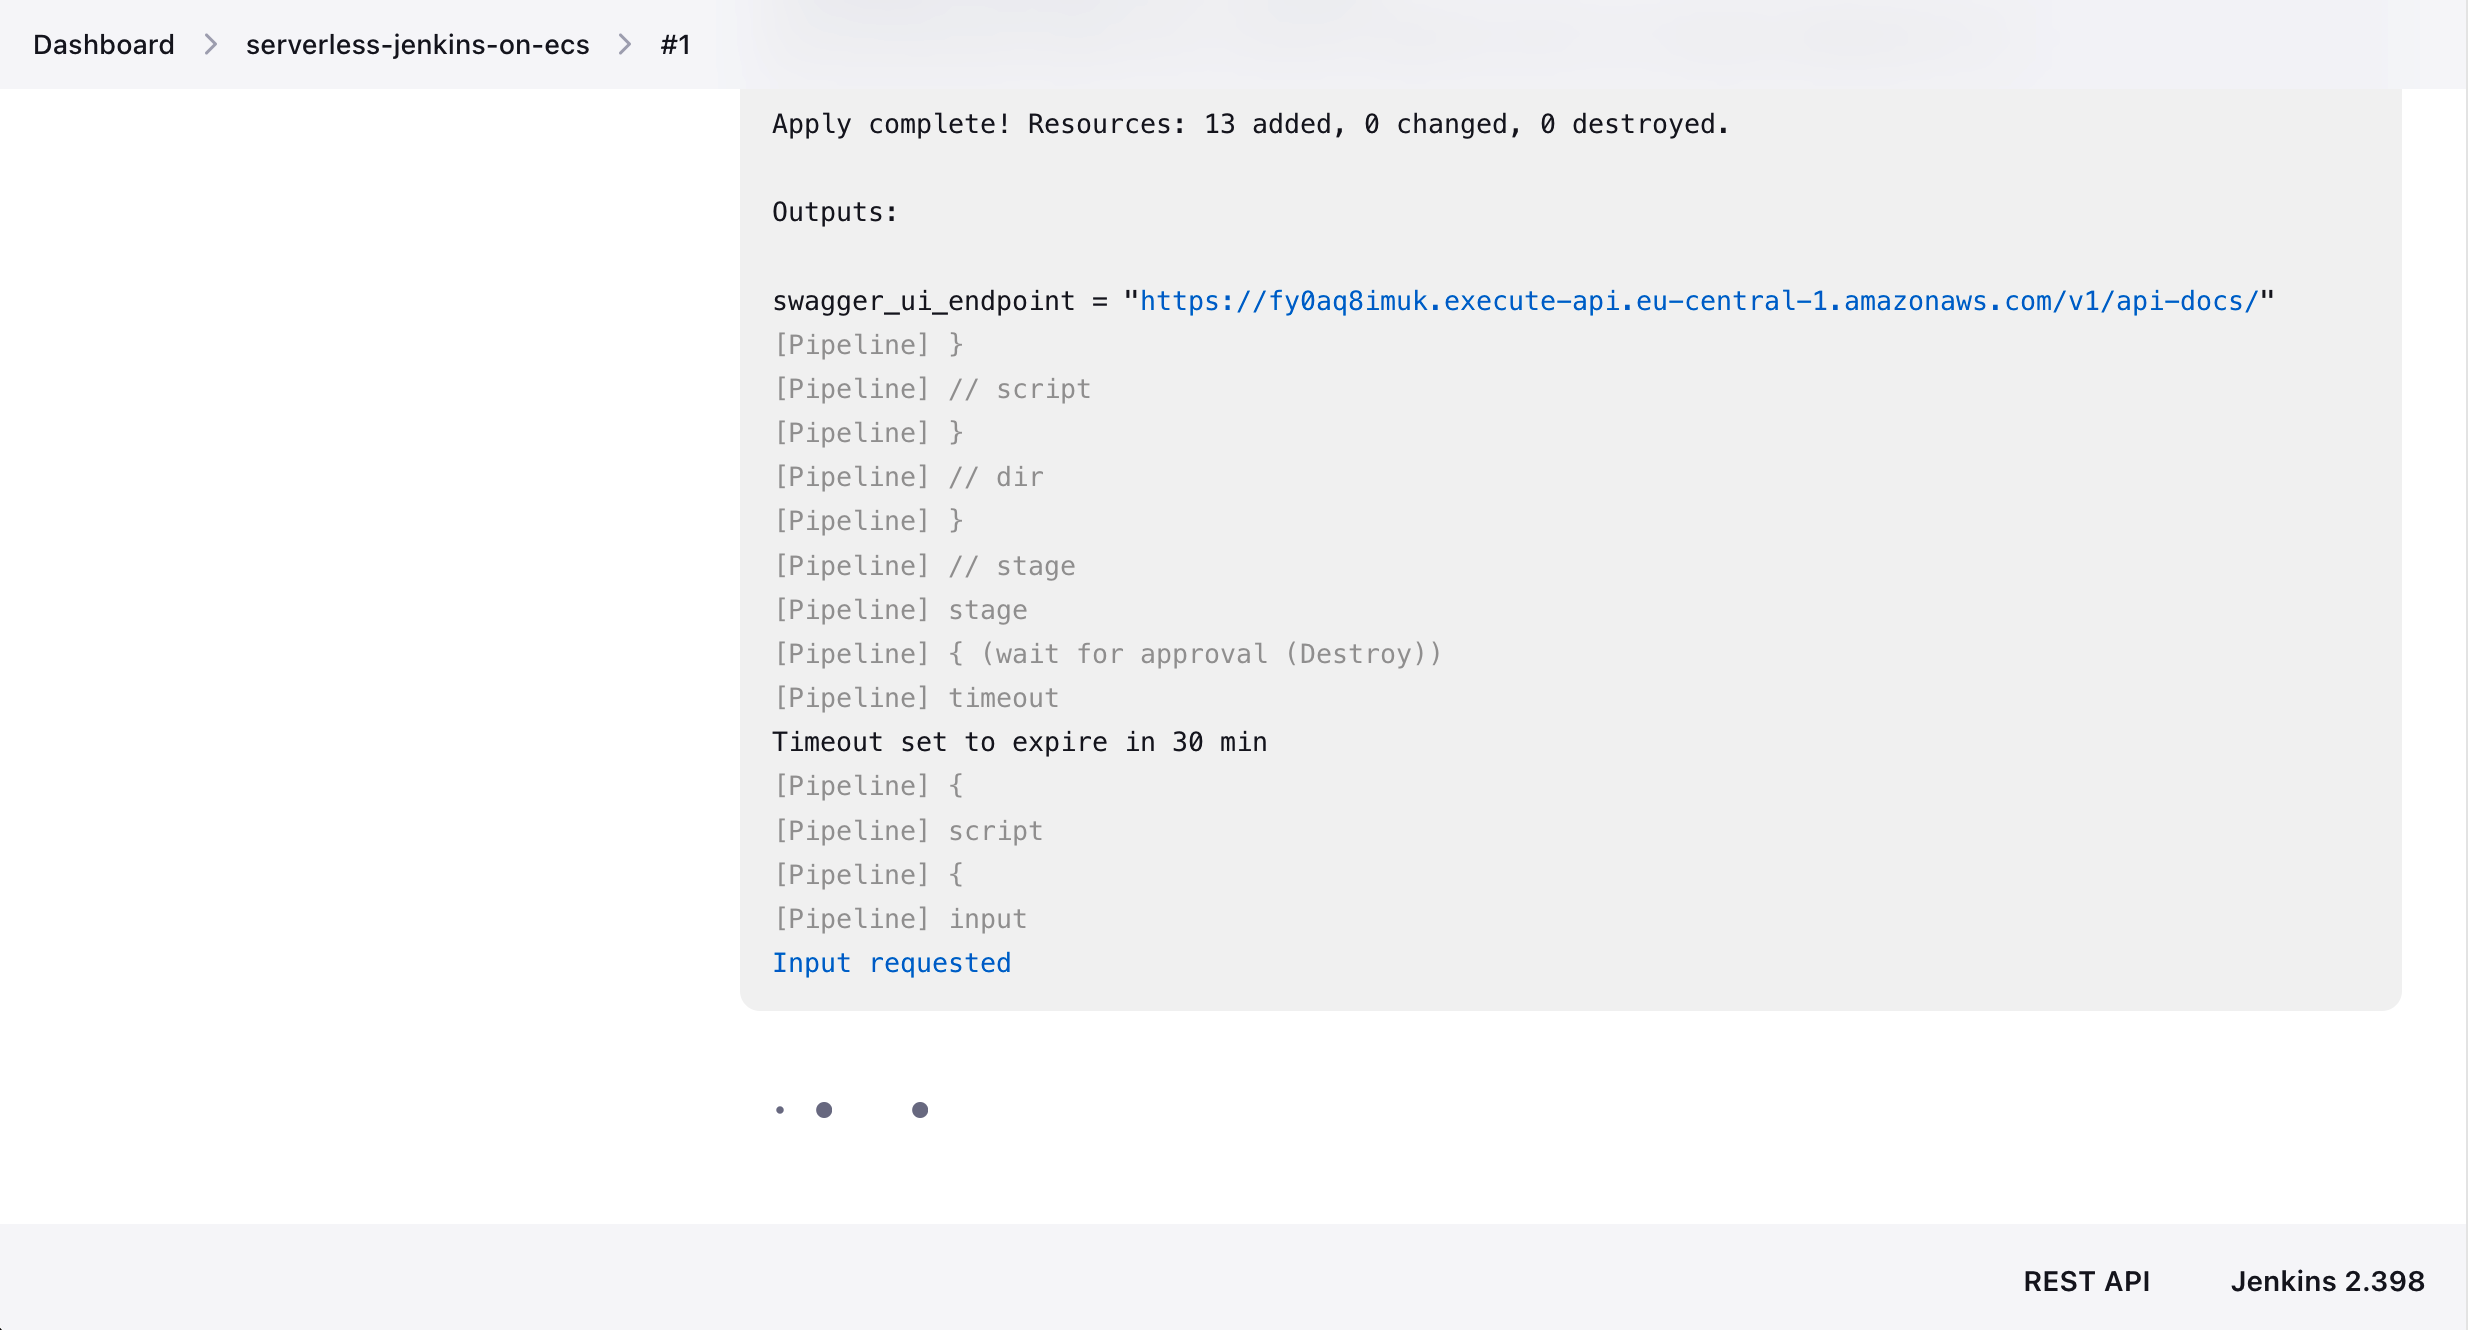
After the successful terraform plan command, we will be asked to approve the changes. Click on Input requested at the bottom of the Console Terminal. A new input window will open. If you wish to apply the Terraform configuration type in yes.

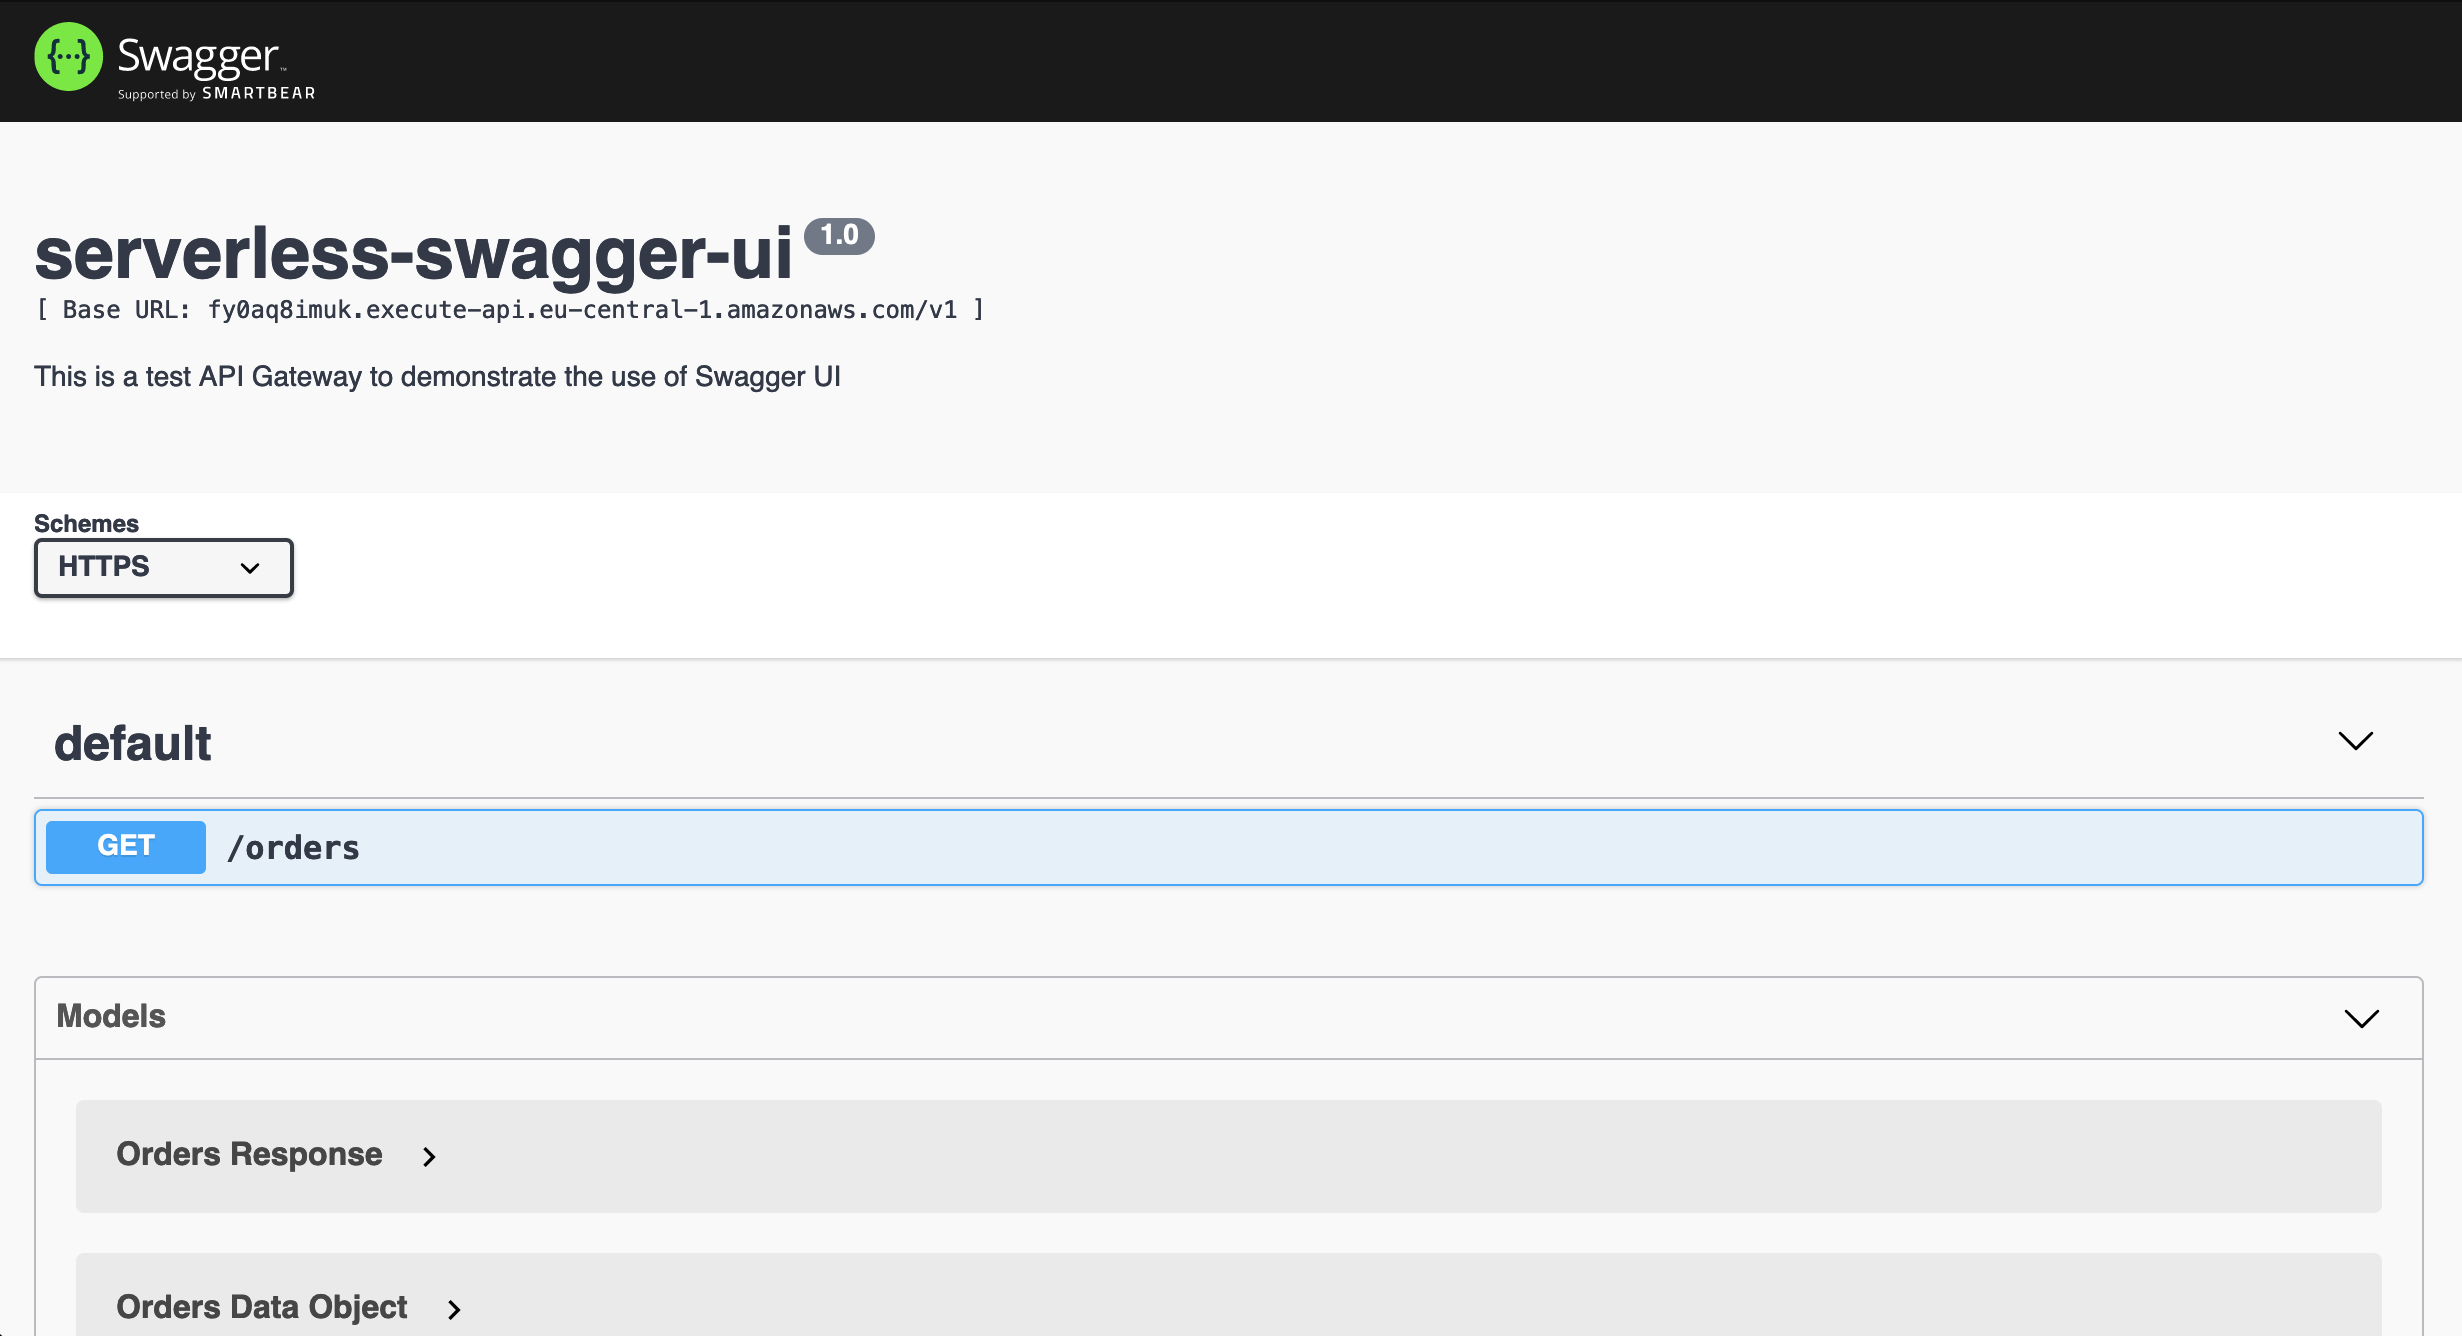
Once you have approved the Terraform configuration, Jenkins will execute terraform apply and deploy the infrastructure. The infrastructure that will be applied is the code from my previous blog post Serverless Swagger UI: Generate interactive documentation for your AWS API Gateway. Double-check whether Jenkins has actually deployed our infrastructure by clicking on the Terraform output swagger_ui_endpoint.
A Swagger UI should open. Feel free to explore the Swagger UI and the infrastructure that was deployed by Jenkins.
The last step of the pipeline workflow is the destruction of the recently created infrastructure. After the terraform apply Terraform will prompt you again for user input. Click on Input requested at the bottom of the Console Terminal. A new input window will open. If you wish to destroy the Terraform configuration type in yes.
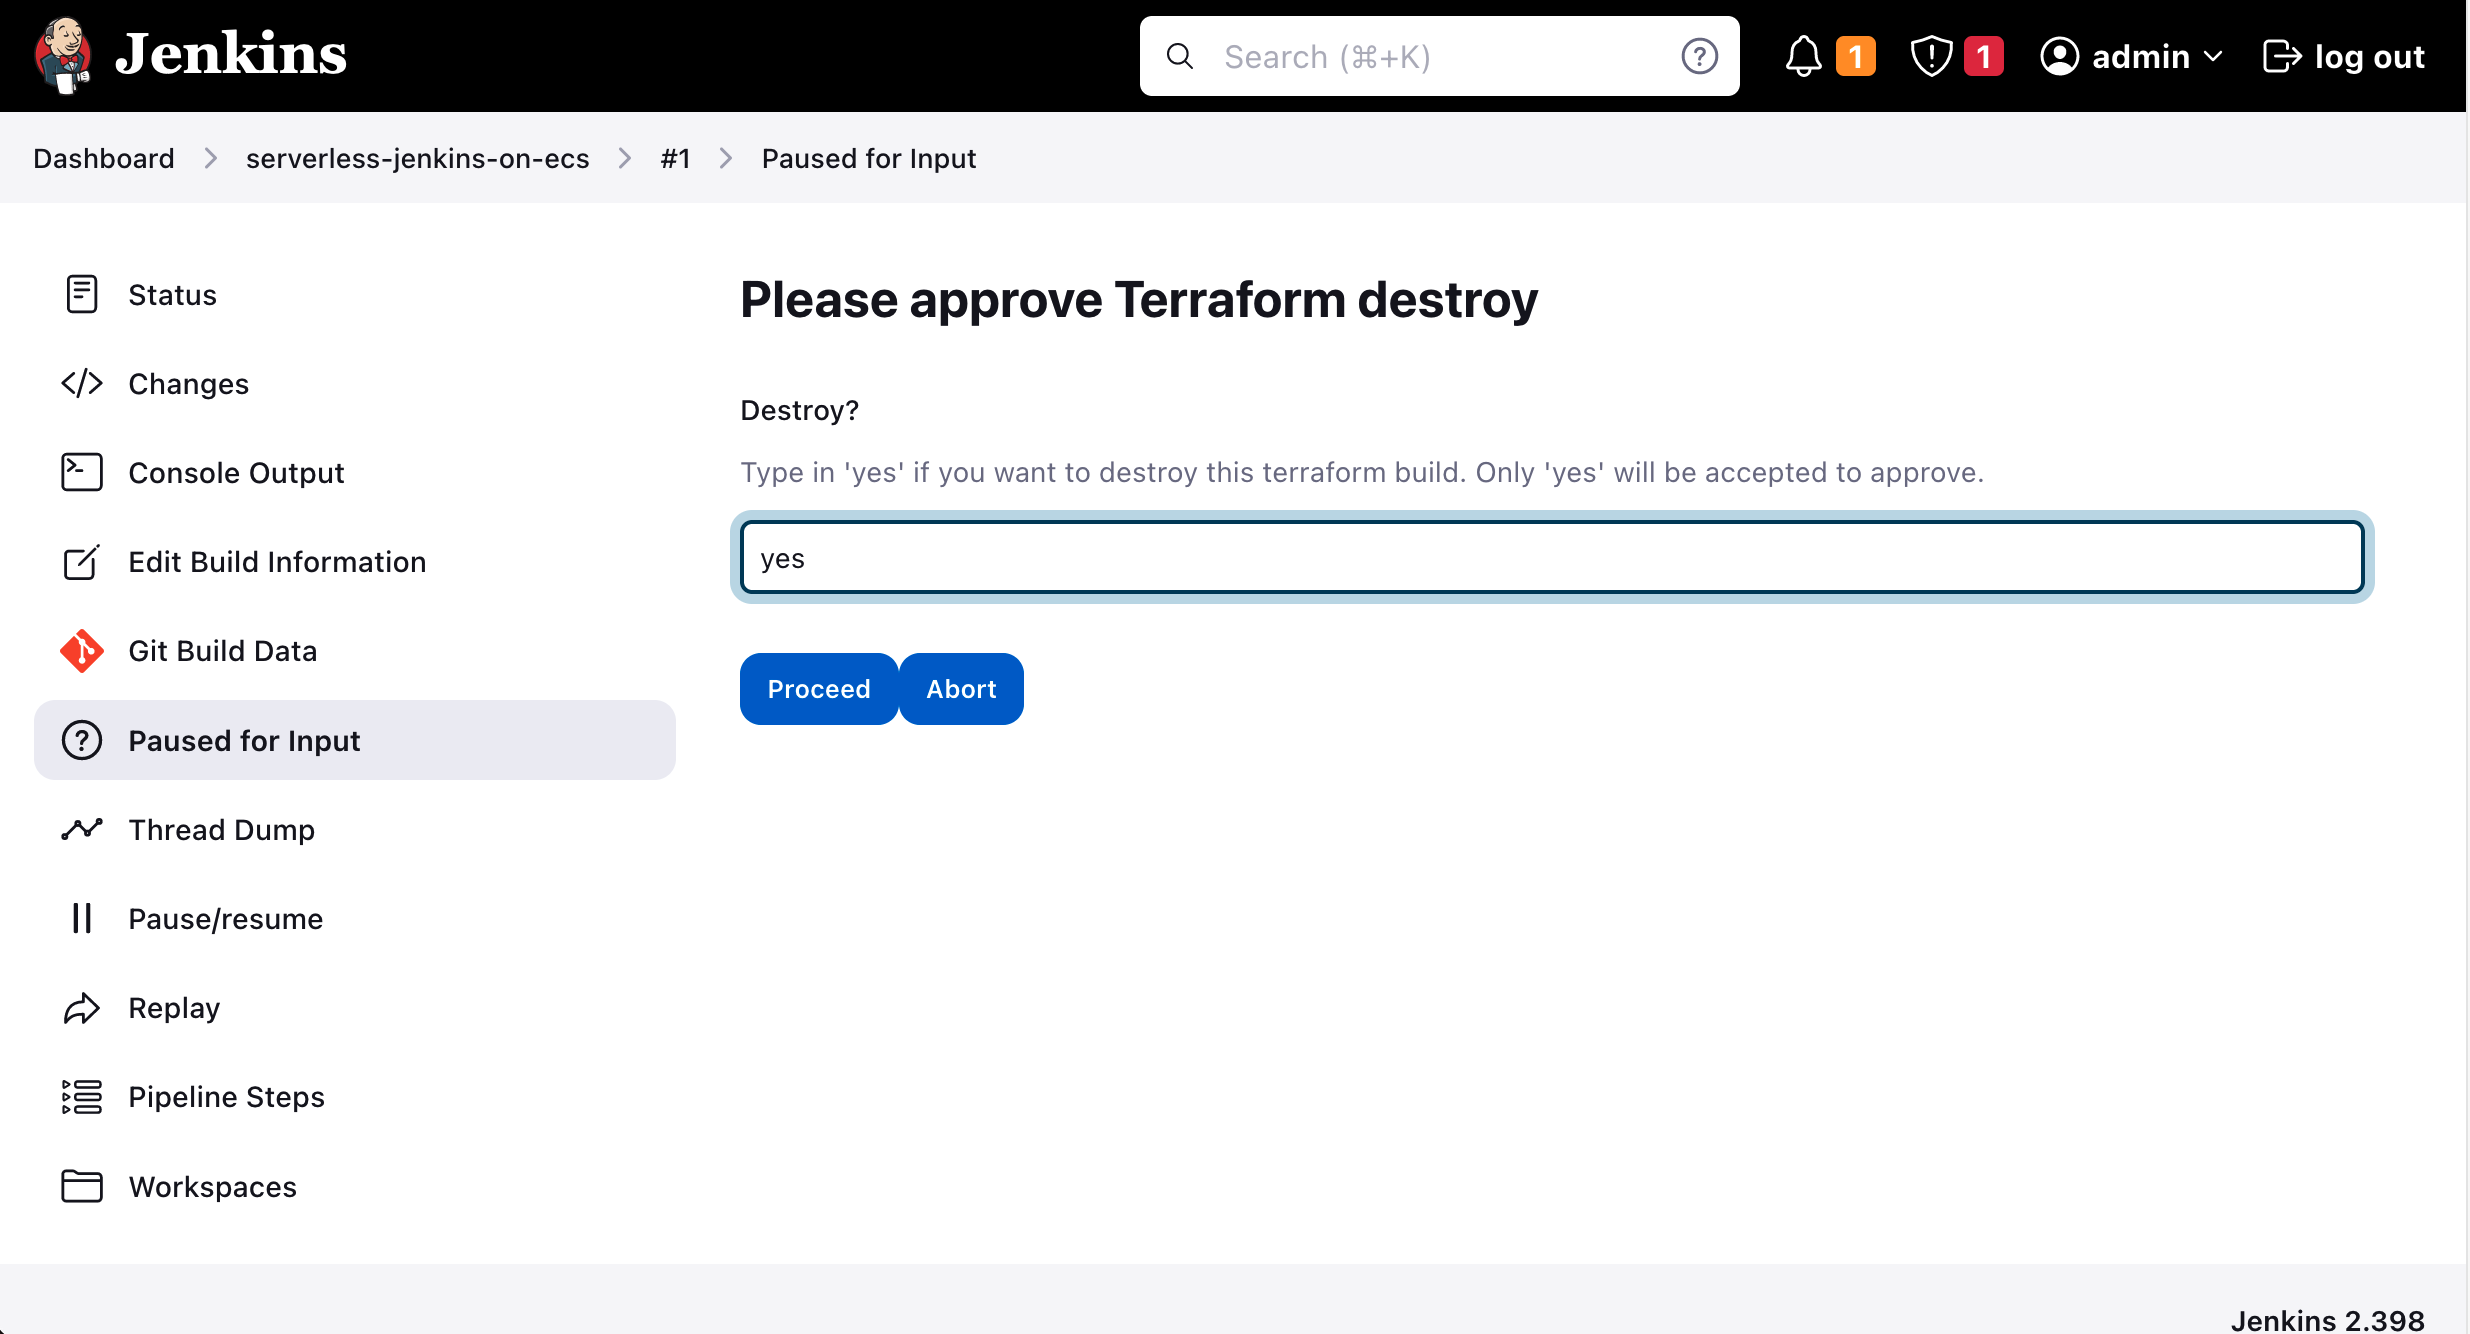
Once you have approved the Terraform configuration, Jenkins will execute terraform destroy and deploy the infrastructure. The Jenkins workspace will be cleaned up and the agent terminates.
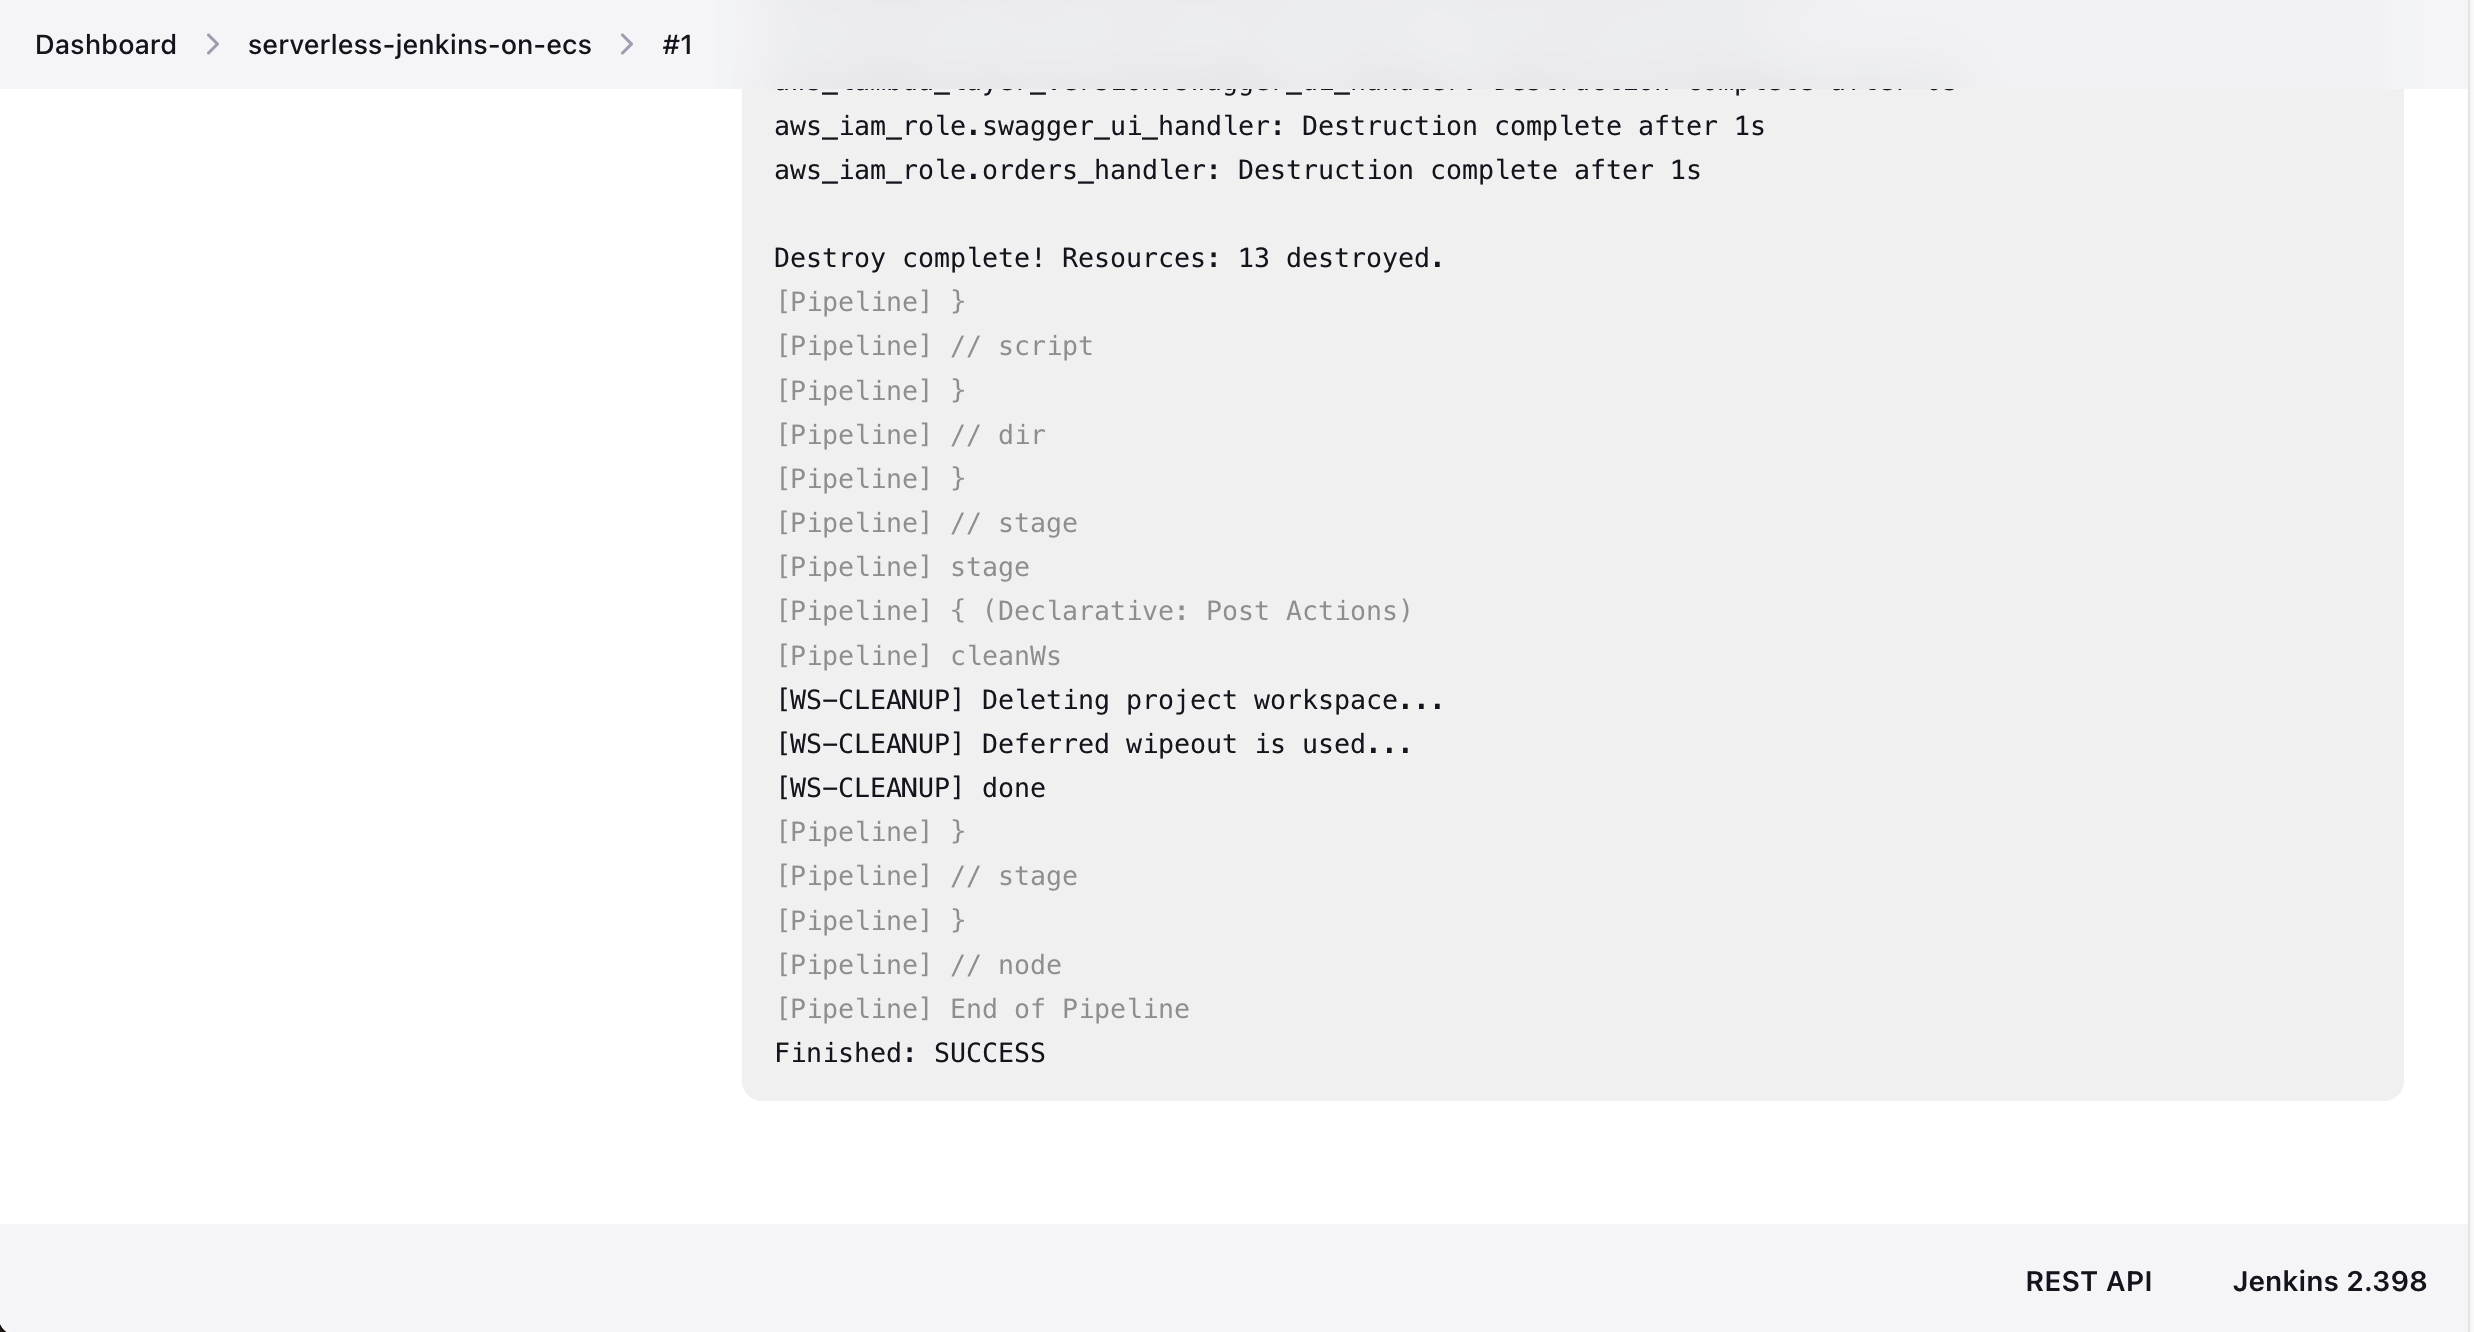
Congratulations! You just successfully deployed Terraform code using a Jenkins Controller/Agent setup.
Please be aware that we are not using Terraform Remote States in this example to keep it as simple as possible. When working with transient agents, Terraform Remote State is essential. Please add Remote State when setting up production workloads.
Summary
Building a Terraform deployment pipeline using a Jenkins Controller/Agent setup does not have to be complicated. Using this architecture we just build, you are able to run your Terraform deployments in a serverless and highly available environment. By leveraging Jenkins Configuration as Code you are also able to configure your Jenkins nodes more efficiently and make the configuration process less error-prone. This will not only make your deployments more reliable but will also speed up the overall development process of your team in the future.
The architecture that we just implemented is meant to serve as a starting point and an example. There are multiple ways to make the solution more robust and efficient. One possibility would be to set up a certificate on the Application Load Balancer and to listen on port 443 instead of port 80. The next step would be to integrate GitHub and Jenkins to be able to use private repositories. Another essential part is the implementation of Terraform Remote State. When working with transient Agents, the state-file will be lost after the container is shut down.
I hope you had fun and learned something new while working through this example. I am looking forward to your feedback and questions. If you want to take a look at the complete example code please visit my Github.
— Hendrik